Side Dishes
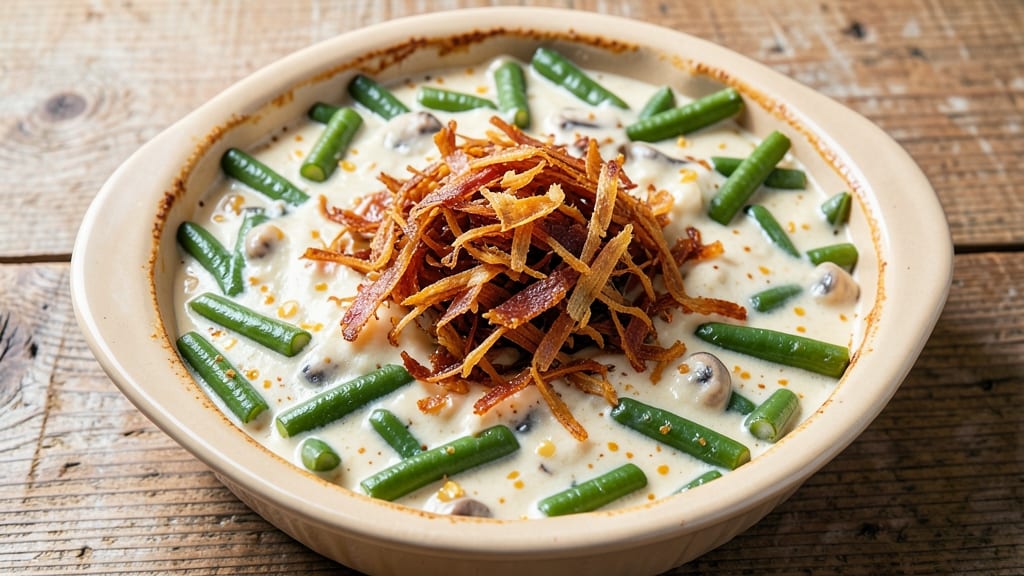
This classic green bean casserole recipe with canned green beans delivers all the nostalgic comfort of a retro holiday table—crispy fried onion topping, creamy mushroom soup base, and tender green beans in one satisfying dish.
The beauty of using canned beans is the simplicity: no chopping, no waiting for fresh beans to cook, just the perfect shortcut for a crowd-pleasing side that tastes like home. I've perfected this version over years of holiday gatherings, where it disappears faster than the mashed potatoes.
The secret to achieving that iconic texture lies in the layering: first, the creamy soup mixture with green beans, then the crispy fried onions spread evenly on top before baking.
This isn't just any green bean casserole—it's the one your family will request year after year, with that perfect balance of creamy, crunchy, and savory flavors. The canned beans maintain their texture while absorbing the rich mushroom soup, creating a dish that's both comforting and surprisingly easy to prepare.
By the time it emerges from the oven, you'll have a golden-brown casserole with bubbling edges and a crispy onion topping that shatters with every bite.
The aroma alone will have everyone gathering around the table, and the first forkful delivers that nostalgic taste of holidays past—creamy, slightly tangy, with just the right amount of crunch.
This is the kind of dish that transforms an ordinary meal into a memorable gathering, all while keeping prep time manageable.
Whether you're hosting a holiday feast or just craving a taste of comfort food, this recipe delivers restaurant-quality results with minimal effort. The canned green beans make it beginner-friendly, while the fried onion topping ensures that classic crunch we all love.
Let's get started on creating this timeless side dish that brings warmth to any table.
Ingredients for classic green bean casserole recipe with canned green beans
Canned beans, creamy soup, and crispy onions—this is the nostalgic lineup for holiday comfort.
| Ingredient | Amount | Notes |
|---|---|---|
| Canned Green Beans 🥦 | 2 cups | Drained, no salt added preferred |
| Cream of Mushroom Soup 🍄 | 1 cup | Condensed, not low-fat |
| Milk 🥛 | ½ cup | Whole milk for creaminess |
| Yellow Onions 🧅 | 1 whole | Thinly sliced for topping |
| Butter 🧈 | ½ cup | Unsalted, cold for frying |
| All-Purpose Flour 🌾 | ¼ cup | For coating onions |
| Garlic Powder 🧄 | 1 tsp | For seasoning onions |
| Salt 🧂 | ½ tsp | Kosher or sea salt |
| Black Pepper 🌶️ | ¼ tsp | Freshly ground preferred |
| French Fried Onions 🧅 | ¾ cup | For extra crunch (optional) |
| Cheddar Cheese 🧀 | ½ cup | Shredded, sharp variety |
| Heavy Cream 🥛 | ¼ cup | For extra richness |
The green beans are the star, so grab no-salt-added canned beans—they let you control the seasoning. Trader Joe's and Costco usually have good options, or check the regular grocery store's organic section. If you're short on time, French fried onions from the canned aisle save you from frying your own. For the soup, Campbell's Condensed Cream of Mushroom is the classic choice, but any good-quality brand works. The heavy cream and milk combo makes it extra creamy—don't skimp on the full-fat versions here (trust me, it's worth it).
No French fried onions? Toast sliced onions in butter until golden—it's the same crispy magic. Short on cheddar? Parmesan or Gruyère work too, though cheddar's tang cuts through the creaminess. The garlic powder is key—Penzeys or McCormick are solid choices if you're buying a bottle, but the tiny packets in the spice aisle work fine. For the onions, slicing them thin ensures they crisp up properly. If you're frying your own, keep the heat medium—too hot burns them, too low makes them soggy.
This casserole reheats beautifully—cover with foil if you're microwaving to keep it creamy. Keeps in the fridge for 4-5 days, freezes for 3 months. I always make a double batch—half for Thanksgiving, half for leftovers that disappear just as fast. The onions crisp up even better after baking, so don't skip spreading them evenly before the final bake. For extra crunch, sprinkle more on top after baking.
Why You'll Love This Recipe
- Here’s what sold me: that crispy fried onion topping meets the velvety mushroom soup base. The canned beans soak up all the richness, giving you tender bites with every forkful—no one ever guesses it’s from a can.
- Pantry Magic: I swear by this recipe when I forget to buy fresh veggies—just open the can, drain, and go. The onions caramelize in butter while I stir the soup and milk together, and suddenly, dinner’s ready. No chopping, no wilting, no stress.
- Creamy Crunch Combo: Here’s what sold me: that crispy fried onion topping meets the velvety mushroom soup base. The canned beans soak up all the richness, giving you tender bites with every forkful—no one ever guesses it’s from a can.
- Leftovers That Win: Between us, this is my secret weapon for lunches. The flavors only get better the next day, especially reheated with a splash of milk to loosen it up. Pack it in containers, and you’ve got a week’s worth of easy meals.
Step-by-step instructions for classic green bean casserole
Here's how to make this nostalgic comfort dish with creamy layers and perfect crispy topping.
🍳 Step 1: Make the Creamy Green Bean Mixture
Preheat your oven to 350°F. In a large mixing bowl, combine the 2 cups drained canned green beans, 1 cup cream of mushroom soup, 0.5 cup milk, 0.25 cup heavy cream, 0.5 tsp salt, and 0.25 tsp black pepper. Stir gently until everything is evenly distributed. The mixture should look smooth with no visible lumps—this is your base for that classic creamy texture.
I like to give it a quick taste at this stage to check seasoning. The soup already provides some saltiness, so you might not need the full 0.5 tsp salt—just a pinch if needed. This is your chance to adjust before baking. Transfer this mixture to a greased 9x13-inch baking dish and spread it out evenly with a spatula. The layer should be about ½-inch thick for even cooking.
🍳 Step 2: Prepare the Crispy Fried Onion Topping
In a small bowl, combine the 0.75 cup French fried onions, 0.25 cup all-purpose flour, 1 tsp garlic powder, and 0.5 tsp salt. Mix thoroughly until every onion piece is coated—this is what creates that perfect crunchy texture. The flour helps create a crispy crust while the garlic powder adds depth of flavor.
In a separate skillet, melt the 0.5 cup butter over medium heat. Once melted and foamy, carefully add the coated onion mixture. Cook for 3-4 minutes, stirring constantly, until the onions are golden brown and the butter has turned into a rich, caramelized sauce. You'll know it's ready when the onions release easily from the pan and have a toasted aroma. Remove from heat immediately to prevent burning.
🥘 Step 3: Assemble and Bake for Creamy Perfection
Spread the crispy fried onion mixture evenly over the green bean mixture in the baking dish. Then, sprinkle the 0.5 cup shredded cheddar cheese on top, pressing down gently with a spatula to help it adhere. The cheese will melt into the creamy layer, creating that signature gooey texture we all love.
Bake in the preheated oven for 30-35 minutes until the top is bubbly and the cheese has melted completely. The edges should be lightly golden while the center remains creamy. If you notice the top browning too quickly, tent loosely with aluminum foil for the last 5-10 minutes of baking to prevent over-browning.
⏰ Step 4: Rest and Serve Warm
Remove the casserole from the oven and let it rest for 10-15 minutes before serving. This resting period allows the layers to set slightly, making it easier to cut clean slices. The creamy green bean mixture should be thick but still smooth, with the crispy fried onions holding their crunch on top.
Serve warm with a side of buttered dinner rolls or crusty bread. The contrast between the creamy green beans, crispy onions, and melted cheese creates the perfect balance of textures and flavors that makes this dish so comforting. Store any leftovers in the refrigerator for up to 4 days—it actually tastes even better the next day!
Pro Tips For Making Classic Green Bean Casserole Recipe With Canned Green Beans
- DRAIN BEANS WELL—THEN RINSE: I learned this the hard way—those canned green beans come packed in salty brine, and if you don’t drain and rinse them, your casserole turns into a sad, mushy salt bomb. Toss them in a colander, give them a quick cold-water rinse, and shake off the excess. Trust me, your taste buds will notice.
- SOFTEN ONIONS FIRST: Skip the raw onion chunks—they’ll turn your creamy sauce into a watery mess. Sauté ½-inch diced yellow onions in butter until translucent (about 5 minutes) before mixing anything else. This step makes a real difference in texture, and it’s the thing that separates "meh" from "delicious."
- STIR IN MILK LAST: Adding milk too early turns your soup into a thin, gloopy disaster. Wait until the very end, right before folding in the beans, to stir in the milk. This keeps the sauce thick and velvety instead of turning your casserole into a green bean soup.
- USE HALF-AND-HALF FOR RICHNESS: I know, I know—milk is classic, but swap half of it for half-and-half or even a splash of heavy cream. The extra fat cuts through the canned-bean bitterness and makes the sauce luxuriously smooth. (Yes, even if you’re on a budget, a small carton goes a long way.)
Storing and reheating this classic green bean casserole recipe with canned green beans
Refrigerator Storage
After baking, let your casserole cool completely before transferring to an airtight container—I use glass Pyrex with snap-on lids for best results. Store in the fridge at 40°F or below for up to 4-5 days.
The flavors actually deepen overnight as the spices meld together, making it taste even more comforting the next day. Always press plastic wrap directly on the surface to prevent a skin from forming. 🥗
Freezer Prep Tips
For long-term storage, freeze portions in quart-sized freezer bags or glass containers with 1-inch headspace for expansion. I recommend dividing into single-serving portions for easy reheating.
Label with the date—this casserole maintains quality for 3 months when frozen properly. Let it thaw in the fridge overnight before reheating for best texture. ❄️
Oven Reheating Method
For the best texture, transfer the casserole to an oven-safe dish and cover loosely with aluminum foil. Reheat at 350°F for 20-25 minutes until bubbly. The oven method helps restore that creamy consistency while keeping the fried onions crispy.
Add a splash of milk if it looks too dry after reheating. This method works perfectly for serving family-style gatherings. 🔥
Microwave Revival
For quick reheating, cover the casserole with a damp paper towel and microwave on 50% power in 1-minute intervals, stirring between each. Total reheating time should be 3-4 minutes until heated through to 165°F.
The damp towel prevents drying while maintaining moisture. Add extra milk or cream if the texture seems too thick after reheating. This is my go-to for busy weeknights. 💡
Crispy Topping Rescue
If your fried onion topping loses its crunch after storage, sprinkle extra French fried onions on top before reheating. For oven reheating, broil for 1-2 minutes at the end to restore crispiness.
I also keep a small batch of pre-fried onions on hand specifically for this purpose. The key is timing—don't overdo the broil or they'll burn. ✨
Portion Control
This casserole serves 6-8 people, so plan accordingly for leftovers. I always make two 9x13-inch pans for large gatherings—one for immediate serving and one for freezing. Individual portions reheat beautifully in ramekins for personal servings.
Store leftovers in shallow containers to cool faster and prevent bacterial growth. The creamy texture holds up well for 3-4 days in the fridge. 🍽️
Nutrition facts
Frequently asked questions
Can I use fresh green beans instead of canned?
Fresh beans work but require more prep time. Blanch 1.5 pounds fresh green beans for 3 minutes in boiling water, then drain and shock in ice water before mixing with the soup. The texture will be slightly firmer than canned beans, but the flavor is equally delicious. Just be sure to drain them thoroughly to avoid a watery casserole.
Why do some recipes call for French fried onions AND homemade fried onions?
The canned French fried onions add convenience and extra crunch, while homemade fried onions create a deeper flavor. For the best of both worlds, use 0.5 cup canned onions in the topping mix and sprinkle 0.25 cup extra homemade fried onions on top after baking. This gives you that signature crunch with maximum flavor impact.
What if my casserole turns out too watery?
This usually happens if the beans weren't drained well or the soup wasn't thickened enough. For a quick fix, spread the casserole on a baking sheet and bake uncovered at 375°F for 10-15 minutes to evaporate excess moisture. You can also stir in 1 tablespoon cornstarch mixed with 1 tablespoon cold water before baking to thicken it.
Can I make this ahead for a holiday meal?
Assemble the casserole (without baking) up to 24 hours ahead and refrigerate. When ready to bake, add 5-10 minutes to the baking time since it'll be cold. For make-ahead convenience, I often prepare the fried onion topping separately and store it in the fridge until needed. The flavors meld beautifully overnight!
What's the best way to serve leftovers?
For restaurant-style presentation, transfer leftovers to a baking dish and broil for 2-3 minutes to restore crispiness. Serve with a dollop of sour cream or additional fried onions on top. The casserole also reheats beautifully in individual ramekins—just cover with foil and warm at 350°F for 10 minutes for perfect texture.