Side Dishes
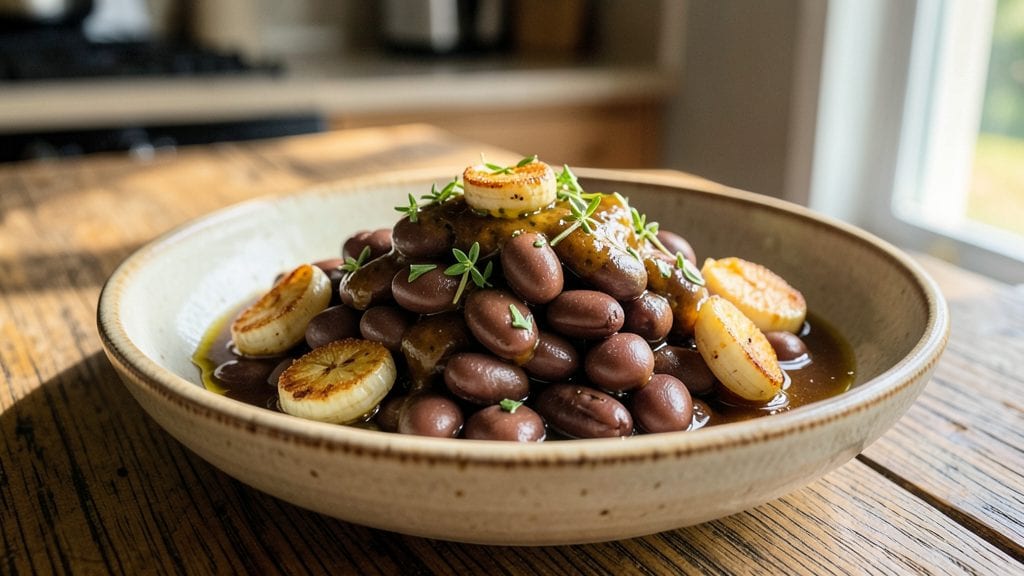
Transforming canned navy beans into a smoky garlic and herb one-pot dish proves you don’t need fancy ingredients to create restaurant-quality flavor.
This recipe builds on the natural earthiness of navy beans while adding layers of depth through slow-cooked aromatics and a touch of smokiness that elevates them from side dish to star.
The beauty lies in its simplicity—just one pot, minimal prep, and a method that lets flavors meld effortlessly over time.
What makes this dish truly special is how it turns pantry staples into something extraordinary. The beans absorb rich, savory broth infused with garlic, herbs, and a hint of smokiness from liquid smoke, creating a texture that’s tender yet substantial.
No soaking, no pre-cooking—just open the can, combine with aromatics, and let the oven or stovetop work its magic. This is the kind of recipe that works for busy weeknights or meal prep, delivering hearty results without the fuss.
By the time you’re ready to serve, you’ll have a one-pot dish with navy beans that are impossibly tender, infused with garlic and herb aromatics, and topped with a smoky, golden crust. The broth reduces to a velvety consistency, coating every bean in a flavorful embrace.
It’s the kind of meal that feels indulgent yet remains light enough for any occasion—perfect for pairing with crusty bread or serving alongside grilled proteins.
This recipe also adapts effortlessly to dietary needs, making it a versatile addition to any meal plan. Whether you’re serving it as a standalone dish or pairing it with complementary sides, the smoky garlic and herb profile ensures it steals the show.
Let’s get cooking—this one-pot wonder is about to become a staple in your rotation.
Ingredients for canned navy beans
Pantry staples meet smoky magic in this restaurant-quality one-pot dish.
| Ingredient | Amount | Notes |
|---|---|---|
| Canned Navy Beans 🌱 | 2 cans | Drained, rinsed, high-quality brand |
| Garlic Cloves 🧄 | 6 cloves | Fresh, minced for maximum aroma |
| Extra-Virgin Olive Oil 🫒 | ¼ cup | High quality, fruity variety |
| Liquid Smoke 🔥 | 1 tbsp | For authentic smoky depth |
| Vegetable Broth 💧 | 2 cups | Low-sodium, homemade or store-bought |
| Fresh Thyme Leaves 🌿 | 1 tbsp | Or 1 tsp dried thyme |
| Fresh Rosemary 🌿 | 1 tbsp | Chopped, finely minced |
| Lemon Juice 🍋 | 1 tbsp | Freshly squeezed |
| Maple Syrup 🍯 | 1 tbsp | For subtle sweetness balance |
| Smoked Paprika 🌶️ | 1 tsp | For extra smoky intensity |
| Sea Salt 🧂 | 1 ½ tsp | Adjust to taste |
| Black Peppercorns 🌶️ | ½ tsp | Freshly cracked |
| Fresh Parsley 🌿 | ¼ cup | Chopped, for garnish |
| Toasted Breadcrumbs 🍞 | ¼ cup | For golden crust |
The quality of your broth and herbs makes all the difference. Low-sodium vegetable broth ensures you control the seasoning, while fresh herbs like thyme and rosemary add layers of complexity. For the herbs, Trader Joe's or local farmers markets have the freshest options—look for vibrant green leaves with no wilting. The liquid smoke is non-negotiable for that authentic smoky flavor; Columbus Craft Liquid Smoke is a trusted brand. Don't skip the maple syrup—it balances the smokiness and enhances the natural sweetness of the beans without overpowering them. The canned navy beans should be high-quality—brands like Wild Garden or Amy's are excellent choices.
No liquid smoke? Smoked paprika plus a splash of balsamic vinegar works in a pinch. Fresh herbs unavailable? Dried thyme and rosemary at one-third the amount will suffice, though fresh is always better. The breadcrumbs can be regular panko or even crushed crackers for a different texture. For the garlic, roasted garlic adds a mellow sweetness if you prefer less pungency. The maple syrup can be swapped for agave nectar if you're avoiding maple products. This dish is incredibly forgiving—adjust the lemon juice to taste if you prefer more or less acidity.
This dish reheats beautifully—simply add a splash of water or broth to prevent drying out. Stores well in the fridge for 4-5 days, making it perfect for meal prep. For longer storage, freeze portions for up to 3 months. The flavors actually deepen overnight, so leftovers often taste even better. Garnish with fresh parsley right before serving to keep the colors vibrant and add a pop of freshness. Serve with crusty bread to soak up all that smoky, garlicky goodness.
Why You'll Love This Recipe
- Five-Ingredient Magic: I swear by this recipe when I’m staring at an empty pantry and a hungry family. Just open a can, crush some garlic, and let the liquid smoke work its smoky charm—no fancy prep, no stress.
- Smoky Garlic Kiss: That liquid smoke and olive oil combo? It turns simple beans into something rich and savory, like a campfire in a bowl. The garlic cloves? They caramelize just enough to make every bite sing.
- Meal Prep MVP: I make a big batch on Sundays and keep it in the fridge for quick lunches or to bulk up salads. The broth keeps it tender, and the flavor only gets better as it sits—perfect for busy weeks.
- Budget-Friendly Powerhouse: Navy beans are my secret weapon for stretching meals without breaking the bank. A can of beans, a few cloves of garlic, and a splash of broth feed four people for under $5. No guilt, all flavor.
Step-by-step instructions for smoky garlic and herb one-pot magic
This method delivers rich, smoky flavor in a single pot—no chopping boards needed.
Sauté Garlic and Aromatics in Olive Oil
Heat the 0.25 cup extra-virgin olive oil in a large, deep skillet or Dutch oven over medium heat. Add the 6 minced garlic cloves and cook for 2-3 minutes until they become fragrant and just begin to turn golden. Be careful not to let them burn—garlic darkens quickly and can turn bitter.
Add the 1 tbsp chopped fresh rosemary and 1 tbsp fresh thyme leaves to the pan. Stir for 30 seconds until the herbs release their essential oils and fill your kitchen with an aromatic burst. Remove the pan from heat briefly if the garlic starts to brown too quickly, but keep it warm for the next step. This aromatic base is the foundation of your dish's complex flavor profile.
Build the Smoky Flavor Base
Return the pan to medium heat and add the 1 tbsp liquid smoke and 1 tsp smoked paprika. Stir vigorously for 30 seconds to distribute the smoky flavors evenly. Then pour in the 2 cups vegetable broth and bring the mixture to a gentle simmer, which should take about 2-3 minutes. The broth will help dissolve the smoky compounds and create a rich, flavorful liquid.
Add the 1 tbsp lemon juice and 1 tbsp maple syrup to the simmering broth. Stir well and let the mixture cook for 2 minutes to allow the flavors to meld together. This combination of acidity and sweetness balances the smokiness and enhances the overall depth of flavor. Taste the broth now—it should be rich, slightly sweet, and deeply smoky.
Incorporate the Navy Beans and Season
Drain and rinse the 2 cans navy beans thoroughly under cold water to remove any excess sodium. Add them to the simmering broth along with the 1.5 tsp sea salt and 0.5 tsp cracked black peppercorns. Stir gently to combine, then reduce the heat to low and let the mixture simmer for 10-12 minutes. This gentle cooking allows the beans to absorb the smoky, garlicky broth without breaking apart.
After 10 minutes, taste the beans and adjust the seasoning if needed. The dish should be well-seasoned but not overly salty. If the broth has reduced too much and the beans look dry, add 2-3 tablespoons of water to maintain the desired consistency. The beans should be tender but still hold their shape, with a rich, smoky flavor coating each one.
Finish with Toasted Breadcrumbs and Fresh Parsley
Increase the heat to medium-high and sprinkle the 0.25 cup toasted breadcrumbs evenly over the top of the beans. Let them toast for 2-3 minutes, stirring occasionally, until they turn a beautiful golden brown. This step adds a delightful crunchy texture that contrasts perfectly with the soft beans and creamy broth.
Remove the pan from heat and stir in the 0.25 cup chopped fresh parsley. The parsley not only adds a pop of color but also brightens the dish with its fresh, herbal notes. Let the mixture sit for 2-3 minutes off the heat to allow the flavors to fully meld together. Serve immediately while the breadcrumbs are still crispy and the beans are warm.
Pro Tips For Making Canned Navy Beans
- Mince That Garlic: DESCRIPTION: Don’t chop it—smash those cloves flat with the side of your knife first. This releases more flavor into the olive oil without burning, and you’ll get a deeper, richer taste in every bite. (Yes, even if you’re impatient like me.)
- Drain and Rinse: DESCRIPTION: Open that can of navy beans and give them a quick rinse under cold water. The starchy water clinging to them can turn your dish gluey, and you’ll end up with a smoother, cleaner texture. Trust me, your broth will thank you.
- Simmer, Don’t Boil: DESCRIPTION: Liquid smoke and vegetable broth need gentle heat to meld properly. If you let this simmer too hard, the smoke flavor will dissipate like fog in sunlight. Keep it at a low, steady bubble—just enough to hear a quiet hum.
- Toast the Beans First: DESCRIPTION: Drain the beans, pat them dry, and toss them in a hot skillet with olive oil for 2-3 minutes before adding anything else. This step caramelizes their edges, giving your dish a nutty depth that raw beans just can’t match. (I skip this when I’m lazy, but the dish is noticeably better when I don’t.)
Make-ahead tips for this recipe
Prep Ahead for Effortless Cooking
Start by prepping your aromatics the night before—mince the 6 garlic cloves and finely chop the 1 tbsp rosemary and 1 tbsp thyme. Store them in a small airtight container in the fridge. This saves 10 minutes of prep time on the day you cook.
I also like to toast the 0.25 cup breadcrumbs ahead of time by spreading them on a baking sheet and baking at 350°F for 5-7 minutes until golden. Store them in a sealed container until ready to use. 🌿
Broth and Bean Prep
Measure out the 2 cups vegetable broth and store it in a small container in the fridge. If using canned beans, drain and rinse them the day before and store them in their liquid (reserve ½ cup) to keep them moist.
Reheat the reserved liquid with the beans for 3-5 minutes on the stove before adding to your dish. This ensures the beans stay tender and absorb flavors better.
The liquid smoke and smoked paprika can also be mixed ahead in a small bowl—just stir them together and store in the fridge until ready to use. This simplifies the cooking process significantly. 🔥
One-Pot Oven Shortcut
For a hands-off approach, transfer your prepped aromatics and broth to a Dutch oven or oven-safe skillet the night before. Cover and refrigerate. The next day, simply add the beans, seasonings, and liquid smoke mixture, then pop it in the oven at 375°F for 30-35 minutes until bubbly and tender.
This method is perfect for busy mornings or when you want to set and forget. The oven does a great job of evenly distributing heat, ensuring every bean gets infused with flavor. 💫
Freezer-Friendly Make-Ahead
This dish freezes beautifully for up to 3 months, making it ideal for meal prep. After cooking, let it cool completely, then transfer to a freezer-safe container or heavy-duty freezer bag.
When ready to eat, thaw overnight in the fridge, then reheat on the stovetop with 2-3 tablespoons of water or broth to restore moisture. The flavors actually deepen after freezing, making it taste even richer when reheated. Label your containers with the date to keep track of freshness. ❄️
Batch Cooking for the Week
Double the recipe and store half in the fridge for 4-5 days and half in the freezer for later. I like to make a big batch on Sundays so I can grab it for quick lunches or dinners throughout the week.
The dish reheats perfectly—just add a splash of water or broth to prevent drying out. For extra convenience, portion the dish into individual containers before freezing. This way, you can grab just what you need without thawing the entire batch. It’s a game-changer for busy schedules! 💡
Nutrition facts
Frequently asked questions
Do I need to rinse canned navy beans before using them?
Always drain and rinse canned navy beans thoroughly under cold water. This removes excess sodium and prevents a metallic taste in your dish. The recipe calls for 2 cans—rinse each one individually to ensure no residue remains.
Can I substitute dried navy beans for canned?
Yes, but it requires extra time! Soak 1 cup dried navy beans overnight, then simmer for 1.5-2 hours until tender. Use the same quantity as canned (2 cups cooked = 1 can drained). The texture will be slightly firmer, but the flavor develops beautifully in slow-cooked dishes.
How do I make this dish vegan?
This recipe is already vegan-friendly! Just ensure your vegetable broth is plant-based (check labels for hidden animal products). The maple syrup and olive oil are naturally vegan, and all other ingredients are plant-derived. For extra richness, stir in 1 tbsp nutritional yeast at the end for a cheesy flavor.
What if I don't have liquid smoke?
No problem! Mix 1 tsp smoked paprika with ½ tsp balsamic vinegar for a similar smoky depth. For extra flavor, add ¼ tsp chipotle powder or a pinch of cayenne. The dish will still be delicious—just with a slightly different smoky profile.
Can I make this in an Instant Pot?
Sauté the garlic and herbs as directed, then add all remaining ingredients (including beans) to the Instant Pot. Cook on high pressure for 8 minutes, then quick-release. Finish with toasted breadcrumbs and parsley. The pressure cooker cuts prep time to just 20 minutes.