Side Dishes
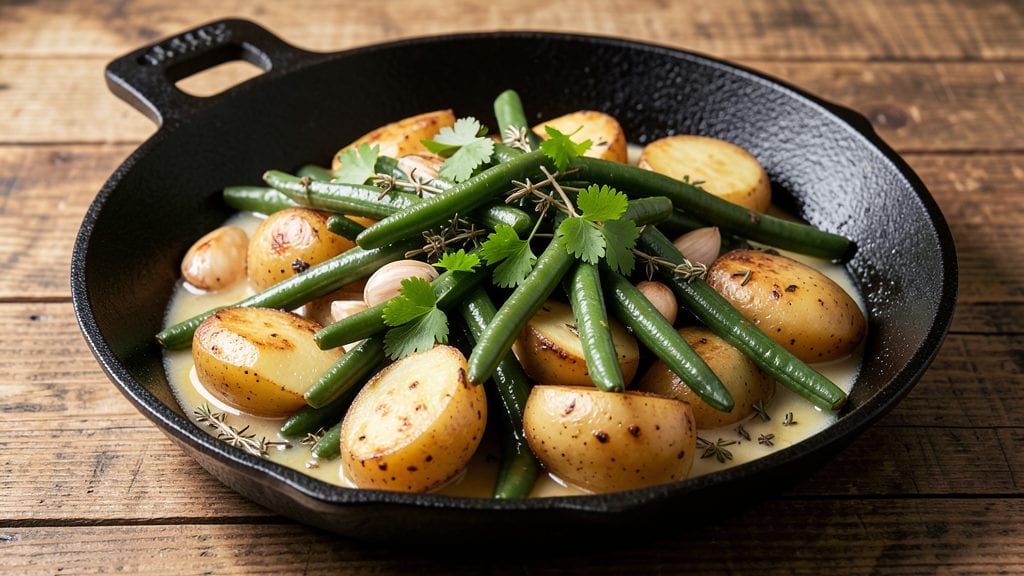
Transforming canned green beans and potatoes into a one-pot garlic-herb crisp-top side proves that pantry staples can deliver restaurant-quality results. I developed this recipe during a particularly busy week when I needed dinner on the table in under 30 minutes—no fancy ingredients, just simple techniques that guarantee impressive outcomes.
The secret lies in the crispy breadcrumb topping, which adds texture and depth while keeping the potatoes tender and the beans bright.
What makes this dish truly remarkable is its versatility and ease. You'll start with just five ingredients—canned beans, potatoes, broth, garlic, and herbs—then build flavor through a simple stovetop method before finishing under the broiler.
The garlic-herb seasoning transforms ordinary vegetables into something aromatic and satisfying, while the crispy topping elevates the dish to side-dish perfection. This recipe is designed to work in any standard pot, making it ideal for weeknight meals when you're juggling multiple dishes.
By the time you serve this side, you'll have a golden, crisp-topped dish with tender potatoes and bright green beans infused with garlic and herbs. The aroma alone will draw everyone to the table, and the contrasting textures—crispy topping, tender vegetables—make every bite satisfying.
It's the kind of simple side that turns a basic meal into something special without requiring extra effort or expensive ingredients. Ready to make dinner effortless?
This recipe pairs beautifully with grilled meats, roasted chicken, or even a simple steak. The flavors are hearty enough to stand up to rich main dishes while remaining light enough for summer meals.
With just one pot to wash, you'll have more time to enjoy the meal instead of cleaning up afterward. Let's get cooking!
Ingredients for canned green beans and potatoes
Five simple ingredients transform into a restaurant-style side with golden, crispy topping.
| Ingredient | Amount | Notes |
|---|---|---|
| Baby Potatoes 🥔 | 1 ½ lb | Yukon gold preferred, halved |
| Canned Green Beans 🌿 | 2 cups | Drained, no salt added |
| Chicken or Vegetable Broth 💧 | 1 ½ cups | Low-sodium preferred |
| Garlic Cloves 🧄 | 4 cloves | Minced, fresh preferred |
| Fresh Parsley 🌿 | ¼ cup | Chopped, stems removed |
| Dried Thyme 🌿 | 1 tsp | Or 1 tbsp fresh thyme |
| Panko Breadcrumbs 🍞 | ½ cup | For crispy topping |
| Parmesan Cheese 🧀 | ¼ cup | Freshly grated, fine |
| Extra-Virgin Olive Oil 🫒 | 2 tbsp | For drizzling |
| Salt 🧂 | 1 tsp | Diamond Crystal preferred |
| Black Pepper 🌶️ | ½ tsp | Freshly cracked |
| Butter 🧈 | 2 tbsp | Unsalted, melted |
The potatoes are the star here—Yukon golds stay creamy while holding their shape, but russets work too if you prefer. Trader Joe's sells pre-washed baby potatoes that cut prep time in half. For the green beans, stick with no-salt-added cans—Green Giant or Del Monte are reliable. Fresh thyme is ideal, but dried works at one-third the amount. If you're short on time, grab a pre-minced garlic jar, but fresh always tastes better. The Parmesan matters for that crispy topping—grate it yourself from a wedge for maximum flavor.
No panko? Regular breadcrumbs toasted in the dry pan work fine, but they won't be as crispy. Short on parsley? Fresh cilantro or basil adds a nice twist. The broth can be swapped for white wine or tomato juice for a different flavor profile. If you're avoiding dairy, skip the Parmesan and use nutritional yeast instead. The butter is optional but adds richness—olive oil works too. For extra crispiness, broil the topping for 2-3 minutes at the end.
This keeps beautifully in the fridge for 4 days—reheat covered with foil to keep the topping crisp. For meal prep, portion into individual containers and reheat just the top layer under the broiler for 1-2 minutes. The flavors actually improve overnight as everything melds together. Freeze for up to 3 months by storing in an airtight container with parchment between layers. Leftovers reheat best with a splash of water or broth to restore moisture.
Why You'll Love This Recipe
- No Chopping Chaos: I swear by this recipe when I’m too tired to peel potatoes. Baby potatoes stay whole, canned beans are pre-drained, and the only prep is mincing garlic—no knife marathon here.
- Garlic-Parsley Magic: That first bite of tender potatoes kissed by garlic and bright parsley? Honestly, it’s the kind of flavor that makes you pause mid-fork. The broth soaks in just enough to keep everything juicy without drowning it.
- Weeknight to Potluck: Same simple method works for a rushed dinner or a picnic basket. Double the batch, toss in a thermos, and it’s still delicious cold—no one will guess it started with canned beans.
- Budget-Friendly Leftovers: This recipe costs next to nothing but feeds four easily. Leftovers reheat perfectly, and the flavors actually improve the next day—proof that simplicity wins. (My kids’ favorite, weirdly.)
Step-by-step instructions for one-pot garlic-herb crisp-top side
This method keeps everything in one pot for easy cleanup and perfect flavor balance.
Parboil and Season the Baby Potatoes
In a large, deep skillet with a lid (your one-pot vessel), combine the 1.5 lb baby potatoes and 1.5 cups chicken or vegetable broth. Bring to a boil over medium-high heat, then reduce to medium and simmer uncovered for 8-10 minutes until the potatoes are slightly tender when pierced with a fork but still firm. This partial cooking prevents mushiness later.
Drain the potatoes, reserving the broth in a separate bowl. Return the potatoes to the same skillet and let them cool slightly. In a small bowl, whisk together 2 tbsp extra-virgin olive oil, 1 tsp salt, 0.5 tsp black pepper, 1 tsp dried thyme, and the 4 cloves minced garlic. Drizzle this mixture evenly over the potatoes, tossing gently to coat completely. Let them sit for 5 minutes while you prep the green beans.
Add Green Beans and Build the Crisp-Top Mixture
Return the reserved broth to the skillet with the seasoned potatoes. Add the 2 cups drained canned green beans, bringing everything to a simmer over medium heat. Cook for 5-6 minutes until the green beans are heated through but still vibrant green. The potatoes should now be fully tender when pierced.
While the vegetables cook, prepare the crisp-top mixture in a small bowl. Combine 0.5 cup panko breadcrumbs, 0.25 cup freshly grated parmesan cheese, and 2 tbsp melted butter. Stir until evenly moistened—this ensures a golden, crunchy topping. Sprinkle the mixture evenly over the potatoes and green beans, pressing down lightly with a spatula to help it adhere.
Bake to Golden Perfection with Crispy Topping
Transfer the skillet to a preheated 400°F oven (no need to preheat the oven separately). Bake uncovered for 15-18 minutes until the topping turns deep golden brown and the edges of the potatoes begin to crisp slightly. The crisp-top should be firm to the touch and smell nutty from the toasted panko.
Remove from the oven and let rest for 3-4 minutes before serving. The residual heat will finish cooking the potatoes while allowing the crisp-top to set properly. Garnish with 0.25 cup chopped fresh parsley just before serving to add a bright, fresh contrast to the rich, herby flavors.
Optional Stovetop Finish for Extra Crispiness
For maximum crispiness, return the skillet to medium heat for 1-2 minutes after baking. This stovetop finish helps crisp any softened areas of the topping while keeping the potatoes warm. Serve immediately with the crisp-top intact—it's the star of this dish, providing texture contrast and a savory crunch with every bite.
This one-pot method delivers a restaurant-quality side with minimal effort. The garlic-herb potatoes pair perfectly with the bright green beans, while the crispy topping adds a satisfying crunch that elevates the entire dish. Leftovers keep well for 2-3 days in the refrigerator, though they won't be quite as crispy when reheated.
Pro Tips For Making Canned Green Beans And Potatoes
- HALVE THE POTATOES FIRST: Baby potatoes take forever to cook whole—learned that cutting them into quarters (not eighths) speeds things up while keeping them intact. Use a sharp knife and work in batches if needed; you’ll save 10 minutes and still get that tender bite.
- DRAIN BEANS DRY: That liquid in the canned beans is salty and watery—rinsing them first is a must, but don’t stop there. Drain them on a towel or colander for 5 minutes to remove excess moisture. Trust me, soggy beans ruin the texture of the whole dish.
- BROWN THE GARLIC LOW: After sautéing the garlic, let it sit in the pan for 30 seconds—just until it’s golden, not burnt. High heat turns it bitter fast, and you’ll taste the difference. If it smells like nail polish, you’ve gone too far.
- ADD BROTH IN STAGES: Dump all the broth in at once and you’ll end up with a watery mess. Start with half, let it simmer for 5 minutes, then add the rest. This concentrates the flavor and lets the potatoes soak up the broth properly—no one wants mushy spuds.
Common mistakes when making your canned green beans and potatoes
Overcooking Potatoes
I’ve ruined more potatoes than I’d like to admit by letting them simmer too long in the broth. The key is stopping when they’re just tender—they’ll finish cooking in the oven. Test with a fork: it should slide in easily but still meet slight resistance.
If you overcook them, they’ll turn to mush, and your crisp-top will just sit on a sad, starchy bed. 🥔
Skipping the Resting Step
After baking, I used to rush to serve this dish immediately, thinking the crisp-top would stay perfect. Big mistake! Letting it rest for 3-4 minutes lets the residual heat set the topping properly.
Without this step, the crispy bits will soften, and the flavors won’t meld as beautifully. Patience here makes all the difference.
Uneven Crisp-Top
The crisp-top is the star of this dish, so don’t skimp on pressing it down gently with a spatula. If it’s not evenly distributed, some areas will burn while others stay soft.
I’ve also learned that mixing 2 tbsp melted butter into the panko and Parmesan ensures even moisture distribution, which means a uniformly golden crust. 🍞
Using Salted Canned Beans
This is a rookie error I made early on—using regular canned green beans with added salt. The sodium levels skyrocket, and your dish will taste bland because the salt masks the garlic and herbs.
Stick with no-salt-added brands like Green Giant or Del Monte, and season to taste at the end. Trust me, your taste buds will thank you.
Broiling Instead of Baking
Broiling might seem like a shortcut, but it’s a common mistake that leads to uneven cooking. The top burns while the bottom stays cold. Baking at 400°F ensures gentle, even heat that cooks the potatoes and beans thoroughly while crisping the topping perfectly.
If you’re in a hurry, use the broiler for just the final 2-3 minutes—but only after baking!
Ignoring the Broth
Don’t drain that reserved broth! It’s the secret to keeping your potatoes tender and your green beans bright. I’ve seen people skip it, and the results are always drier and less flavorful. Use that broth to simmer the vegetables—it’s liquid gold for this dish. 💧
Nutrition facts
Frequently asked questions
Can I make this recipe without an oven?
Skip the baking step and finish under the broiler for 3-4 minutes at high heat. For a stovetop-only version, cover the skillet and cook on medium-low heat for 10-12 minutes after adding the crisp-top mixture. The topping won't be quite as crispy, but the flavors will still shine.
What's the best way to reheat leftovers?
Reheat covered with foil in a 350°F oven for 10-12 minutes to restore moisture. For extra crispiness, broil the top for 1-2 minutes at the end. Microwave reheating works but will make the crisp-top soggy. The dish keeps well for 4 days in the fridge.
Can I substitute fresh green beans?
Yes! Use 1 lb fresh green beans trimmed and cut into 2-inch pieces. Blanch them in boiling water for 2 minutes before adding to the skillet. Fresh beans will be slightly more tender than canned, so reduce the simmering time to 3-4 minutes after adding them.
Why does my crisp-top sometimes get oily?
Too much butter in the crisp-top mixture causes oiliness. Stick to 2 tbsp melted butter and mix it thoroughly with the panko and Parmesan. For extra crispiness without grease, try using olive oil spray on the skillet before baking. The topping should be golden, not greasy.
What are the best main dishes to pair with this?
This side pairs beautifully with grilled chicken breasts, roasted salmon, or pan-seared steaks. For vegetarian meals, serve with garlic bread or a simple tomato salad. The herby flavors complement rich proteins perfectly while standing up to hearty meals.