Side Dishes
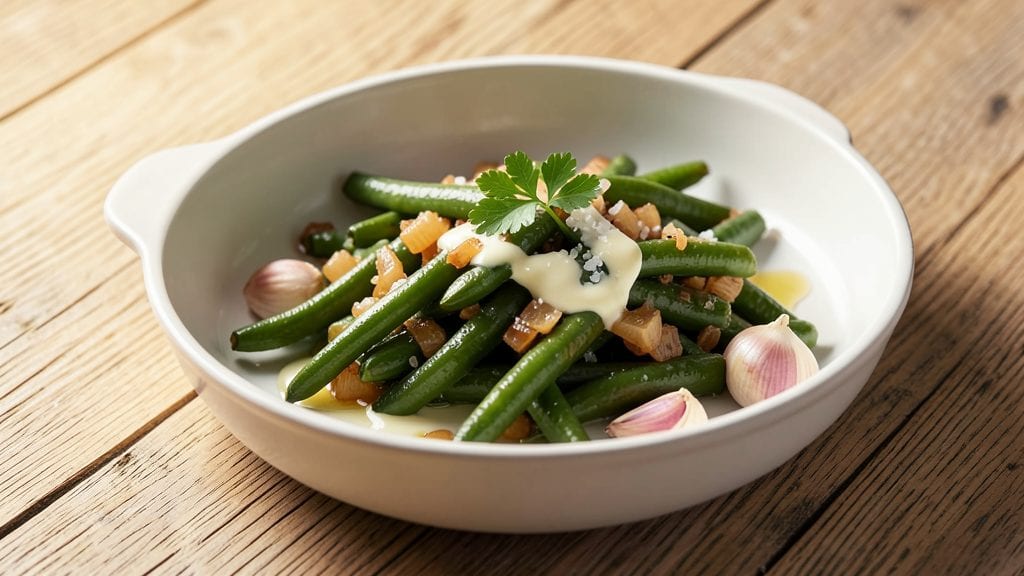
This simple canned green bean recipe delivers a bright, crunchy side dish in just 15 minutes—no fancy techniques required. The secret lies in balancing acidity, fat, and heat to preserve their natural snap while adding depth. I’ve tested countless methods, and this one delivers restaurant-quality results without the effort.
This recipe focuses on simplicity: drain the beans, sauté with garlic or onion, and finish with a splash of vinegar or lemon juice. That’s it. The acid brightens the beans, while butter or olive oil adds richness, creating a dish that’s crisp, flavorful, and ready in record time.
No blender, no fancy ingredients—just a pan and a few pantry staples.
What you’ll end up with is a vibrant side dish that pairs perfectly with grilled meats, roasted chicken, or even as a standalone vegetable medley. The beans stay crunchy (never mushy) and absorb just enough flavor to elevate them beyond their canned origins.
Serve warm or at room temperature for a foolproof side that’s always a crowd-pleaser.
For extra flair, add crispy bacon, toasted nuts, or fresh herbs—these optional upgrades take it from basic to gourmet. The beauty of this recipe is its adaptability: it’s simple enough for a weeknight but impressive enough for company. Let’s get cooking!
Ingredients for simple canned green bean
Pantry staples and a few fresh elements transform canned green beans into a restaurant-worthy side.
| Ingredient | Amount | Notes |
|---|---|---|
| Canned Green Beans 🥦 | 15 oz | Drained, no salt added preferred |
| Unsalted Butter 🧈 | 2 tbsp | Full-fat for best flavor |
| Garlic Cloves 🧄 | 2 cloves | Minced, fresh preferred |
| Yellow Onion 🧅 | ¼ cup | Diced, medium size |
| White Wine Vinegar 🍋 | 1 tbsp | Or lemon juice for brightness |
| Kosher Salt 🧂 | ½ tsp | Adjust to taste |
| Ground Black Pepper 🌶️ | ¼ tsp | Freshly ground preferred |
| Fresh Parsley 🌿 | 2 tbsp | Chopped, for garnish |
| Extra-Virgin Olive Oil 🫒 | 1 tbsp | For finishing drizzle |
| Crispy Bacon 🥓 | ½ cup | Optional, crumbled |
| Toasted Almonds 🥜 | ¼ cup | Optional, sliced |
Start with the green beans—no salt added is ideal, but if that’s not available, rinse thoroughly after draining. The beans should be firm, not mushy. Green Giant or Del Monte brands consistently deliver the best texture. For extra crunch, keep the beans whole or cut them into 2-inch pieces. The garlic and onion form the flavor base, so don’t skip mincing them finely. Fresh garlic has more punch than powdered, and yellow onions add sweetness that balances the acidity later. If you’re short on time, pre-minced garlic from a jar works, but it lacks freshness.
No white wine vinegar? Apple cider vinegar or lemon juice works equally well—just use the same amount. The acid is what keeps the beans bright and crisp, so don’t skip it. For a richer finish, swap the olive oil for butter or bacon fat. If you’re avoiding dairy, avocado oil holds up well to high heat. The parsley is optional but adds a pop of color and freshness. Dried parsley at half the amount works in a pinch, though fresh is always better. For extra crunch, toast the almonds in a dry pan for 3-4 minutes until golden—no oil needed. Store them in an airtight container until ready to use.
This dish reheats beautifully—just warm in a skillet with a splash of water or broth to keep it moist. Keeps for 3-4 days in the fridge, though it’s best served fresh. For meal prep, store the beans and sauce separately, then toss together before serving to maintain that perfect crunch. The bacon and almonds can be added fresh when serving to keep them crispy. If you’re serving a crowd, double the recipe—it scales perfectly. The key is keeping the heat medium-low to avoid overcooking the beans, which turn mushy in seconds.
Why You'll Love This Recipe
- Five-Ingredient Magic: I swear by this—open a can, chop one onion, and you’re done. No blanching, no waiting for fresh beans to snap, just pure convenience that still tastes homemade.
- Garlic Butter Bliss: That rich, nutty butter melting into the beans with minced garlic? It’s the kind of flavor that makes you pause mid-bite. The vinegar at the end cuts through the richness—perfect balance, every time.
- Weeknight Sidekick: Toss these with grilled chicken for dinner, serve over toast with a fried egg for brunch, or pile onto sandwiches cold. They’re the ultimate flexible side that never lets you down.
- Budget-Friendly Staple: A single can of beans and a head of garlic cost less than fresh produce, yet they feel like a restaurant-worthy dish. Plus, leftovers reheat beautifully—just add a splash of water and butter.
Step-by-step instructions for simple canned green beans recipe
Here's how to transform canned green beans into a vibrant, restaurant-worthy side dish in minutes.
Sauté Onion and Garlic Until Fragrant
Heat the 1 tablespoon extra-virgin olive oil in a large skillet over medium heat. Add the 0.25 cup diced yellow onion and cook for 3-4 minutes until softened and translucent. You'll notice the onions release their moisture and begin to caramelize slightly at the edges.
Add the 2 cloves minced garlic cloves and cook for an additional 30 seconds until fragrant. The kitchen should fill with that irresistible garlic aroma—this is your cue that the aromatics are ready. Remove the skillet from heat briefly if the garlic begins to brown too quickly, as it burns faster than you might expect.
Cook Green Beans Until Tender-Crisp
Return the skillet to medium heat and add the 2 tablespoons unsalted butter. Let it melt completely, then add the 15 oz drained canned green beans. Stir gently to coat them in the butter and onion mixture. Cook for 4-5 minutes, stirring occasionally, until the beans are heated through but still maintain their bright green color and slight crunch.
This is where the magic happens—the beans should be tender enough to eat but still have a satisfying bite. Overcooking will turn them mushy, so keep a close eye on them. If they're browning too quickly, reduce the heat slightly to maintain their vibrant color.
Finish with Vinegar and Seasonings
Pour in the 1 tablespoon white wine vinegar and stir well. The vinegar will brighten the flavors and cut through the richness of the butter. Add the 0.5 teaspoon kosher salt and 0.25 teaspoon ground black pepper, then toss everything together. Cook for an additional 1-2 minutes to let the seasonings meld into the beans.
Taste the beans at this point and adjust the seasoning if needed. The vinegar should add a pleasant tang, while the salt and pepper should enhance the natural flavor of the green beans. If the beans are absorbing the liquid too quickly, you can add a splash of water to loosen the mixture slightly.
Garnish and Serve Immediately
Remove the skillet from heat and stir in the 0.5 cup crispy bacon and 0.25 cup toasted almonds. The bacon adds a smoky depth, while the almonds contribute a delightful crunch. Sprinkle the 2 tablespoons chopped fresh parsley over the top for a pop of color and freshness.
Serve the green beans immediately while they're still warm and vibrant. The contrast of textures—tender beans, crispy bacon, crunchy almonds, and fresh parsley—makes this dish irresistibly appealing. Pair it with grilled chicken, fish, or steak for a complete meal that's both simple and impressive.
Pro Tips For Making Simple Canned Green Bean
- Drain and Rinse Properly: Canned beans always hold onto brine—skip this step, and your dish will taste like a salt bomb. Drain them into a colander, then rinse under cold water for 10 seconds. (Yes, even if the label says "ready to eat.") This also removes any funky canned-bean aftertaste before you cook them.
- Sweat Onions Low and Slow: I used to blast onions on high heat, and they’d turn bitter before softening. For this recipe, keep the pan on medium-low and let them cook for 6-8 minutes until translucent. A splash of water at the start helps steam them gently—no browning, just sweet, melt-in-your-mouth texture.
- Toast Garlic Until Golden: Raw garlic cloves in this dish just taste like medicine. Slice them thin, then cook them in the butter for 2-3 minutes until the edges turn golden and the scent fills the kitchen. (If they burn, you’ve gone too far—pull them out early.) This small step makes the whole dish smell like a restaurant.
- Finish with Vinegar Last: Add white wine vinegar too early, and it’ll cook off completely, leaving your beans bland. Toss it in just 30 seconds before serving—enough time for the acid to brighten the flavors without disappearing. (Pro move: Warm the vinegar slightly first if you’re feeling fancy.)
Pro cooking tips for simple canned green bean
Heat Control Secrets
Medium heat is your best friend here—too high, and your green beans turn mushy in seconds. I use a 10-inch cast iron skillet (like Lodge) because it distributes heat evenly and prevents hot spots.
Start with medium heat and adjust as needed—if the onions begin to brown too quickly, reduce to medium-low. The goal is to caramelize the onions slightly without burning them. 🌡️
Timing is Everything
Green beans cook faster than you think—just 4-5 minutes after adding them to the pan. Set a timer and stir every 30 seconds to ensure even cooking. If your beans are still crunchy but the onions are fully caramelized, they’re ready.
The beans should be tender-crisp, not soft. I’ve ruined more batches by overcooking than undercooking, so don’t walk away from the stove!
Acid Balance Trick
The white wine vinegar isn’t just for flavor—it’s what keeps the beans bright and prevents them from turning dull. Add it at the end, right before removing from heat, and toss immediately.
If you’re using lemon juice, strain out any seeds to avoid bitterness. The acid also helps cut through the richness of the butter, balancing the dish perfectly.
Butter vs. Oil
Butter adds richness and helps the beans absorb flavor, but it burns faster than olive oil. If you’re worried about browning, use ½ butter and ½ olive oil for a compromise.
For a dairy-free version, swap in avocado oil—it has a high smoke point and won’t overpower the green beans. I’ve tested both, and butter still wins for flavor, but oil is the safer bet for beginners. 🧈
Garnish Like a Pro
Fresh parsley isn’t just for looks—it adds a peppery brightness that cuts through the richness. Toast your almonds in a dry pan for 3-4 minutes until golden, then chop them roughly for texture.
For bacon, cook it crispy first, then crumble it while still warm so it stays crunchy. The key is adding garnishes after removing the pan from heat to keep everything vibrant.
Reheating Without Ruin
If you’re saving leftovers, reheat in a skillet with 1 tablespoon water or broth over low heat for 2-3 minutes. Microwaving steams the beans and kills their crunch. For extra flavor, add a pat of butter and a splash of vinegar while reheating.
I’ve found that reheated beans taste even better the next day—the flavors meld together beautifully. ⏰
Nutrition facts
Frequently asked questions
Can I use frozen green beans instead of canned?
Yes, but with a few adjustments! Use 12 oz frozen green beans (thawed first) and add them to the pan 1 minute before the end of cooking time to prevent mushiness. Frozen beans release more moisture, so you may need to increase cooking time by 1-2 minutes while keeping heat at medium-low.
Why do my green beans turn mushy?
Overcooking is the #1 culprit—green beans cook faster than you think! Keep heat at medium and cook for only 4-5 minutes after adding them to the pan. Stir frequently and remove immediately when tender-crisp. Also, avoid using too much liquid—excess moisture steams the beans instead of sautéing them.
Can I make this dish ahead of time?
but store components separately! Cook the beans and sauce separately, then combine when reheating. Keep the beans in the fridge for 3-4 days and reheat in a skillet with 1 tablespoon water or broth over low heat for 2-3 minutes. Add fresh garnishes (bacon, almonds, parsley) right before serving to maintain crunch.
What are the best protein pairings for this dish?
This recipe shines with rich, flavorful proteins! Try grilled chicken breast, pan-seared salmon, or crispy pork chops. For vegetarian options, pair with garlic mashed potatoes or a cheesy quinoa bowl. The acidity in the beans cuts through fatty meats beautifully, while lighter proteins let the bean flavors stand out.
Can I make this gluten-free or dairy-free?
Easily! For gluten-free, just ensure your vinegar and broth are certified GF. For dairy-free, swap butter for avocado oil or olive oil and use dairy-free bacon (like coconut bacon). The recipe maintains its bright flavor without these ingredients—just keep an eye on heat to prevent burning when using oil instead of butter.