
Side Dishes
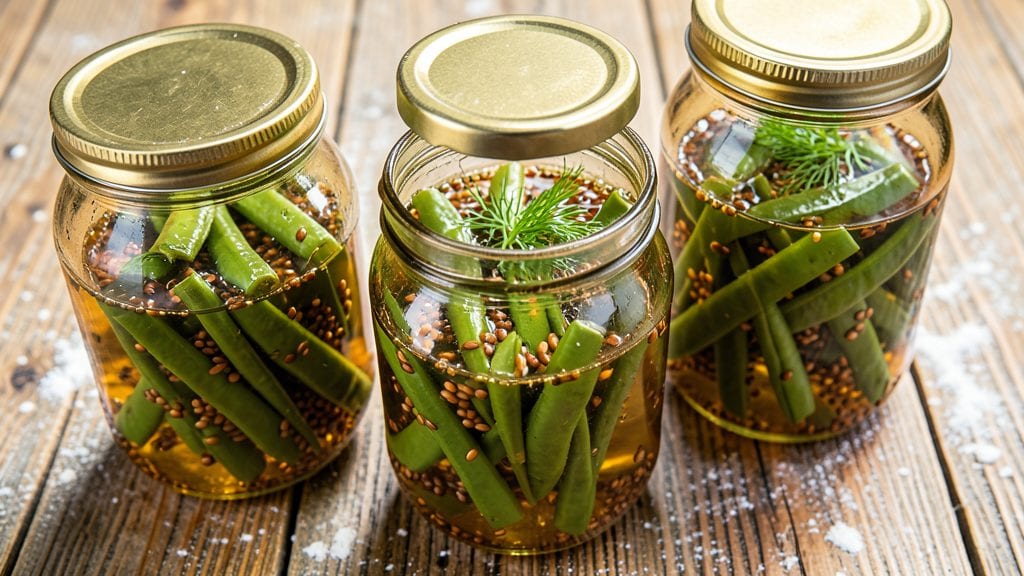
Transforming fresh French beans into pickled French beans in just 15 minutes delivers that perfect balance of tangy crunch and bright acidity that elevates any meal. The secret lies in a precise vinegar-to-water ratio combined with aromatic spices that infuse flavor without overpowering the beans' natural freshness.
I developed this method after realizing how often store-bought pickles fell short of homemade quality—this version stays crisp, vibrant, and packed with flavor for days.
What makes this recipe stand out is its versatility—whether you're serving it as a crisp side dish, a refreshing snack, or a tangy topping for sandwiches and salads.
The process is straightforward: sterilize your jars, combine vinegar, water, and spices, then add the beans to preserve their bright green color and satisfying crunch. No fermentation required, just a quick 15-minute prep that yields restaurant-quality results at home.
The end result is beans that maintain their crisp texture while absorbing the vinegar's bright acidity and the subtle warmth of spices like mustard seeds and garlic.
Each bite delivers that perfect contrast of tangy and crunchy, making it a standout side that pairs beautifully with grilled meats, fried chicken, or even as a topping for burgers. The flavor only deepens as it sits, so you'll find yourself reaching for the jar again and again.
Perfect for meal prep or last-minute sides, this recipe delivers consistent results every time. Once you try homemade pickled French beans, store-bought versions simply won't compare. Let's get started on creating your own batch that stays crisp and flavorful for up to two weeks in the refrigerator.
Ingredients for pickled french beans
Fresh beans meet tangy vinegar and aromatic spices for a crunchy, flavor-packed side in just 15 minutes.
| Ingredient | Amount | Notes |
|---|---|---|
| Fresh French Beans 🥦 | 2 lbs | Trimmed ends, cut into 2-inch pieces |
| White Vinegar 💧 | 2 cups | Distilled preferred for clarity |
| Water 💧 | 2 cups | Filtered or bottled for best results |
| Granulated Sugar 🍚 | ½ cup | White or raw preferred |
| Salt 🧂 | 1 ½ tbsp | Non-iodized preferred for flavor |
| Mustard Seeds 🌶️ | 1 tbsp | Whole seeds, toasted lightly |
| Garlic Cloves 🧄 | 4 cloves | Smashed lightly for infusion |
| Black Peppercorns 🌶️ | 1 tsp | Crushed for texture |
| Fresh Dill Sprigs 🌿 | 2 whole | Or 1 tbsp dried dill |
| Red Wine Vinegar 🍷 | ½ cup | Optional for depth of flavor |
| Canning Jars 🍶 | 4 whole | Pint-sized, sterilized |
The beans are the star—farmers market or grocery store fresh makes all the difference. Look for vibrant green, crisp beans (the thinner the better). If they're rubbery or limp, skip them. Costco or Trader Joe's usually have great options, but local markets often have fresher picks. Trim the ends and cut into even 2-inch pieces so they pack nicely into jars. The vinegar matters too—white vinegar for clarity, but red wine vinegar adds depth if you want extra complexity. Don't skimp on the sugar; it balances the acidity perfectly and keeps those beans crisp.
No mustard seeds? Dried mustard powder at half the amount works, but the texture changes. Short on dill? Fresh parsley or tarragon gives a different but lovely flavor. The garlic can be minced instead of smashed if you prefer—just don't skip it. For a sweeter pickle, add an extra tablespoon of sugar. If you're worried about sterilization, boiling the jars and lids for 10 minutes is foolproof. And if you're making a big batch, double the spices—just keep the vinegar-to-water ratio the same for perfect balance.
These stay crisp for up to 2 weeks in the fridge—honestly, they taste better after a day or two as flavors meld. Store the jars in the coldest part of your fridge, and don't open them until ready to use. The brine gets thicker over time, so give it a good shake before serving. Perfect for meal prep: grab a jar and toss it with grilled chicken, fried rice, or just eat straight from the jar with a spoon. The beans keep their crunch, so no soggy sides here!
Why You'll Love This Recipe
- No-Fuss Prep: I swear by this—just trim the ends, blanch for 2 minutes, and toss in the vinegar-sugar brine. No dicing, no peeling, no stress. The beans stay whole and crisp, so you’re basically done in 15 minutes flat.
- Tangy Crunch Magic: That vinegar-sugar balance? It turns plain green beans into something ridiculously good—bright, slightly sweet, with a satisfying crunch. Honestly, I eat them straight from the jar sometimes. (Don’t judge.)
- Meal Prep MVP: Make a big batch on Sunday, and you’ve got a snack, side, or salad topper ready for the week. Slip them into wraps, toss with rice, or just grab a handful when you’re starving. They keep for months—way better than sad lettuce.
- Budget Stretch: French beans are cheap, and this recipe stretches them into something fancy-feeling without breaking the bank. A jar of vinegar, a bag of sugar, salt—you’re using pantry staples, not gourmet ingredients. My wallet and my taste buds thank me.
Step-by-step instructions for pickled French beans
This method delivers vibrant, tangy pickled beans bursting with fresh dill and aromatic garlic in just minutes.
Prepare the Beans and Sterilize Jars
Start by trimming the ends off the 2 lbs fresh french beans and cutting them into 2-inch pieces. Rinse them thoroughly under cold water to remove any dirt or debris. While the beans soak in a colander, sterilize the 4 whole canning jars by running them through hot, soapy water, then rinsing and drying them completely. You'll want the jars completely dry to prevent any contamination once filled.
This preparation ensures your pickled beans stay fresh longer and develop that perfect crunch. The sterilization step is crucial—it eliminates any bacteria that could spoil your preserved beans. I always use the boiling water method for sterilization, which guarantees a safe, long-lasting product. Let the jars cool slightly while you prepare the pickling liquid.
Create the Pickling Liquid
In a large saucepan, combine the 2 cups white vinegar, 2 cups water, 0.5 cup granulated sugar, and 1.5 tbsp salt. Stir over medium heat until the sugar and salt completely dissolve. This mixture should be clear and free of any graininess. While it heats, lightly toast the 1 tbsp mustard seeds in a dry skillet for about 1 minute until fragrant.
The vinegar and sugar combination creates the perfect balance of tangy and sweet flavors that will infuse the beans. I've found that using distilled vinegar gives the clearest, most vibrant final product. Keep the heat at a gentle simmer—you don't want it to boil yet. This step builds the foundation for your pickled beans' signature flavor profile.
Add Aromatics and Simmer
Add the smashed 4 cloves garlic, crushed 1 tsp black peppercorns, and toasted mustard seeds to the simmering liquid. Stir gently to combine, then add the 2 whole fresh dill sprigs. Bring the mixture to a full boil for exactly 5 minutes. If you're using the optional 0.5 cup red wine vinegar, add it now and stir well. Remove from heat and let it cool slightly for 2 minutes.
The aromatics infuse their flavors into the liquid during this simmering time. The garlic and dill will create that signature fresh, herby taste we all love in pickled beans. This cooling period is important—it prevents the beans from cooking too quickly once added to the hot liquid. The mixture should still be hot enough to maintain its temperature when you add the beans.
Pack and Seal the Beans
Using a slotted spoon, carefully pack the prepared beans into the sterilized canning jars, leaving about 1 inch of headspace at the top. Pour the hot pickling liquid over the beans until each jar is filled to within 1 inch of the rim. Wipe the jar rims clean with a damp cloth to ensure a proper seal.
This packing method allows the beans to maintain their shape while ensuring they're fully submerged in the flavorful liquid. The headspace is crucial for proper sealing during the canning process. I always use a clean, damp cloth to wipe the rims—this prevents any residue from interfering with the jar seal.
Process and Store
Place the lids on the jars and screw on the bands until they're fingertip tight. Process the jars in a boiling water bath for 10 minutes. Remove the jars and let them cool completely on a towel-lined surface. You'll hear the satisfying "ping" as the jars seal. Once cooled, store the pickled beans in a cool, dark place for at least 24 hours before eating to allow flavors to fully develop.
The boiling water bath creates a vacuum seal that preserves your pickled beans for months. That distinctive "ping" sound confirms a proper seal—if you don't hear it, the jar didn't seal properly and should be refrigerated for immediate use. These pickled beans will keep their vibrant color and crisp texture for up to 6 months when stored properly. The waiting period allows all the flavors to meld together perfectly.
Pro Tips For Making Pickled French Beans
- Trim the Ends: Cut the stems off the beans first—this keeps them cleaner and lets the brine penetrate better. I used to leave them on, and the pickles always tasted unevenly seasoned. A quick snip with a knife or scissors saves time and makes the jar look tidier too.
- Boil the Brine Hard: Bring the vinegar-water mix to a full rolling boil before adding sugar and salt—this dissolves everything faster and prevents grainy bits. I learned this the hard way after finding undissolved sugar at the bottom of jars. Trust me, the extra 30 seconds pays off.
- Skip the Crowded Jar: Pack the beans loosely in the jar, leaving at least an inch of headspace. Tight packing traps air, which makes the beans mushy and the brine cloudy. Your future self will thank you when you don’t have to fish out soggy beans later.
- Add Mustard Seeds First: Toss a teaspoon of mustard seeds into the hot brine before the beans go in—it adds subtle heat and keeps the beans crisp longer. Sounds weird, but it works: my jars stay crunchy for weeks instead of turning limp after a few days.
Essential equipment for great pickled french beans
Sterilization Essentials
Your canning jars and lids are the foundation of safe, long-lasting pickled beans. I recommend Ball or Mason jars—they're the gold standard for home canning. Sterilize them by boiling in hot, soapy water for 10 minutes, then rinse thoroughly with hot water.
You can also run them through a dishwasher's sanitize cycle if you prefer convenience. Never skip this step—it eliminates bacteria that could spoil your beans. 🔥
Vinegar Selection Guide
White vinegar is my go-to for clarity and tang, but apple cider vinegar adds subtle sweetness. For depth, swap ½ cup red wine vinegar—it enhances the garlic and dill flavors beautifully. Avoid balsamic or flavored vinegars; they can overpower the delicate bean profile. Always use distilled vinegar for the cleanest, brightest results. A 5-gallon jug from Costco is cost-effective for frequent picklers.
Precision Tools Matter
A slotted spoon is essential for packing beans tightly without crushing them. I use a stainless steel one—it's durable and won't rust. For measuring, a digital kitchen scale ensures accurate vinegar-to-water ratios (critical for safety).
A jar lifter prevents burns when handling hot jars, and rubber jar seals create an airtight vacuum. These tools make the difference between professional and homemade results. 💡
Spice Toasting Tips
Lightly toasting mustard seeds in a dry skillet for 1 minute unlocks their nutty aroma. Use a small nonstick pan to prevent burning—watch closely! For garlic, a garlic press makes smashing cloves easier than mincing.
A mortar and pestle works too if you prefer texture. Toasting spices enhances flavor without adding heat, keeping those beans crisp. Pro tip: Store toasted spices in airtight containers to preserve freshness.
Boiling Water Bath Setup
You'll need a large stockpot that holds your jars upright with 2 inches of water covering them. A canning rack keeps jars off the bottom, ensuring even heat distribution. If you don't have one, use a clean towel folded into a ring.
Maintain a gentle boil—rolling boils can crack jars. I use a thermometer to confirm 212°F for proper processing. Never submerge lids in water before sealing. ⚡
Nutrition facts
Frequently asked questions
Can I use wax beans instead of French beans for pickling?
Yes! Wax beans work perfectly—they're just a slightly sweeter variety. The process stays identical, but you might want to reduce sugar by 1 tablespoon since wax beans have more natural sweetness. The texture will be equally crisp when pickled, though wax beans hold their color slightly better during cooking.
How do I know if my pickled beans are properly sealed?
Listen for the distinctive "ping" sound when jars cool completely—this confirms a vacuum seal. Visually check the lid: if it doesn't flex when pressed and stays concave, it's sealed. If the lid pops up or feels loose, refrigerate and use within 1 week. Unsealed jars may develop mold or off smells.
Can I make this recipe without canning jars?
Store the pickled beans in airtight containers (like glass jars with tight lids) and refrigerate. The flavor develops differently but stays fresh for 2 weeks. For best texture, use within 10 days. This method works perfectly for small batches or when you don't have canning equipment.
Why did my pickled beans turn mushy?
Overcooking during processing or using old beans are the most common causes. Always blanch fresh beans for 2 minutes before pickling to preserve crispness, and never process jars longer than 10 minutes. Also ensure your beans were firm and fresh when purchased—older beans break down faster during pickling.
What are the best ways to use up pickled beans?
These versatile pickles shine as a topping for burgers, tacos, or grilled meats. They also make a fantastic snack straight from the jar, or add crunch to salads and sandwiches. Try mixing them into pasta dishes or using them as a tangy garnish for soups. The flavor only improves after 24 hours of resting!