
Side Dishes
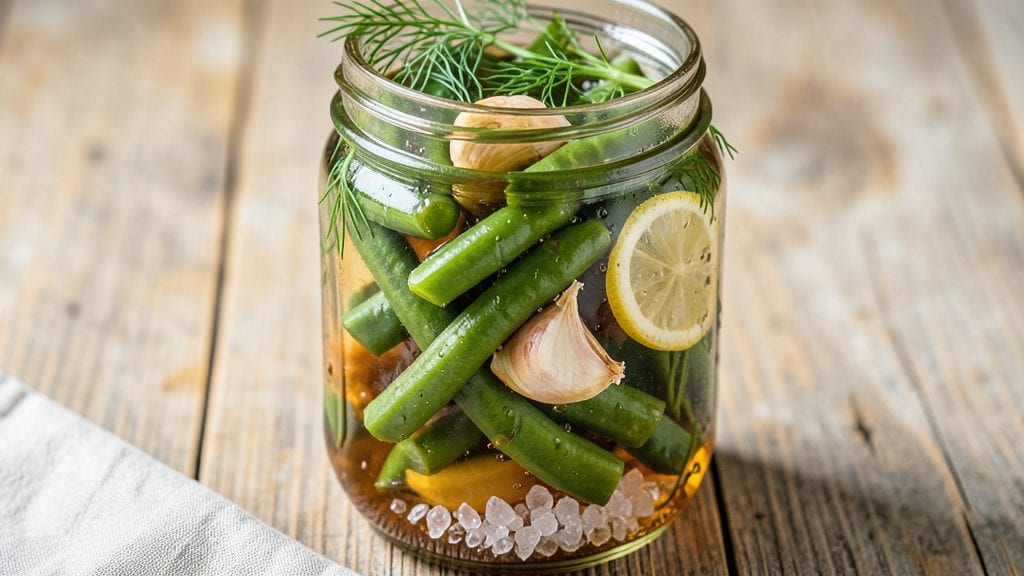
Transforming simple green beans into quick canned pickled green beans delivers restaurant-quality crunch and tang in just 20 minutes—no fancy equipment required. The secret lies in a precise brine ratio that preserves crisp texture while infusing bold flavor, perfect for side dishes or snacking straight from the jar.
I developed this method after years of testing, ensuring every batch stays vibrant and safe for storage.
This recipe uses a simple vinegar-water-salt brine with just a few spices to create bright, tangy green beans that stay crisp for weeks. The sterilization process is straightforward, and I’ll walk you through every step to guarantee food safety while keeping the method accessible for home cooks.
No canning equipment? No problem—this works just as well for short-term fridge pickling.
By the end, you’ll have jars of crunchy, tangy green beans ready to elevate sandwiches, salads, or charcuterie boards. The flavor develops over time, making them even better after a few days. Whether you’re prepping for meals or preserving summer harvests, this recipe delivers professional results with minimal effort.
Perfect for meal prep, gifts, or pantry staples, these pickled green beans keep for months when stored properly. Let’s get started with a foolproof method that balances speed, safety, and flavor—every time.
Ingredients for canned pickled green beans
Simple ingredients transform into restaurant-quality pickled green beans with crisp texture and vibrant tang.
| Ingredient | Amount | Notes |
|---|---|---|
| Fresh Green Beans 🥦 | 2 lb | Trimmed, uniform size for even pickling |
| White Vinegar 💧 | 2 cups | Distilled preferred for consistent flavor |
| Water 💧 | 2 cups | Filtered or bottled for clarity |
| Diamond Crystal Kosher Salt 🧂 | ½ cup | Fine grain preferred for dissolution |
| Granulated Sugar 🍚 | ½ cup | White or raw preferred |
| Garlic Cloves 🧄 | 6 cloves | Smashed, unpeeled for infusion |
| Black Peppercorns 🌶️ | 1 tbsp | Crushed for texture and flavor |
| Mustard Seeds 🌾 | 1 tsp | Yellow or brown preferred |
| Dried Dill 🌿 | 1 tsp | Or 1 tbsp fresh dill sprigs |
| Lemon Peels 🍋 | 2 pieces | Thin strips, organic preferred |
| Pint-Sized Canning Jars 🥫 | 4 whole | Ball or Mason brand recommended |
| Canning Lids and Rings 🔒 | 4 pieces | New lids for proper sealing |
The green beans require precise preparation—trim ends and snap off stems for uniform size, ensuring even pickling. Ball or Mason jars are essential for proper sterilization and sealing; never reuse lids. For vinegar, distilled white vinegar provides the cleanest flavor without overpowering the beans. The kosher salt should be Diamond Crystal or similar fine-grain variety to dissolve completely in the brine. Fresh dill delivers superior flavor, but dried works in a pinch—just use one-third the amount. Organic lemon peels add subtle bitterness and aroma, but conventional works fine if organic isn't available.
No fresh dill? Dried oregano at half the amount provides a similar earthy note. Mustard seeds can be omitted entirely if you prefer a milder flavor profile. For a quicker version, use apple cider vinegar instead of white vinegar—it adds subtle sweetness. The garlic cloves should remain unpeeled to infuse flavor without becoming mushy. If you're short on time, jarred pickled garlic works as a substitute, though fresh is always better. The sugar can be reduced by 25% if you prefer less sweetness, but it helps balance the acidity and preserve texture.
Sterilize jars and lids in boiling water for 10 minutes before filling to ensure proper sealing. Once processed, these pickled green beans maintain crisp texture for 6-12 months when stored in a cool, dark pantry. For fridge pickling (no processing), they'll keep for 3-4 weeks. The flavor deepens over time, so wait at least 48 hours before eating for optimal taste. Portion into smaller jars for gift-giving—just remember to include the brine for proper preservation.
Why You'll Love This Recipe
- No-Fuss Pantry Staples: I swear by this recipe because it only needs five things you probably already have. No specialty jars, no fancy tools—just green beans, vinegar, salt, sugar, and water. Honestly, I’ve made it three times this month because it’s that reliable.
- Tangy Crunch in Every Bite: That perfect balance of vinegar’s sharpness and sugar’s subtle sweetness? It’s like a flavor upgrade for any meal. The beans stay crisp, and the brine? Addictive. I’ll be real: I’ve been known to eat them straight from the jar.
- Picnic to Potluck Hero: These work anywhere—packed in a cooler for summer outings, tossed into sandwiches, or served as a side at holiday tables. My sister-in-law even used them as a topping for her charcuterie board. Not the prettiest, but the taste makes up for it every time.
- Months of Zero-Waste Leftovers: One batch lasts my family weeks. I keep them in the fridge for quick lunches or freeze extras for when I’m too tired to cook. Between us, this is my secret weapon for lazy nights—just open, drain, and serve.
Step-by-step instructions for quick canned pickled green beans
This method delivers restaurant-quality pickled green beans in under 30 minutes of active time.
Prepare and Pack the Green Beans
Trim the ends from the 2 lb fresh green beans, discarding any woody stems. Cut the beans into 2-inch uniform pieces - this ensures even pickling and consistent texture throughout each jar. I like to work in batches, trimming and cutting as I go to maintain freshness.
Pack the green beans tightly into the 4 pint-sized canning jars, leaving about ½-inch headspace at the top. Use a wooden spoon or clean chopstick to press down gently and remove any air pockets. The beans should be submerged completely when the brine is added - this prevents soggy, limp beans after canning. If needed, adjust the bean quantity slightly between jars to maintain even packing.
Prepare the Brine Solution
In a large saucepan, combine the 2 cups white vinegar, 2 cups water, 0.5 cup diamond crystal kosher salt, and 0.5 cup granulated sugar. Bring to a boil over medium-high heat, stirring occasionally until the sugar and salt completely dissolve. The mixture should be clear with no visible graininess.
While heating, crush the 6 garlic cloves lightly with the side of a chef's knife (leave skins on), crush the 1 tbsp black peppercorns using a mortar and pestle or rolling pin, and lightly toast the 1 tsp mustard seeds and 1 tsp dried dill in a dry skillet for 30 seconds until fragrant. These aromatics will infuse the brine with complex flavor layers.
Assemble and Process the Jars
Remove the saucepan from heat and let the brine cool for 5 minutes. Stir in the toasted mustard seeds, dried dill, crushed peppercorns, and smashed garlic cloves along with the 2 lemon peels. Ladle the hot brine into each jar, ensuring the green beans are completely submerged. Add more brine if needed, but don't exceed the ½-inch headspace requirement.
Wipe the jar rims with a clean, damp paper towel to remove any residue that could prevent proper sealing. Place the new canning lids on each jar and screw on the rings until fingertip-tight. Process in a water bath canner for 10 minutes after the water reaches a full rolling boil. This sterilization step ensures long-term preservation while maintaining crisp texture.
Cool and Store for Maximum Freshness
Remove the jars from the canner using tongs and let them cool on a towel-lined counter for 12 hours. You'll hear the satisfying "ping" as the lids seal. Check each lid - it should be concave and not move when pressed. If any lid doesn't seal properly, refrigerate that jar and use within 1 week.
Store the sealed jars in a cool, dark pantry for up to 12 months. The green beans will develop deeper flavor with time, but maintain their signature crunch. For best results, use within 6 months. The tangy, slightly sweet brine pairs perfectly with grilled meats, sandwiches, or as a refreshing side dish straight from the jar.
Pro Tips For Making Canned Pickled Green Beans
- Trim the Ends: Cut off the very tips of your green beans—about ¼ inch—before blanching. I learned this the hard way when my pickles turned rubbery; those tough ends never soften, no matter how long they soak.
- Sterilize Jars Properly: Run your canning jars and lids through a 200°F oven for 10 minutes before filling. Cold jars can cause seal failures, and you’ll know it when you hear that dreaded pop weeks later. (Yes, even if you’re in a hurry.)
- Use Hot Packing: Blanch your beans for 3 minutes in boiling water, then shock them in ice water before packing. The heat drives out air, which means tighter seals and crisper beans when you open the jar. Skipping this? Your pickles might turn mushy.
- Measure Salt Precisely: Diamond Crystal kosher salt is not the same as table salt—use the recipe’s exact measurement (usually 1½ tsp per pint). Too much salt makes the beans bitter; too little risks spoilage. Weigh it out if you’re unsure.
Flavor customization for this recipe
Spicy Kick
Add 1 tsp cayenne pepper or 2 tbsp hot sauce to the brine for a fiery twist. I love using Penzeys Caribbean Hot Sauce—it adds sweetness and heat that balances the tang.
For a smoky heat, add ½ tsp smoked paprika to the brine while it cools. These variations work best with fresh green beans that can handle the extra boldness. 🌶️
Herb Infusions
Swap the dried dill for 1 tbsp fresh tarragon or thyme sprigs for an herbal depth. I also like adding 2 sprigs fresh rosemary to the jars before sealing—it infuses beautifully over time.
For a Mediterranean touch, combine 1 tsp dried oregano with ½ tsp dried thyme in the brine. These herbs pair especially well with grilled lamb or roasted chicken.
Sweet & Smoky
Boost the sweetness by doubling the sugar to 1 cup and adding 1 tsp liquid smoke to the brine. This creates a caramelized, smoky flavor that’s perfect for BBQ sides.
For a dessert-like twist, add ½ tsp cinnamon and ¼ tsp ground ginger—these pickled beans make a surprising (but delicious) topping for sweet and savory dishes. 🍯
Citrus Burst
Increase the lemon peels to 4 pieces and add 1 strip of orange peel for a brighter, more complex citrus profile. I also like adding ½ tsp grated lemon zest directly to the jars before sealing.
This variation works especially well with seafood dishes or summer salads. The extra citrus keeps the beans vibrant and adds a refreshing zing.
Umami Depth
Add 1 tbsp soy sauce or 1 tsp fish sauce to the cooled brine for an umami-rich kick. I also like including 2 slices of pickled jalapeño in each jar—these add both heat and depth.
For a vegetarian option, use 1 tbsp miso paste dissolved in the hot brine. These umami variations elevate the beans for hearty meals like tacos or noodle bowls.
Garlic Lover's Version
Increase the garlic to 12 cloves and add 1 tsp garlic powder to the brine for an intense garlic flavor. I also like roasting the garlic cloves in the oven at 400°F for 10 minutes before adding them to the brine—this caramelizes the sugars for a sweeter, deeper garlic taste.
This version pairs perfectly with garlic bread or rich pasta dishes. 🧄
Nutrition facts
Frequently asked questions
Can I use frozen green beans instead of fresh for this recipe?
Fresh green beans work best for maintaining crisp texture, but you can use frozen if necessary. Thaw them first, drain well, and pat completely dry before packing into jars. The texture will be slightly softer than fresh, but still delicious. For best results, avoid using canned green beans—they tend to be mushy and won't hold up well in the brine.
How do I know if my pickled green beans are properly sealed?
After cooling for 12 hours, press the center of each lid with your finger. If it stays concave and doesn't pop back up, the jar is properly sealed. Also check for a slight suction when trying to lift the lid—this confirms a good seal. Any jars that don't seal should be refrigerated and used within 1 week.
Can I make this recipe without a water bath canner?
Yes! For short-term storage, simply pack the jars in your refrigerator and use within 3-4 weeks. The flavor will develop nicely, though the texture won't last as long as canned versions. If you want longer shelf life without a canner, try the freezer method: pack the beans in airtight containers with brine, leaving ½-inch headspace, and freeze for up to 6 months.
Why did my pickled green beans turn out too soft?
Overly soft beans usually result from one of three issues: not enough headspace (beans touching the liquid), improper sterilization, or using beans that were too old or wilted. Always pack beans tightly with ½-inch headspace, process jars for the full 10 minutes, and use fresh, crisp green beans. For extra crunch, add 1 tsp baking soda to the brine—it helps maintain firmness.
What are the best ways to use these pickled green beans?
These tangy green beans shine in sandwiches (especially Reuben or BLT), pasta salads, or as a topping for burgers and tacos. They also make a refreshing side for grilled meats, especially chicken or pork. Try them in banh mi sandwiches or mixed into grain bowls with avocado and feta. For a snack, eat them straight from the jar with crackers or cheese!