Side Dishes
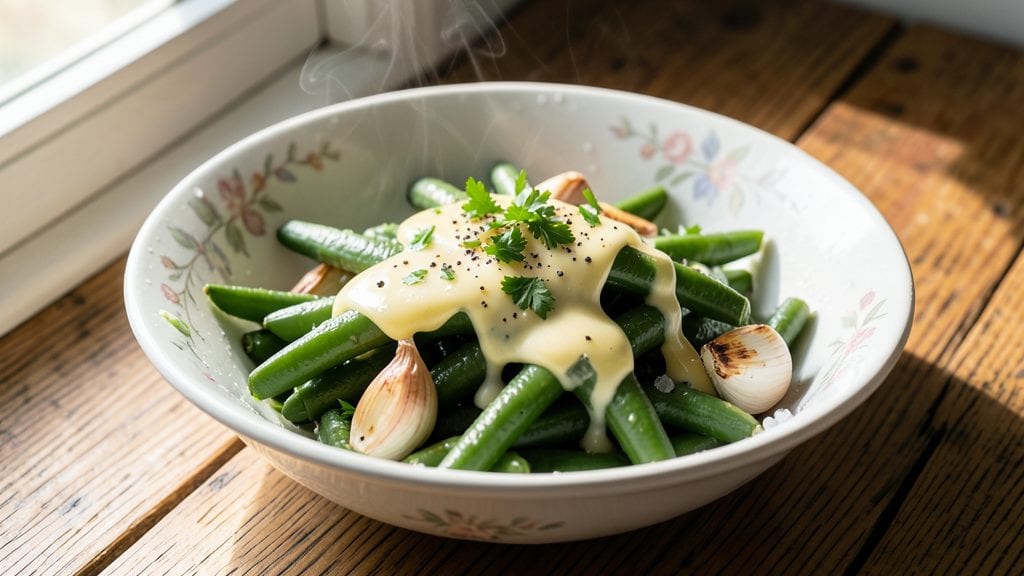
Grandma's green beans recipe brings back the comforting flavors of home-cooked meals that taste like they simmered all day. The secret lies in a crisp-tender texture achieved through careful blanching before a rich garlic butter sauté—just like my grandmother used to make.
This method transforms simple green beans into a side dish that steals the show at any family dinner table.
What makes this recipe special is the balance of simplicity and depth. Fresh green beans get blanched to perfection, then tossed in a buttery garlic sauce that infuses every bite with aromatic richness.
The key is timing—too long in the pot, and they turn mushy; too short, and they stay raw. I’ve perfected this technique over years of holiday gatherings, ensuring the beans stay tender yet slightly crisp at the edges.
By the end, you’ll have a side dish that’s golden, fragrant, and packed with flavor—ready to pair with roasted chicken, mashed potatoes, or even a simple steak.
The aroma alone will have everyone at the table asking for seconds. This is the kind of recipe that turns a simple vegetable into a centerpiece dish.
Serve it warm with a sprinkle of fresh parsley for a touch of brightness, or add crispy bacon bits for extra depth. The possibilities are endless, but the method remains foolproof. Let’s get cooking!
Ingredients for grandma's green bean
Fresh green beans, rich butter, and aromatic garlic—simple ingredients for a timeless side dish.
| Ingredient | Amount | Notes |
|---|---|---|
| Fresh Green Beans 🥦 | 1 ½ lb | Trimmed, ends removed |
| Unsalted Butter 🧈 | ½ cup | Cold, cut into small cubes |
| Garlic Cloves 🧄 | 4 cloves | Minced, fresh preferred |
| Salt 🧂 | 1 ½ tsp | Kosher or sea salt |
| Black Pepper 🌶️ | ½ tsp | Freshly ground preferred |
| Fresh Parsley 🌿 | ¼ cup | Chopped, for garnish |
| Lemon Juice 🍋 | 1 tbsp | Freshly squeezed |
| Extra-Virgin Olive Oil 🫒 | 1 tbsp | For sautéing beans |
| Crispy Bacon Bits 🥓 | ¼ cup | Optional, for garnish |
The green beans are the star, so pick fresh, crisp ones—avoid those with yellow or wilted ends. Local farmers markets or the produce section of Whole Foods usually have the best quality. If you must use frozen, thaw them first and pat completely dry. The butter should be cold and cubed—this ensures it melts beautifully during sautéing without turning greasy. For the garlic, fresh is non-negotiable; jarred minced garlic lacks the depth of flavor. If you're short on time, pre-minced garlic works in a pinch, but it won't have the same aromatic punch.
No fresh parsley? Dried parsley at one-third the amount will work, but fresh is ideal for that bright pop of color. Out of lemon juice? A splash of apple cider vinegar adds tanginess without altering the flavor profile. For the bacon bits, store-bought works fine, but crispy bacon cooked from scratch adds a smoky depth. If you're avoiding dairy, olive oil replaces butter (use 2 tbsp extra), but the texture will be slightly different. The key to the crisp-tender texture is the blanching—don't skip it! It pre-cooks the beans just enough to ensure they stay al dente during the final sauté.
Store blanched green beans in an airtight container with a damp paper towel for up to 3 days in the fridge. The finished dish reheats beautifully—just warm in a skillet with a splash of water for 2-3 minutes. For meal prep, sauté the beans fully before adding the butter and garlic, then store separately. Reheat the butter-garlic mixture in a pan, add the beans, and toss to coat. This dish freezes well for up to 3 months, though the texture may soften slightly. Always garnish fresh parsley or bacon bits just before serving to keep them crisp.
Why You'll Love This Recipe
- No-Chop Nightmare: I swear by this—just trim the ends, snap the beans in half, and toss them in. My kids think it’s magic (and honestly, so do I).
- Butter-Garlic Magic: That simple combo of browned butter and minced garlic? It turns green beans from side dish to main event. Crispy edges, rich flavor—no fancy ingredients needed.
- Leftovers That Last: Make a big batch on Sunday, and you’ve got lunch or a quick side for the next four days. Tastes just as good reheated (yes, even the next day).
- Budget Dinner Hero: Fresh green beans are cheap, butter’s a pantry staple, and garlic lasts forever. This feeds four for under $8—and still feels like a fancy meal.
Step-by-step instructions for Grandma's green beans recipe
This method delivers perfectly tender green beans with a rich, buttery garlic flavor—just like Grandma used to make.
Blanch the Green Beans for Perfect Tenderness
Fill a large pot with 2 quarts of water and bring to a rolling boil. Add 1 teaspoon of the salt and the 1.5 pounds of trimmed green beans. Cook for 3-4 minutes until the beans are bright green and just tender—they should still have a slight bite when pierced with a fork. Overcooking leads to limp, mushy beans, so watch closely.
Drain the beans immediately in a colander and rinse under cold water to stop the cooking process. This blanching step is crucial—it removes any bitterness and creates the ideal texture for the buttery garlic sauté. Don't skip this step, even if it seems like extra work. The flavor and texture difference is dramatic.
Sauté Garlic in Olive Oil Until Fragrant
Heat 1 tablespoon of extra-virgin olive oil in a large skillet over medium heat. Add the 4 minced garlic cloves and sauté for 1-2 minutes until they become golden and fragrant, not browned. If the garlic starts to brown too quickly, reduce the heat slightly—burnt garlic adds bitterness to the dish.
Here's the thing—this is where the flavor foundation is built. The garlic should smell deeply aromatic, almost like it's filling your kitchen. If you're unsure, taste a small piece. It should be sweet and pungent, not harsh. This ensures your green beans will have that signature garlic flavor without overpowering the natural taste of the vegetables.
Add Butter and Cook Until Foamy
Reduce the heat to medium-low and add the ½ cup of cold, cubed unsalted butter. Stir constantly for 2-3 minutes until the butter melts and the mixture becomes foamy and bubbly. The butter should coat the back of a spoon, indicating it's ready to combine with the beans.
This step creates the rich, velvety sauce that makes Grandma's green beans so special. The low heat prevents the butter from browning while allowing it to fully incorporate with the garlic. If the butter starts to brown too quickly, reduce the heat further. You want a smooth, creamy sauce, not a browned one.
Combine Beans and Season Thoroughly
Add the blanched green beans to the skillet and toss gently to coat them evenly in the buttery garlic mixture. Sprinkle with the remaining ½ teaspoon salt and ½ teaspoon black pepper, then stir for 2-3 minutes until everything is well-coated and heated through. The beans should be tender-crisp with a glossy sheen from the butter.
Taste a bean at this stage. It should be tender but still have a slight bite, with a rich, garlicky flavor that coats your mouth. If the seasoning needs adjustment, add a pinch more salt or pepper. The lemon juice will come next, but it's better to taste first—seasoning builds in layers, and you want to balance the flavors before adding acidity.
Finish with Lemon Juice and Garnish
Remove the skillet from heat and stir in the 1 tablespoon of freshly squeezed lemon juice. This brightens the dish and cuts through the richness of the butter, adding a fresh contrast. Toss the beans gently to distribute the lemon juice evenly. The final mixture should look glossy and vibrant, with a bright green color that indicates freshness.
Transfer the green beans to a serving dish and sprinkle with the ¼ cup of chopped fresh parsley and ¼ cup of crispy bacon bits (if using). The parsley adds a fresh, herbal note, while the bacon bits provide a salty, crunchy contrast. Serve immediately while the beans are still hot and the butter is melty. This dish tastes best straight from the pan, so don't let it sit too long before serving.
Pro Tips For Making Grandma'S Green Bean
- TRIM BEANS LIKE A PRO: Cut the ends off just enough—about ¼ inch—to remove the tough stems but leave the rest intact. I used to hack off too much, wasting good bean. A sharp knife makes this faster, and don’t overcrowd the cutting board (yes, even if you’re impatient like me).
- SWEAT GARLIC LOW AND SLOW: After melting the butter, reduce heat to medium-low when adding minced garlic—burnt garlic ruins everything. Stir constantly and let it cook until fragrant but not browned (about 2-3 minutes). I learned this the hard way after one disastrous Thanksgiving.
- SALT THE BEANS FIRST: Toss the trimmed green beans with salt before cooking—this draws out moisture and ensures even seasoning. A pinch of salt per pound works; skip this, and you’ll end up with bland beans no matter how much you season later.
- USE COLD BUTTER FOR FLAVOR: Cut the unsalted butter into small cubes and let them sit at room temp for 10 minutes before cooking. Cold butter melts slower, coating the beans evenly without overheating. (Your future self will thank you when the sauce isn’t greasy.)
Health benefits of this recipe
Fiber-Rich Boost
Green beans are packed with dietary fiber—about 4 grams per cup—which supports healthy digestion and keeps you feeling full longer. This makes them perfect for balanced meals, especially when paired with protein-rich mains like roasted chicken or steak.
The fiber also helps regulate blood sugar levels, making this dish a smart choice for anyone watching their glucose intake. 💪
Low-Calorie, High-Nutrient
A single serving of this recipe provides just 120 calories, yet delivers vitamin K (for bone health), vitamin C (immune support), and folate (cell repair). The garlic adds antioxidant properties, while the lemon juice boosts vitamin C absorption.
It’s a nutrient-dense side that won’t weigh you down—ideal for health-conscious eaters.
Heart-Healthy Fats
The unsalted butter in this recipe contains saturated fats, but the overall dish remains heart-healthy when balanced with lean proteins. The monounsaturated fats from olive oil support cardiovascular function, while the potassium in green beans helps regulate blood pressure.
For a lighter option, swap half the butter for olive oil without sacrificing flavor.
Antioxidant Powerhouse
Green beans contain lutein and zeaxanthin, antioxidants that protect your eyes and reduce oxidative stress. The garlic in this recipe adds allicin, a compound linked to lower cholesterol and improved circulation.
Together, they create a side dish that’s as good for your body as it is for your taste buds. 🌱
Blood Sugar Balance
With a low glycemic index, these green beans won’t spike blood sugar levels, making them a great choice for diabetics or those managing insulin sensitivity.
The lemon juice further enhances this effect by improving insulin sensitivity. Serve as a side to grilled fish or lean meats for a perfectly balanced plate.
Bone-Strengthening Nutrients
Green beans are rich in calcium, magnesium, and vitamin K, all essential for strong bones. The butter adds a touch of vitamin D (if using grass-fed), which aids calcium absorption. This makes the dish a subtle but effective way to support skeletal health—especially important as we age. 💡
Nutrition facts
Frequently asked questions
Why do I need to blanch the green beans first?
Blanching creates the perfect crisp-tender texture by pre-cooking the beans just enough to remove bitterness while keeping them firm. This step also stops the cooking process before the final sauté, preventing mushy results. Think of it as setting the foundation for that signature Grandma-style texture.
Can I use frozen green beans instead of fresh?
Yes, but with adjustments: thaw them first, pat completely dry, and increase blanching time by 1 minute to ensure even cooking. Frozen beans work best when fully thawed to prevent excess water in your pan. The flavor won't be identical to fresh, but it's a great backup option.
What if my garlic burns before the butter melts?
Reduce the heat to low-medium immediately and stir constantly. Burnt garlic adds bitterness, but removing it and starting fresh with new garlic won't ruin the dish. For next time, try slower heat or add the garlic after the butter begins melting. Patience is key here!
How can I make this recipe ahead of time?
Blanch and store the beans in an airtight container with a damp paper towel for up to 3 days. Reheat by sautéing in fresh butter and garlic for 3-4 minutes with a splash of water. The texture won't be identical to fresh, but it's still delicious. For best results, sauté the beans fully before storing and reheat the butter separately.
What other proteins pair well with these green beans?
This dish shines with grilled chicken, roasted pork chops, or pan-seared salmon. The buttery garlic flavor complements rich meats beautifully, while lighter options like steamed fish or tofu keep it balanced. For a vegetarian option, serve with garlic mashed potatoes or crusty bread.