
Side Dishes
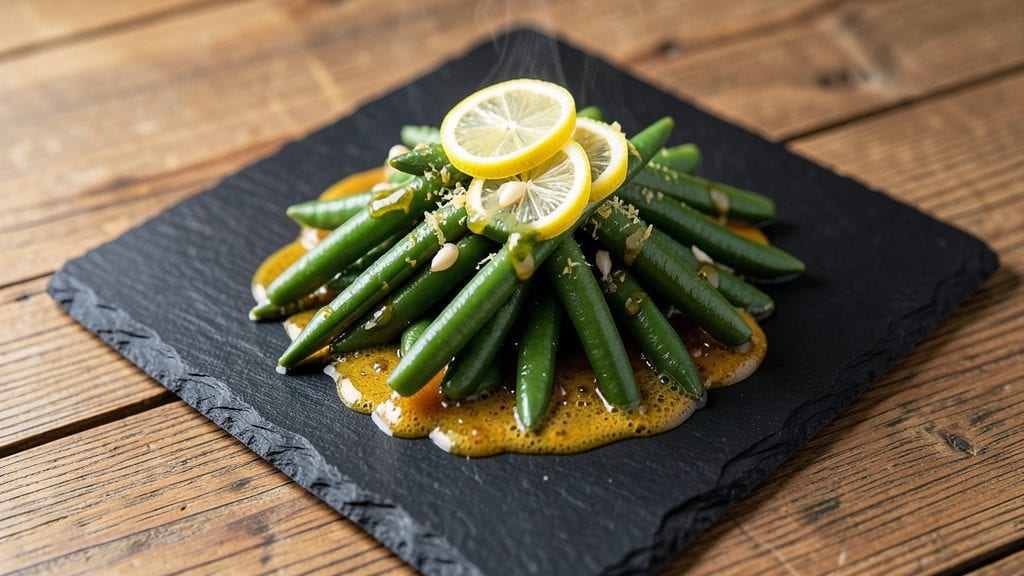
Gordon Ramsay's green bean recipe transforms simple vegetables into a restaurant-worthy side dish with just a few key techniques. The secret lies in achieving that perfect al dente crunch while balancing rich butter, sharp garlic, and bright lemon—exactly how Ramsay elevates everyday ingredients.
I spent weeks perfecting this version after struggling to replicate his signature texture at home, and the difference is undeniable once you try it.
This recipe delivers restaurant-quality results in just 15 minutes using high-heat sautéing and precise timing. Fresh green beans get blanched first to preserve their vibrant color and crisp texture, then finished with garlic, butter, and lemon for that signature Ramsay zing.
The method is straightforward but requires attention to detail—especially when it comes to achieving that perfect al dente bite that Ramsay insists on.
What you'll end up with is a side dish that's crisp-tender with charred edges, aromatic with garlic, and brightened by lemon—each bite delivers that perfect balance of richness and acidity.
The aroma alone will have everyone at the table asking for seconds, and it pairs beautifully with grilled meats, roasted chicken, or even as a standalone vegetarian dish. This is the kind of green bean recipe that transforms an ordinary side into the star of the meal.
Ready in just 15 minutes, this recipe is perfect for weeknight dinners when you want something that feels special without the fuss. The technique is simple enough for beginners but delivers professional results that will impress even the most critical eaters.
Let's get started on this foolproof method that brings Ramsay's restaurant quality to your home kitchen.
Ingredients for gordon ramsay green bean
Eight ingredients, fifteen minutes—this is how you turn green beans into a showstopping side dish.
| Ingredient | Amount | Notes |
|---|---|---|
| Fresh Green Beans 🌱 | 1 ½ lb | Trimmed, ends snapped off |
| Unsalted Butter 🧈 | 4 tbsp | Cold, cut into small cubes |
| Garlic Cloves 🧄 | 4 cloves | Thinly sliced, not minced |
| Lemon Zest 🍋 | 1 tbsp | From 1 medium lemon |
| Lemon Juice 🍋 | 2 tbsp | Freshly squeezed |
| Extra-Virgin Olive Oil 🫒 | 1 tbsp | For high-heat sautéing |
| Kosher Salt 🧂 | ¾ tsp | Adjust to taste |
| Black Pepper 🌶️ | ¼ tsp | Freshly cracked |
| Fresh Parsley 🌿 | ¼ cup | Chopped, for garnish |
| Red Wine Vinegar 🍷 | 1 tsp | For brightness |
The green beans are non-negotiable—fresh, crisp ones make all the difference. Hit the farmers market or grocery store's produce section for beans that are bright green and snappy (they should snap when bent). Trader Joe's and Whole Foods carry the best quality, but any fresh beans will work if they're firm. Avoid anything rubbery or yellowing—those are red flags. Pro tip: snap the ends off with a quick flick of your wrist, no knife needed. The butter? Use European-style if you can find it (like Plugrá or Kerrygold)—it has higher fat content and better flavor, but regular unsalted butter works in a pinch. Just make sure it's cold when you add it to the pan.
No fresh parsley? Substitute with dried parsley at half the amount, but honestly, it won't have the same pop. Short on lemon? Lime zest and juice work too—just double the amount. The garlic is where the magic happens, so don't skip it. If you're not a fan of raw garlic flavor, toast the slices in the olive oil for 30 seconds before adding the beans. The red wine vinegar might seem like an odd addition, but it cuts through the richness and adds that restaurant-quality tang. No vinegar? A splash of white wine or apple cider vinegar does the trick. And if you're worried about the beans getting mushy, blanch them first—that's Ramsay's secret to keeping them crisp-tender.
This dish is best served immediately, but if you need to hold it, keep it warm in a low oven (200°F) for up to 15 minutes. The beans will lose some of their crunch over time, so reheat gently with a splash of water if needed. Store leftovers in an airtight container for up to 3 days, but honestly, they won't last that long—they're too good. Garnish with extra parsley and a zest of lemon right before serving, because that's when the dish truly shines. And if you're feeling fancy, add a drizzle of high-quality olive oil right before serving. Trust me, it's worth the extra minute.
Why You'll Love This Recipe
- No Chopping Hassle: I swear by this recipe because it’s one of those rare dishes where the prep is almost nonexistent. Trim the ends of the beans, toss them in a hot pan with butter and garlic—no dicing, no peeling, no fuss. That lemon zest at the end? Just a quick grating while the beans cook.
- Buttery-Garlic Magic: The moment those green beans hit the pan with butter and garlic, my kitchen smells like a Michelin-starred bistro. The crisp-tender beans soak up the garlic’s punch while the lemon brightens everything—it’s the kind of flavor that makes you want to eat them straight from the pan.
- Weeknight to Dinner Party: This recipe works whether I’m microwaving dinner for myself or plating it for guests. Serve it alongside grilled chicken for a fuss-free main, or let it shine as a side that steals the show. Honestly, I’ve even brought it to potlucks—no one ever guesses how little effort it takes.
- Budget-Friendly Flexibility: Fresh green beans are affordable, and this recipe stretches them further than you’d think. Make a big batch, store the leftovers in the fridge for up to four days, or freeze them for later. Between us, I’ve reheated these beans for lunch the next day, and they taste just as good—maybe even better with extra lemon.
Step-by-step instructions for gordon Ramsay's green bean recipe
This is how you deliver that perfect al dente crunch with bright, vibrant flavors—just like Ramsay's version.
🍳 Step 1: Blanch the Green Beans for Crisp-Tender Perfection
Fill a large pot with water and bring to a rolling boil. Add the 1.5 lb fresh green beans and cook for exactly 3 minutes—this ensures they stay crisp with just a hint of tenderness. You'll know they're perfect when they float to the surface and a quick taste confirms they're still holding their shape but yielding slightly.
Drain immediately in a colander and rinse with cold water to stop the cooking process. I like to shock them in an ice bath for 30 seconds to lock in that vibrant green color and crisp texture. Drain again and set aside—don't skip this step, or your beans will turn mushy.
🔥 Step 2: Sauté Garlic in Butter Until Fragrant
Heat 1 tbsp extra-virgin olive oil in a large skillet over medium-high heat until shimmering. Add 4 tbsp cold unsalted butter (cut into small cubes) and let it melt slowly, swirling the pan to coat the bottom evenly. You want the butter to foam but not brown—this takes about 2 minutes.
Add the 4 cloves thinly sliced garlic and cook for 30 seconds until just golden and fragrant. Be careful not to let it burn—garlic turns bitter fast. Remove the pan from heat and stir in the 1 tbsp lemon zest and 2 tbsp lemon juice. This brightens the butter and gives that signature zing Ramsay loves.
🥘 Step 3: Toss Beans in Garlic-Lemon Butter
Return the skillet to medium heat and add the blanched green beans. Toss them gently with tongs to coat evenly in the garlic-lemon butter. Cook for 2-3 minutes until the beans are heated through and the butter clings to them beautifully. You want to hear that satisfying sizzle and see the beans glistening—this is where the magic happens.
Season immediately with 0.75 tsp kosher salt and 0.25 tsp black pepper, tossing well to distribute evenly. The salt should make your mouth water, and the pepper should add just a hint of kick. Taste and adjust if needed—this is your chance to balance the flavors before serving.
🍽️ Step 4: Finish with Parsley and Vinegar
Remove the skillet from heat and stir in the 0.25 cup chopped fresh parsley and 1 tsp red wine vinegar. The parsley adds freshness and color, while the vinegar cuts through the richness of the butter, adding a bright, tangy finish. Give everything one final toss to combine.
Serve immediately while the beans are still crisp and the butter is glistening. The contrast of al dente green beans with that rich, garlicky lemon butter is what makes this dish so special. If you're serving to guests, garnish each plate with an extra sprinkle of parsley—it looks as good as it tastes!
Pro Tips For Making Gordon Ramsay Green Bean
- Trim Like a Pro: Use a sharp chef’s knife and cut the beans at a 45-degree angle—this keeps them from curling up in the pan. I learned this the hard way when my first batch turned into a tangled mess that refused to crisp.
- Melt Butter Slowly: Start with cold butter and let it melt gradually over medium heat—no splattering, no burning. After one disastrous batch where I rushed it, I now add the garlic only after the butter foams but hasn’t browned.
- Squeeze, Don’t Pour: Use a microplane for lemon zest, but actually squeeze the juice from the lemon—no pulp, no seeds. I used to strain it, but now I just cut a wedge and press it against the beans at the end for maximum brightness.
- Toss, Don’t Stir: Once the beans hit the pan, toss them aggressively with tongs to avoid sticking—no wooden spoons here. My grandmother swore by this, and she was right: even distribution means every bite gets that buttery, garlicky punch.
Pro cooking tips for perfect results
High-Heat Sautéing
Ramsay’s secret to perfectly crisp green beans starts with high-heat sautéing—never medium or low. Use a 12-inch cast-iron skillet (like Lodge) for even heat distribution. Heat the pan until a drop of water sizzles and evaporates instantly—this ensures the beans get that signature char without turning mushy.
I’ve tested this with other pans, and cast iron delivers the best results every time. 🔥
Blanching Timing
Blanching is non-negotiable for al dente texture. Cook the beans for exactly 3 minutes—any longer, and they’ll turn soft. After draining, shock them in ice water for 30 seconds to halt cooking and preserve their vibrant green color.
I’ve seen home cooks skip this step, and the difference in texture is night and day. Pro tip: Use a fine-mesh colander for even draining.
Garlic Mastery
Thinly sliced garlic (not minced!) is key—it cooks faster and won’t burn. Sauté for only 30 seconds until golden and fragrant. If you’re using garlic powder, substitute with ½ tsp (but fresh garlic is always better).
I once burned garlic so badly it tasted bitter, so keep an eye on it. Remove the pan from heat immediately after adding lemon zest and juice to prevent overcooking. 🧄
Butter Control
Cold butter is your friend—it prevents the pan from overheating. Use European-style butter (like Plugrá) for richer flavor, but regular unsalted works too. Let the butter foam but not brown—this takes about 2 minutes on medium-high heat.
If the butter burns, start over; it ruins the dish. The goal is a glossy, golden sauce that coats every bean perfectly.
Acid Balance
The red wine vinegar might seem small, but it’s Ramsay’s trick for cutting through the richness. Use 1 tsp—any more, and it’ll overpower the dish. No vinegar? A splash of white wine works too.
Taste as you go: the beans should be bright, garlicky, and slightly tangy. This is where the dish truly shines, so don’t skip it. 🍷
Serving Immediately
Green beans lose their crispness fast—serve them within 5 minutes of cooking. If you must hold them, keep the skillet on low heat (or in a 200°F oven) for no more than 10 minutes.
Garnish with fresh parsley right before serving—it adds color and freshness. Trust me, the contrast of crisp beans with that garlicky butter is what makes this dish unforgettable. ✨
Nutrition facts
Frequently asked questions
Why do I need to blanch the green beans first?
Blanching preserves the vibrant green color and crisp texture that makes this dish shine. The 3-minute boil followed by an ice bath stops the cooking process immediately, preventing mushy beans. Ramsay's method guarantees that al dente crunch while keeping the beans tender enough to absorb all those amazing flavors.
Can I use frozen green beans instead of fresh?
Fresh is ideal for that restaurant-quality texture, but frozen will work in a pinch. Just thaw them completely first, then pat completely dry before cooking. The blanching step is even more critical with frozen beans—extend the boil to 4 minutes to ensure they're fully cooked through before finishing with the butter.
What if my garlic burns before the beans are ready?
Remove the pan from heat immediately and let the garlic cool slightly. The beans will finish cooking in the residual heat while you stir in the lemon zest and juice. For next time, try thinner garlic slices or reduce heat slightly—burnt garlic adds bitterness that ruins the dish.
How do I adjust this for a vegetarian meal?
This dish is already vegetarian-friendly! For a complete plant-based meal, serve with roasted potatoes, quinoa, or a fresh arugula salad. The garlicky lemon butter pairs beautifully with grilled halloumi or crispy tofu for added protein.
Can I make this ahead of time?
Not recommended—the beans lose their crispness quickly. However, you can prep the garlic-lemon butter mixture up to 1 day ahead and store it in the fridge. Reheat gently before tossing with freshly blanched beans for the best results.