Side Dishes
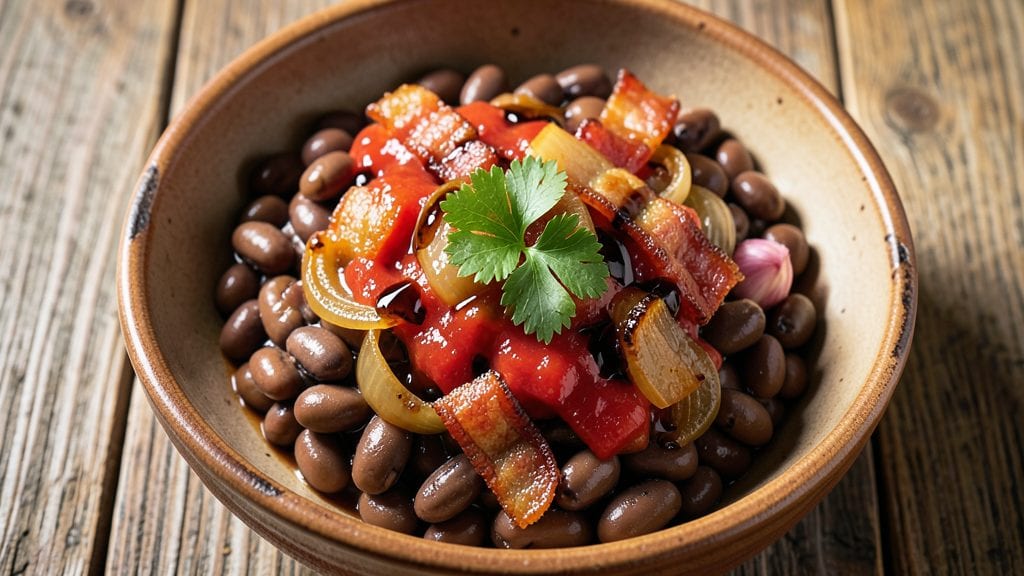
This funeral beans recipe delivers the soul-warming comfort of Southern home cooking, where smoky bacon and tangy tomatoes create a dish steeped in tradition. The name may sound somber, but these beans are anything but—rich, savory, and packed with deep flavors that bring people together.
I first tasted them at a family gathering where they became the star of the meal, and now I make them for every holiday and potluck.
The secret lies in slow-cooked pork—whether ham hocks or crispy bacon—that infuses the beans with smoky depth while keeping them tender. A balance of mustard, vinegar, and black pepper creates that signature tangy-savory harmony, while tomatoes add a bright, fresh contrast.
This isn’t just a side dish; it’s a centerpiece that pairs perfectly with rice, cornbread, or even as a standalone meal.
What makes these beans truly special is how they transform simple ingredients into something extraordinary. The pork renders slowly, creating a broth so flavorful it needs no embellishment.
Each bite delivers layers of smoky, tangy, and slightly sweet notes that linger—exactly the kind of comfort food that feels like a warm embrace on a plate.
Serve these funeral beans alongside cornbread or over steamed rice for a meal that’s both hearty and full of Southern charm. The leftovers only get better, making this recipe perfect for feeding a crowd or meal prepping for the week ahead.
Ingredients for funeral beans
These Southern staples transform simple pantry items into a smoky, tangy masterpiece perfect for gatherings.
| Ingredient | Amount | Notes |
|---|---|---|
| Dried Navy Beans 🌱 | 2 cups | Unsoaked, rinsed thoroughly |
| Thick-Cut Bacon 🥓 | 1 ½ lb | Uncooked, chopped into 1/2-inch pieces |
| Yellow Onion 🧅 | 1 whole | Diced, medium size |
| Garlic Cloves 🧄 | 6 cloves | Minced, fresh preferred |
| Canned Tomato Sauce 🍅 | 2 cups | No salt added, 28 oz can |
| Apple Cider Vinegar 🍎 | 2 tbsp | Unfiltered for depth |
| Dijon Mustard 🌶️ | 1 tbsp | High-quality, smooth texture |
| Black Peppercorns 🌶️ | 1 tsp | Freshly cracked, not ground |
| Dried Thyme 🌿 | 1 tsp | Or 1 tbsp fresh, chopped |
| Bay Leaves 🍃 | 2 whole | Fresh, not dried |
| Salt 🧂 | 2 tsp | Kosher or sea salt |
| Water 💧 | 6 cups | Filtered preferred |
| Smoked Paprika 🌶️ | 1 tsp | For smoky depth |
The bacon is non-negotiable for that signature smoky flavor. Thick-cut bacon from Costco or local butchers renders beautifully, creating crispy edges while keeping the meat tender. If you can't find thick-cut, regular bacon works in a pinch, but it'll crisp faster—watch it closely. For the beans, dried navy beans from bulk bins at Whole Foods have the best texture, but any dried white bean (like cannellini) will do. The key is rinsing them well to remove any debris. Skip the pre-soaked beans—they're often mushy and lose their integrity during cooking. Fresh bay leaves elevate the dish, so buy them in small bundles at the grocery store and use them within a week for maximum aroma.
No thick-cut bacon? Substitute smoked ham hocks for a deeper, meatier flavor—just add them early and remove before serving. Running short on apple cider vinegar? White vinegar or red wine vinegar works, but the apple cider adds a subtle sweetness that balances the tang. Dijon mustard is essential here—don't use yellow mustard, as it lacks the depth. For the tomato sauce, San Marzano canned tomatoes are ideal, but any no-salt-added brand will suffice. If you're using dried thyme, toast the leaves lightly in a dry pan first to wake up their flavor. The smoked paprika can be swapped for a pinch of liquid smoke (about 1/4 tsp) if you're in a bind, but fresh is always better.
These beans taste even better the next day as the flavors meld. Store leftovers in an airtight container in the refrigerator for up to 5 days, or freeze for 3 months—portion into meal-sized containers for easy reheating. To reheat, add a splash of water or broth and simmer until warmed through. The bacon fat keeps the beans moist, so no extra liquid is needed. For serving, a sprinkle of fresh parsley or extra black pepper adds a bright finish. This dish is a crowd-pleaser, so double the recipe when hosting—it disappears fast.
Why You'll Love This Recipe
- One-Pot Magic: I swear by this recipe—just toss everything in one pot, let it simmer, and walk away. No fancy techniques, no extra dishes, and honestly? That crispy bacon right in the beans? Pure satisfaction.
- Smoky-Sweet Crunch: The thick-cut bacon adds this incredible salty-sweet depth, while the garlic and onions caramelize into something almost buttery. It’s the kind of flavor that makes you want to eat it straight from the pot (no judgment here).
- Leftovers That Shine: This dish tastes better the next day—yes, really. I make a double batch on Sundays, and by Wednesday, it’s still the star of my lunch. Perfect for meal prep, potlucks, or feeding a crowd without stress.
- Budget-Friendly Hero: Navy beans and bacon stretch into a hearty meal that costs next to nothing. I’ll be real: my grocery bill thanks me every time I make this. Plus, it’s one of those rare dishes where the cheap ingredients actually taste luxurious.
Step-by-step instructions for Southern-style smoky bacon beans
This method delivers rich, smoky flavor with tender beans and crispy bacon—every bite packed with Southern comfort.
Prepare the Beans for Soaking
Place the 2 cups dried navy beans in a large bowl and rinse them thoroughly under cold water. This removes any debris and prevents cloudy cooking water. Transfer the rinsed beans to a large pot and cover them with the 6 cups water by about 2 inches. Add the 2 whole bay leaves and 1 tsp salt to the water.
Let the beans soak for at least 8 hours or overnight in the refrigerator. Soaking reduces cooking time and ensures even tenderness. I always soak beans in the fridge for better flavor and texture. After soaking, drain the beans and rinse them again under cold water to remove any surface starch that could make the beans gummy during cooking.
Cook the Bacon and Build the Flavor Base
In a large Dutch oven or heavy pot, cook the 1.5 lb thick-cut bacon over medium heat until it reaches a golden brown color and the fat has rendered out completely. This should take about 10-12 minutes. Remove the bacon with a slotted spoon and set it aside on paper towels to drain, leaving the rendered fat in the pot.
Reduce the heat to medium-low and add the 1 whole yellow onion to the bacon fat. Cook for 5-6 minutes until the onions are softened and beginning to caramelize. Add the 6 cloves minced garlic and cook for another 30 seconds until fragrant. This aromatic base forms the flavor foundation for your beans.
Combine Ingredients and Simmer
Return the cooked bacon to the pot, breaking it into bite-sized pieces with a wooden spoon. Add the drained navy beans, 2 cups canned tomato sauce, 2 tbsp apple cider vinegar, 1 tbsp Dijon mustard, 1 tsp black peppercorns, 1 tsp dried thyme, and 1 tsp smoked paprika to the pot. Stir everything together to combine all the ingredients.
Bring the mixture to a boil over high heat, then immediately reduce the heat to low. Cover the pot and let it simmer gently for 1 hour. Stir occasionally to prevent the beans from sticking to the bottom. You'll know it's cooking properly when you see small bubbles breaking the surface of the liquid.
Finish and Adjust Seasoning
After 1 hour of simmering, taste the beans and adjust the seasoning if needed. Add more salt if the beans taste bland, or more apple cider vinegar if you want a tangier flavor. The beans should be tender but still have a slight bite. If they're not quite tender enough, continue simmering for another 15-20 minutes, checking occasionally.
Once the beans reach your desired tenderness, remove the 2 whole bay leaves. If you prefer a thicker consistency, let the beans simmer uncovered for an additional 5-10 minutes to reduce the sauce slightly. The final dish should have a rich, smoky flavor with perfectly tender beans and crispy bacon pieces throughout.
Pro Tips For Making Funeral Beans
- CRISP THE BACON LOW: Funeral beans need crispy bacon, but don’t let it smoke into oblivion. Cook the thick-cut slices on medium-low heat—yes, it takes longer, but you’ll end up with caramelized edges that actually hold their shape when you pull them out. I used to rush this, and the bacon turned greasy instead of crisp. Patience here makes all the difference when you’re stirring those beans later.
- SOAK NAVIES OVERNIGHT: Dried navy beans expand like magic when soaked, but don’t just toss them in boiling water. Use a bowl of cool water with a pinch of salt (like a tiny bath) and let them sit 8+ hours. I learned this the hard way—skipping the soak means beans that stay tough no matter how long you simmer. Pro move: Drain and rinse them before cooking to cut down on foam.
- SAUTÉ ONIONS UNTIL GOLDEN: The onions in funeral beans aren’t just flavor—they’re the backbone. Cook them in the bacon fat until they’re deep golden, not just soft. I was skeptical until I tried it—this step actually changes the outcome, giving the beans a richness that canned sauce alone can’t match. Skip this, and you’re just eating mushy onion.
- SIMMER LOW AND LONG: Funeral beans need time—don’t rush the simmer. After adding the sauce and beans, keep the heat at a gentle bubble, not a rolling boil. I used to crank the stove and wonder why the beans stayed mealy. Low and slow (about 1.5 hours) breaks them down just right, so they’re tender but still hold their shape. Cover the pot, but crack the lid to let steam escape—this keeps the beans from turning to mush.
Common mistakes when making perfect results
Skipping the Soak
I’ve seen many beginners rush the soaking process, thinking it’s optional. But skipping the soak is a major mistake—it leads to uneven cooking and beans that stay rock-hard even after hours on the stove.
Navy beans need that 8+ hour soak to break down their tough skins and absorb moisture properly. If you’re in a hurry, at least do a quick soak: boil the beans for 2 minutes, then let them sit off the heat for 1 hour covered in water.
This won’t replace full soaking, but it’s better than nothing.
Overcrowding the Pot
Stuffing too many beans into your pot might seem like a shortcut, but it’s a recipe for disaster. When beans are packed too tightly, they won’t cook evenly—they’ll either turn mushy on the bottom or stay undercooked on top.
Use a pot that’s at least 3 quarts for this recipe, and leave 1 inch of headspace at the top. If your pot is too small, cook the beans in batches or use a larger Dutch oven. Trust me, the extra space makes all the difference in texture and flavor.
Ignoring the Bacon Fat
The rendered fat from the bacon isn’t just for flavor—it’s the secret to keeping your beans moist and rich. If you drain it off after cooking, you’re stripping away the dish’s soul. Leave the fat in the pot and let it infuse the onions and garlic.
For extra depth, I even save a little of that bacon grease to finish the dish if it looks dry. If you’re health-conscious, skim most of it off after cooking, but leave at least 2 tablespoons for that authentic Southern richness.
Underseasoning the Beans
Many home cooks hold back on salt and vinegar, thinking they can “fix it later.” But beans absorb flavors slowly, and by the time you taste them, it’s often too late. Start with the full 2 tbsp apple cider vinegar and 2 tsp salt as written, then adjust after simmering.
The vinegar adds tang, and the salt enhances all the other flavors. If your beans taste bland after cooking, it’s usually because you didn’t season them enough from the start. Pro tip: Taste the beans 30 minutes into cooking—this is your chance to correct any flatness early.
Boiling Too Vigorous
A rolling boil is the enemy of tender beans. Once you combine everything, bring the mixture to a boil once, then immediately reduce to a gentle simmer. A vigorous boil can cause the beans to split open and turn mushy.
Keep the heat low enough that you just see small bubbles breaking the surface—this ensures even cooking without breaking down the beans. If your pot is foaming excessively, skim off any excess foam to prevent a gummy texture.
Rushing the Simmer Time
Funeral beans are all about patience. Skimping on simmer time (1 hour minimum) results in beans that are tough and underflavored. The longer they cook, the more the bacon, onions, and spices meld together.
If you’re short on time, consider using pre-soaked canned beans (like Great Northern) and simmer for 45 minutes, but dried beans always taste better when given the full time. The first time I rushed this step, my beans were edible but lacked that deep, smoky harmony I love.
Now, I never cut corners on simmer time.
Nutrition facts
Frequently asked questions
Why are these called "funeral beans" if they sound delicious?
The name comes from Southern tradition where hearty, comforting dishes were served at gatherings—including funerals. These beans were practical (filling, easy to make in large batches) and brought people together. Don't let the name fool you—they're anything but somber!
Can I substitute ham hocks for bacon?
Ham hocks add a deeper, meatier flavor and work beautifully in this recipe. Just add them to the pot during the initial simmer (about 1 hour before beans are done) and remove before serving. For extra richness, use 2 ham hocks instead of the bacon.
How do I make these beans vegetarian?
Swap the bacon for 1 tbsp smoked paprika plus 1/4 tsp liquid smoke, and use vegetable broth instead of water. For protein, add 1 cup cooked lentils or 1 block firm tofu (crumbled). The vinegar and mustard still create that signature tang!
Can I make funeral beans in a slow cooker?
Yes! After cooking the bacon and onions, transfer everything to your slow cooker and cook on low for 6-8 hours or high for 3-4 hours. The long cook time actually enhances the flavors. Just add 1/2 cup water if the mixture looks too thick before serving.
What's the best way to reheat leftovers?
Add 2-3 tablespoons of water or broth to the pot and simmer gently for 5-10 minutes until heated through. Never microwave—it makes the beans mushy. The extra liquid helps restore the perfect texture while keeping all the flavors intact.