Side Dishes
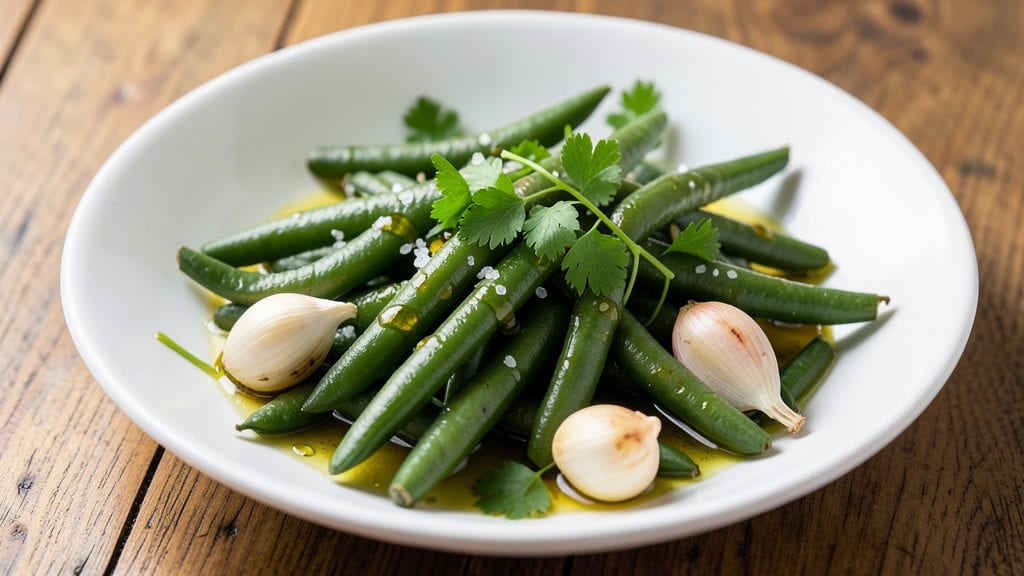
Transforming canned Italian green beans into a restaurant-worthy side dish is simpler than you think—this 15-minute recipe delivers that al dente crunch and bright flavor without sacrificing convenience.
The secret lies in proper heating and a balanced seasoning blend of garlic, olive oil, and fresh herbs that elevate store-bought beans to gourmet status. I developed this method after realizing how often canned beans were overlooked in home cooking, and it’s become a staple in my weekly meal rotation.
This recipe focuses on minimal prep and maximum flavor, making it perfect for busy weeknights or last-minute meals. With just five key ingredients—canned Italian green beans, olive oil, garlic, lemon juice, and fresh herbs—you’ll achieve a side dish that’s crisp-tender, vibrant, and packed with Mediterranean flair.
The process is straightforward: drain, heat, and season, then finish with a squeeze of lemon for brightness.
What you’ll end up with is a crisp-tender side dish that pairs beautifully with grilled meats, roasted chicken, or even as a standalone vegetarian meal. The beans retain their al dente texture while absorbing the aromatic seasoning, creating a dish that’s both elegant and effortless.
Whether serving alongside pasta, rice, or as a light lunch, this recipe proves that canned beans can be just as impressive as their fresh counterparts.
For added depth, consider toasting pine nuts or adding a sprinkle of grated Parmesan—both elevate the dish without complicating the process. Ready in just 15 minutes, this recipe is your go-to for quick, flavorful sides that impress without the fuss. Let’s get started!
Ingredients for canned italian green beans
Five simple ingredients transform canned Italian green beans into a restaurant-quality side dish.
| Ingredient | Amount | Notes |
|---|---|---|
| Canned Italian Green Beans 🌱 | 2 cans | 14.5 oz each, drained well |
| Extra-Virgin Olive Oil 🫒 | ¼ cup | High-quality, fruity variety |
| Garlic Cloves 🧄 | 3 cloves | Fresh, minced to fine texture |
| Fresh Lemon Juice 🍋 | 2 tbsp | Freshly squeezed, strained |
| Fresh Flat-Leaf Parsley 🌿 | ¼ cup | Finely chopped, stems removed |
| Diamond Crystal Kosher Salt 🧂 | ½ tsp | Fine grain preferred |
| Freshly Ground Black Pepper 🌶️ | ¼ tsp | Coarsely ground |
| Toasted Pine Nuts 🥜 | ¼ cup | Optional, for garnish |
| Freshly Grated Parmesan Cheese 🧀 | ¼ cup | Parmigiano-Reggiano preferred |
The quality of your olive oil and herbs makes all the difference here. Look for extra-virgin olive oil with a fruity, peppery finish—California Olive Ranch or Colavita are excellent choices. Fresh parsley should be vibrant green with no wilting; Whole Foods or local farmers markets typically carry the best quality. Garlic cloves should be firm and free of sprouts. For the beans, Barilla or Mutti brands are consistently reliable for texture and flavor. If you're using pre-minced garlic, toast it in olive oil for 30 seconds to deepen its flavor before adding to the beans.
No fresh parsley? Fresh basil at half the amount works beautifully, though it changes the flavor profile slightly. Substitute lemon juice with white wine vinegar if needed, though fresh lemon adds a brightness that's hard to replicate. For the optional pine nuts, walnuts or pecans can stand in, though they'll alter the texture. If you're avoiding dairy, skip the Parmesan or use nutritional yeast for a cheesy flavor without the fat. The kosher salt is crucial—it dissolves completely, so don't substitute with table salt without adjusting the amount.
Store the canned beans in a cool, dark pantry until ready to use—they'll keep for up to 2 years unopened. Fresh herbs should be wrapped in damp paper towels and stored in a sealed container in the fridge for up to 5 days. The finished dish reheats beautifully—simply warm in a skillet over medium heat with a splash of water or olive oil for 2-3 minutes. For meal prep, portion into containers with a thin layer of olive oil on top to preserve freshness for 3-4 days in the refrigerator.
Why You'll Love This Recipe
- No-Chop Necessary: I swear by this trick—just drain the beans, toss them in a hot pan with olive oil, and let the garlic sizzle. No prepping, no peeling, no fuss. The canned beans hold their shape perfectly, so you’re not left with mushy disappointment.
- Garlic-Lemon Magic: That bright lemon cut through the richness of the olive oil while the garlic roasts until it’s fragrant but not bitter. Honestly, it’s the kind of simple combo that makes you want to eat it straight from the pan (no judgment here).
- Weeknight Sidekick: Serve it alongside grilled chicken, toss it into pasta, or pile it on toast with a fried egg. It’s my go-to when I need something that’s actually useful—no one ever says, “I don’t want green beans tonight.”
- Budget-Friendly Flex: A single can of beans feeds four, and the rest of the ingredients cost pennies. Between us, this is how I stretch my grocery money without sacrificing flavor. Plus, leftovers reheat like a dream—just add a splash of water and a pinch of salt.
Step-by-step instructions for canned Italian green beans
Here's how to transform canned green beans into a restaurant-quality side dish with vibrant flavors.
Prepare the Green Beans
Drain the 2 cans of canned Italian green beans thoroughly, reserving ¼ cup of the liquid from the cans. Rinse the beans under cold water to remove any excess sodium and pat them dry with paper towels. This step ensures your beans will absorb the flavors of the olive oil and garlic rather than steaming in their own moisture.
In a large skillet, heat the ¼ cup extra-virgin olive oil over medium heat until shimmering but not smoking. Add the 3 cloves minced garlic cloves and sauté for 30 seconds until fragrant—you should smell the garlic's sweet aroma without any burning. This quick cooking preserves the garlic's delicate flavor while preventing bitterness.
Sauté the Green Beans
Add the drained green beans to the skillet with the garlic and olive oil. Stir gently to coat them evenly in the oil, then sprinkle with the ½ teaspoon diamond crystal kosher salt and ¼ teaspoon freshly ground black pepper. Cook for 5-6 minutes, stirring occasionally, until the beans are heated through and just beginning to soften at the edges.
Here's the key: you want the beans to maintain their crisp-tender texture, not become mushy. They should be bright green with a slight sheen from the olive oil, not limp. If using the reserved bean liquid, add 1-2 tablespoons now to prevent sticking while keeping the beans tender.
Finish with Bright Flavors
Reduce the heat to low and stir in the 2 tablespoons fresh lemon juice and ¼ cup finely chopped fresh flat-leaf parsley. Cook for an additional 2 minutes to allow the lemon to brighten the dish and the parsley to release its fresh aroma. The lemon juice will cut through the richness of the olive oil, creating a balanced flavor profile.
Remove the skillet from heat and fold in the ¼ cup toasted pine nuts and ¼ cup freshly grated parmesan cheese. The pine nuts add a delightful crunch while the parmesan brings a savory depth. Taste and adjust seasoning if needed—this is where you can fine-tune the dish to your preference.
Rest and Serve
Transfer the green beans to a serving dish and let them rest for 3-5 minutes. This brief resting period allows the flavors to meld together and the beans to absorb the remaining juices in the pan. The dish should be vibrant green with a mix of textures—crisp beans, creamy parmesan, and crunchy pine nuts.
Serve immediately while warm, garnished with an additional sprinkle of parsley if desired. These green beans pair beautifully with grilled meats, roasted vegetables, or as a standalone side dish. The bright lemon and fresh herbs make this simple preparation feel gourmet without requiring fresh green beans.
Pro Tips For Making Canned Italian Green Beans
- Drain and Rinse Properly: Canned beans always have that weird brine or syrup clinging to them—skip the rinse if it’s just saltwater, but give them a quick cold-water bath if the liquid is sweet or vinegary. This keeps the texture crisp and the flavors balanced, especially when you’re working with something as bright as lemon and garlic.
- Sauté Garlic Low and Slow: After draining the beans, add the olive oil and garlic to the pan first—let that garlic go golden without burning, about 2 minutes on medium-low heat. I learned this the hard way: charred garlic turns bitter and overpowers everything, even the fresh parsley and lemon you’re about to add.
- Toss with Lemon Juice Last: Add the lemon juice and parsley after the beans are warm but not boiling—right as you turn off the heat. The acid in the lemon will cook off if you add it too early, making the dish taste flat instead of bright. A squeeze of fresh lemon at the end guarantees that zesty kick.
- Use a Splatter Screen: When mincing garlic or tossing hot beans, that olive oil can go everywhere—especially if you’re using a nonstick pan. A cheap splatter screen (or even a folded paper towel over the pan) keeps your stovetop clean and your kitchen from smelling like a restaurant for hours. Trust me, you’ll regret skipping this after the third time you scrub olive oil off your ceiling fan.
Best sauces and condiments for canned italian green beans
Garlic-Infused Olive Oil
Start with ¼ cup extra-virgin olive oil (I love Colavita or California Olive Ranch for their fruity notes) and heat it over medium heat until just shimmering.
Add 3 minced garlic cloves and sauté for exactly 30 seconds—this prevents burning while maximizing flavor. The oil should smell aromatic but not bitter. 🧄
Lemon-Basil Sauce
For a tangy twist, blend 2 tbsp fresh lemon juice with 1 tbsp finely chopped fresh basil and 1 tsp honey (optional). Drizzle this bright sauce over the beans just before serving.
The acidity cuts through the richness of the olive oil beautifully. I keep a small jar of this mix in my fridge for quick flavor boosts.
White Wine Reduction
Deglaze the pan with ¼ cup dry white wine (like Pinot Grigio) after cooking the beans. Simmer for 2 minutes to reduce slightly, then pour over the beans. This adds a sophisticated depth that elevates the dish from side to gourmet accompaniment. 🍷
Pesto Swirl
Stir in 1-2 tbsp basil pesto (store-bought or homemade) during the final 2 minutes of cooking. The nutty, herby flavors blend seamlessly with the beans. I recommend Giovanni's Famous Pesto for its balanced taste. This works especially well if you're serving with pasta or grilled chicken.
Spicy Chili Oil
For heat lovers, finish with 1 tsp chili oil (I use La Choy) and a pinch of red pepper flakes. The oil's smoky spice complements the beans' natural sweetness.
Add it in the last 30 seconds** of cooking to preserve the heat. A squeeze of lemon afterward balances the spice perfectly. 🌶️
Creamy Parmesan Sauce
Mix ¼ cup freshly grated Parmesan with 2 tbsp heavy cream and a pinch of salt. Warm the mixture gently, then spoon it over the beans. The creamy sauce adds richness without overpowering the dish's fresh flavors. This works beautifully as a finishing touch for a more decadent presentation.
Nutrition facts
Frequently asked questions
Can I use frozen green beans instead of canned?
Frozen green beans work perfectly in this recipe. Thaw them first by soaking in cold water for 5 minutes or microwaving for 2 minutes before draining well. Frozen beans may need 1-2 extra minutes of cooking time to reach the same crisp-tender texture. Their flavor will be slightly more neutral, so you might want to add an extra ½ teaspoon salt to compensate.
Why do my green beans turn mushy?
Overcooking is the most common cause. Canned green beans should cook for just 5-6 minutes over medium heat—any longer and they'll lose their crisp texture. Always start with drained, well-rinsed beans and avoid covering them with liquid. For extra insurance, use a skillet with a tight-fitting lid to trap steam but leave it slightly ajar to prevent sogginess.
What's the best way to store leftovers?
Store cooked green beans in an airtight container in the refrigerator for up to 4 days. To reheat, warm in a skillet over medium heat with a splash of water or olive oil for 2-3 minutes until heated through. For longer storage, freeze in a single layer on a tray before transferring to a bag—this preserves texture for up to 3 months. Thaw overnight in the fridge before reheating.
Can I make this recipe ahead of time?
Yes, but with a few adjustments. Prepare the beans up to 2 days ahead and store them in the fridge. When ready to serve, reheat gently in a skillet with a drizzle of olive oil and a pinch of salt. For best texture, add fresh parsley and lemon juice just before serving—this keeps the dish vibrant. The flavors actually improve slightly overnight as they meld together.
What are the best protein pairings?
These green beans shine with grilled chicken breast, shrimp skewers, or pan-seared salmon. For vegetarian meals, pair with roasted potatoes, garlic bread, or a simple Caprese salad. The bright lemon and herbs complement rich proteins beautifully while standing up to heartier dishes. For a complete Italian meal, serve alongside whole wheat pasta or risotto.