Side Dishes
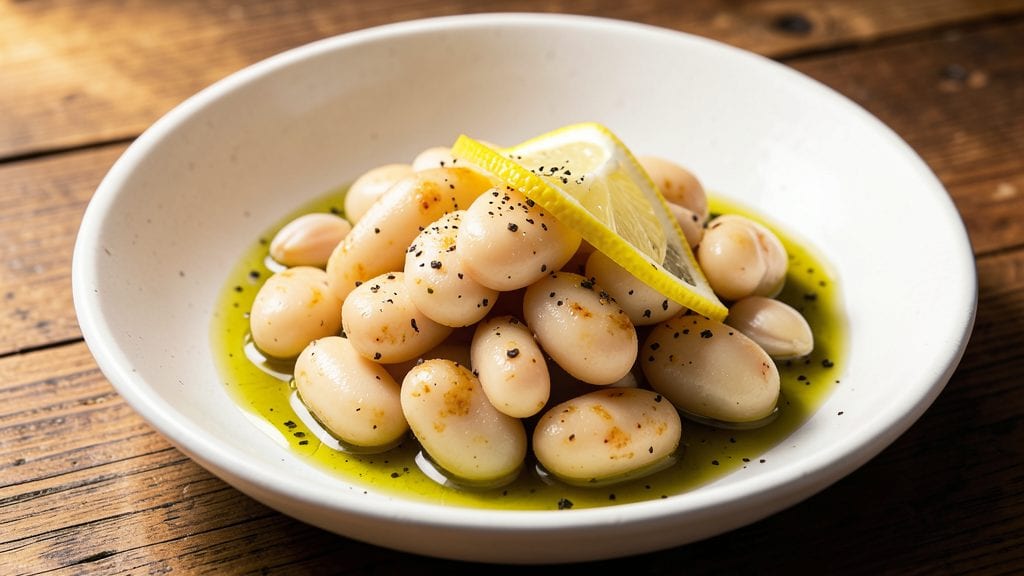
Transforming canned cannellini beans into a creamy garlic white bean mash is one of those kitchen moments that turns simple pantry staples into something extraordinary. This recipe proves you don’t need fresh beans to create restaurant-quality texture—just a few minutes of blending and sautéing.
I developed it after realizing how versatile canned beans could be when given proper attention, and the results are worth every second.
The secret lies in balancing garlic, olive oil, and a touch of lemon to brighten the natural richness of the beans. You’ll start with canned beans, drained and rinsed, then blend them with aromatics until smooth.
The key is cooking the mash gently to develop flavor without breaking down the texture, ensuring every spoonful is velvety yet still holds structure. This isn’t just a side—it’s a dish that deserves center stage.
What you’ll end up with is a creamy, fragrant spread that’s perfect for dipping, spreading, or serving alongside grilled meats, roasted vegetables, or crusty bread. The garlic infuses deeply while the lemon keeps it from becoming heavy, creating a harmony that’s both comforting and sophisticated.
It’s the kind of recipe that makes you appreciate how far a simple can of beans can take you.
Use this mash as a base for soups, a topping for flatbreads, or even a filling for stuffed peppers. The possibilities are endless, but the foundation is foolproof—just 15 minutes of active time and ingredients you likely already have on hand.
Let’s get started on turning those canned beans into something truly special.
Ingredients for canned cannellini beans
Pantry staples transform into creamy perfection with just a few extra ingredients.
| Ingredient | Amount | Notes |
|---|---|---|
| Canned Cannellini Beans 🫘 | 2 cups | Drained and rinsed thoroughly |
| Extra-Virgin Olive Oil 🫒 | ½ cup | High quality, fruity variety |
| Garlic Cloves 🧄 | 6 cloves | Freshly minced, not pre-minced |
| Fresh Lemon Juice 🍋 | 2 tbsp | Freshly squeezed, not bottled |
| Sea Salt 🧂 | 1 ½ tsp | Fine grain preferred |
| Freshly Ground Black Pepper 🌶️ | ½ tsp | Freshly cracked preferred |
| Vegetable Broth 💧 | ¼ cup | Low-sodium preferred |
| Fresh Parsley 🌿 | ¼ cup | Chopped, for garnish |
| Crusty Bread 🍞 | 1 loaf | For serving (not measured) |
| Unsalted Butter 🧈 | 2 tbsp | For sautéing garlic |
| Garlic Powder 🧄 | ½ tsp | Optional for extra flavor |
| Freshly Grated Parmesan Cheese 🧀 | ¼ cup | For topping (optional) |
The cannellini beans are the star—look for low-sodium brands like Bush's or Great Northern in the canned aisle. Fresh garlic makes all the difference here, but if you're short on time, minced garlic from a jar works in a pinch. The olive oil should be extra-virgin—none of that cheap cooking oil. I always grab mine from Trader Joe's or Whole Foods since they have great quality at reasonable prices. The lemon juice needs to be freshly squeezed—bottled just doesn't cut it for this recipe. For the parsley, grab the flat-leaf variety if you can find it—it's more flavorful than curly.
No fresh parsley? Dried parsley at one-third the amount works, but it won't have the same bright flavor. Short on garlic? Garlic powder at half the amount gets you close, but fresh is definitely better. The vegetable broth can be swapped for water plus a pinch of bouillon if you're out. For the bread, any crusty loaf will do—sourdough or baguette slices are perfect for dipping. Want extra richness? Add 2 tbsp of cream cheese to the mash while blending. The Parmesan is optional but adds a nice salty contrast if you're serving it as a spread.
This mash keeps beautifully in the fridge for 5-6 days—it actually tastes better the next day as the flavors meld. For longer storage, freeze portions in ice cube trays for perfect single-serving amounts. I usually make a double batch and use it for everything from soup bases to pasta toppings. The bread? Toast it fresh when serving—it soaks up the mash so much better that way. Leftovers reheat beautifully with a splash of water or broth.
Why You'll Love This Recipe
- I use this for everything: tossed with greens for a salad, stirred into pasta, or even as a quick dip for crusty bread. It’s my go-to when I need something reliable that doesn’t skimp on flavor.
- No-Fuss Pantry Magic: I swear by this when I’ve got nothing but beans and a jar of oil. Open the can, drain, toss with warm olive oil, crushed garlic, and a squeeze of lemon—done. That’s it. No soaking, no waiting, no stress.
- Garlic-Lemon Magic: The moment those beans hit the pan with raw garlic and fresh lemon juice? Chef’s kiss. The acid brightens the beans, the garlic adds depth, and the olive oil ties it all together—simple, but somehow more satisfying than anything fancy.
- Weeknight Workhorse: I use this for everything: tossed with greens for a salad, stirred into pasta, or even as a quick dip for crusty bread. It’s my go-to when I need something reliable that doesn’t skimp on flavor.
Step-by-step instructions for creamy garlic white bean mash
Here's how to transform simple canned beans into a velvety, restaurant-worthy spread.
Prepare the Garlic-Infused Oil
In a medium saucepan, heat the 0.5 cup extra-virgin olive oil over low heat. Add the 6 cloves minced garlic and sauté gently for 2-3 minutes until fragrant but not browned. Watch closely—garlic burns quickly, and you want golden aroma, not bitter flavor. Remove from heat and set aside.
This step builds the aromatic foundation. The oil will carry the garlic flavor throughout the mash, creating that rich, creamy depth. If you're using the optional 0.5 teaspoon garlic powder, sprinkle it in now and stir to dissolve completely in the warm oil.
Cook the Beans Until Tender
In the same saucepan, add the 2 cups drained and rinsed cannellini beans, 0.25 cup vegetable broth, and 1.5 teaspoons sea salt. Bring to a simmer over medium heat and cook for 5-7 minutes, stirring occasionally, until the beans are heated through and slightly softened.
You're not trying to fully cook the beans—just warm them and begin breaking down their skins slightly. The broth helps create steam that will develop that creamy texture later. If the mixture looks too dry, add 1-2 tablespoons water and stir well.
Create the Creamy Base
Reduce heat to low and add the 2 tablespoons unsalted butter and the garlic-infused oil. Stir constantly for 3-4 minutes until the butter melts completely and the mixture becomes silky smooth. This is where the magic happens—the fat from the butter and oil emulsifies with the beans, creating that luxurious texture.
Add the 2 tablespoons fresh lemon juice and 0.5 teaspoon freshly ground black pepper, stirring well to combine. The acidity from the lemon brightens the flavors while balancing the richness. Taste and adjust seasoning—you might need a touch more salt depending on your beans. The final texture should be velvety with just a hint of resistance when you press with a spoon.
Garnish and Serve
Transfer the mash to a serving bowl and stir in the 0.25 cup chopped fresh parsley. The parsley adds freshness and a pop of color that makes the dish look as good as it tastes. For an extra touch, sprinkle with the 0.25 cup freshly grated parmesan cheese just before serving.
Serve immediately with warm crusty bread for dipping. The contrast between the creamy mash and the bread's crunch makes every bite perfect. This dish keeps well in the refrigerator for 3-4 days, but it's best enjoyed fresh when the flavors are at their peak.
Pro Tips For Making Canned Cannellini Beans
- Rinse and Drain Well: Canned beans often hide a salty brine that throws off flavor balance—drain them, then rinse under cold water for 10 seconds. I learned this the hard way after serving a dish that tasted like it was swimming in a pool of saltwater.
- Sauté Garlic Low and Slow: Skip the high-heat sear—cook minced garlic in olive oil over medium-low for 2-3 minutes until just golden. Burning it turns the whole dish bitter, and no one wants that lemony brightness ruined by acrid smoke.
- Zest Before Juicing: Grate lemon zest directly into the pan with the garlic—it melts into the oil and adds bright, aromatic depth. Then juice the lemon last, so the acidity doesn’t cook off before hitting your beans.
- Simmer, Don’t Boil: Warm the beans gently over low heat with the olive oil, garlic, and lemon for 3-4 minutes—just until everything’s incorporated. Boiling turns the oil greasy and dulls the garlic’s punch. Think "gentle embrace," not "aggressive toss."
Perfect pairings for canned cannellini beans
Bread Pairings
This creamy garlic white bean mash pairs perfectly with crusty sourdough or baguette slices for dipping. The bread's chewy texture contrasts beautifully with the mash's velvety smoothness. I recommend toasting the bread lightly in a 400°F oven for 5-7 minutes to enhance its crunch.
For extra flavor, brush the toasted bread with 1 tbsp melted garlic butter before serving. 🍞
Roasted Vegetable Toppings
Add roasted vegetables to elevate this mash into a hearty side dish. Try zucchini, bell peppers, and cherry tomatoes tossed in 1 tbsp olive oil, roasted at 400°F for 20 minutes with ½ tsp smoked paprika.
The caramelized flavors complement the creamy beans beautifully. I also love adding sautéed spinach for a pop of color and freshness.
Grilled Protein Pairings
Serve this mash alongside grilled chicken breast or shrimp skewers for a complete meal. The creamy texture balances the smoky char of grilled proteins. For a vegetarian option, pair it with portobello mushrooms marinated in balsamic vinegar and olive oil, then grilled for 8-10 minutes.
The umami-rich mushrooms add depth to the dish. 🍗
Cheese Board Accompaniments
Turn this mash into a cheese board star by pairing it with aged cheddar, brie, and goat cheese. The creamy beans act as a neutral base that lets the cheeses shine.
Add cured meats like prosciutto and dried fruits such as figs for a balanced flavor profile. I also include honeycomb and walnuts for a touch of sweetness and crunch. 🧀
Salad Enhancements
Use this mash as a creamy dressing for arugula or mixed greens salads. Toss 4 cups baby arugula with 1 tbsp olive oil, 1 tbsp lemon juice, and 2 tbsp of the bean mash.
Add toasted pine nuts and shaved Parmesan for extra texture. The creamy beans add richness without overpowering the fresh greens. ✨
Nutrition facts
Frequently asked questions
Can I use other types of white beans instead of cannellini?
Great Northern, navy, or even butter beans work beautifully in this recipe. Cannellini beans have a slightly creamier texture, but other varieties will still yield delicious results. Just note that cooking times may vary slightly—check for tenderness after 5 minutes of simmering.
How do I make this recipe vegan?
Swap the butter for vegan butter or olive oil, and use vegetable broth instead of any animal-based liquids. The recipe will still be creamy and flavorful! For extra richness, stir in 2 tablespoons of coconut cream while blending.
Why did my bean mash turn out watery?
This usually happens if you overcooked the beans or didn't drain them thoroughly. Next time, simmer the beans for just 5-7 minutes and pat them dry with a paper towel before blending. If it's too thin, stir in 1 tablespoon of cornstarch mixed with cold water to thicken.
Can I make this ahead of time?
Yes! This mash actually tastes better the next day as the flavors meld together. Store it in an airtight container in the fridge for up to 5 days. Reheat gently on the stove with a splash of water or broth to restore creaminess.
What are some creative ways to use leftovers?
Spread it on toast with avocado, blend it into soups for creaminess, or use it as a dip for veggie sticks. You can also freeze portions in ice cube trays for perfect single-serving amounts—just thaw overnight in the fridge before using.