Snacks
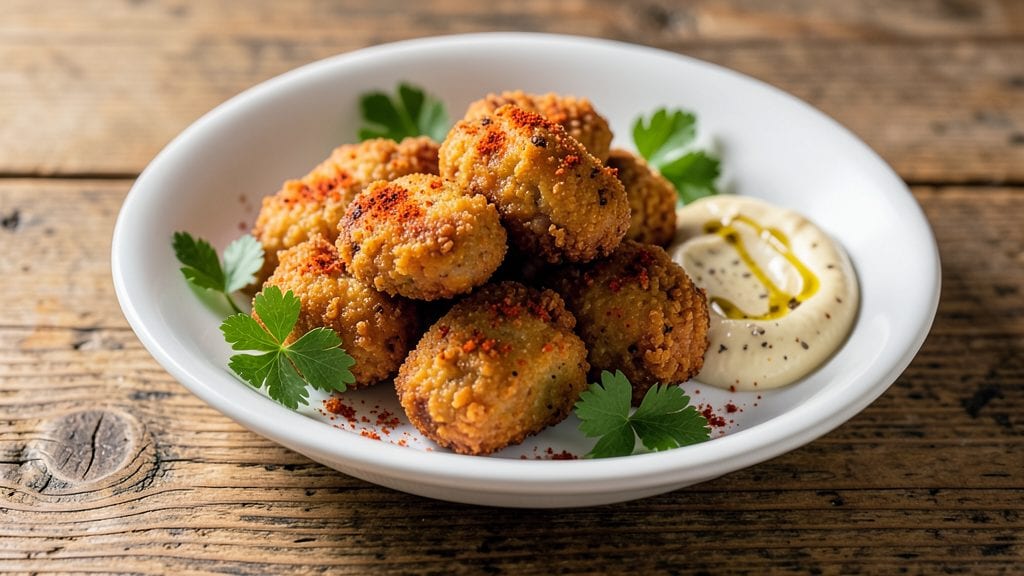
This bean nuggets recipe delivers crispy, kid-friendly bites that rival any fast-food version—100% plant-based and ready in just 15 minutes. The secret lies in blending mashed white beans with flaxseed for binding, then coating them in a crunchy breadcrumb mixture that bakes to golden perfection.
I developed this recipe after years of testing vegan alternatives, and it finally checks all the boxes: crispy exterior, tender interior, and a flavor profile that even picky eaters love.
The beauty of this method is its simplicity—no fancy equipment required, just a bowl, a spoon, and your oven or air fryer. The nuggets hold their shape beautifully, stay crispy even after dipping, and can be made in large batches for meal prep.
What’s more, the seasoning blend (garlic powder, paprika, and a pinch of salt) adds just enough savory depth without overpowering the natural bean flavor.
By the time they emerge from the oven, you’ll have nuggets with a satisfying crunch that gives way to a soft, flavorful center. Serve them with your favorite dipping sauces—ketchup, BBQ, or a creamy vegan ranch—and watch them disappear.
These are the kind of bites that turn snack time into a family favorite, proving that plant-based meals can be just as indulgent as the original.
Perfect for lunchboxes, game day, or a quick weeknight snack, this recipe delivers restaurant-quality results without the guilt. The best part? You’ll have them ready in less time than it takes to order takeout. Let’s make these crispy bites today!
Ingredients for bean nuggets
Pantry staples and a few key vegan swaps make these crispy bites happen.
| Ingredient | Amount | Notes |
|---|---|---|
| Canned White Beans 🌱 | 1 ½ cups | Drained and rinsed thoroughly |
| Ground Flaxseed 🌾 | ½ cup | Freshly ground for best binding |
| Breadcrumbs 🍞 | 1 ½ cups | Panko for extra crispiness |
| Garlic Powder 🧄 | 1 tbsp | Freshly ground preferred |
| Paprika 🌶️ | 1 tbsp | Smoked for deeper flavor |
| Sea Salt 🧂 | ½ tsp | Fine grain preferred |
| Nutritional Yeast 🧀 | 2 tbsp | For cheesy, umami depth |
| Vegan Mayonnaise 🥫 | 2 tbsp | For extra binding (optional) |
| Lemon Juice 🍋 | 1 tbsp | Freshly squeezed |
| Plant-Based Milk 🥛 | 2 tbsp | Almond or soy for creaminess |
| Extra-Virgin Olive Oil 🫒 | 1 tbsp | For crispy coating |
| Vegan Ranch Dressing 🥣 | ½ cup | For dipping (optional) |
The white beans are the star here—cannellini or great northern work best. Drain and rinse them well to avoid soggy nuggets. I grab Trader Joe's organic canned beans for convenience, but any good-quality brand does the trick. The flaxseed is non-negotiable for binding—grind it fresh with a coffee grinder for maximum stickiness. Nutritional yeast adds that cheesy, umami kick that kids (and adults) love. If you can't find panko breadcrumbs, regular breadcrumbs toasted in a dry pan work too—just watch them closely so they don't burn.
No flaxseed? Chia seeds soaked in water (1 tbsp chia + 3 tbsp water = 1 tbsp flax) is a great swap. Short on breadcrumbs? Crushed cornflakes or vegan cracker crumbs add crunch without overpowering. The vegan mayo is optional but helps bind everything together—Hellmann's Vegan or Just Mayo are solid choices. Want extra crispiness? Toss the coated nuggets in a bit of potato starch before baking. The lemon juice brightens everything up, so don’t skip it—even if it’s just a splash.
These keep well in the fridge for 4 days if stored in an airtight container, but honestly, they won’t last that long. For meal prep, bake a double batch and freeze half. Portion into single servings before freezing so you can grab and reheat just one. The air fryer method gives the crispiest results, but a 400°F oven works too. Reheat in the oven for 5 minutes to restore that crunch. Pair with your favorite dipping sauces—ketchup, BBQ, or that creamy vegan ranch you’ve got stashed in the fridge.
Why You'll Love This Recipe
- No Fuss, No Mess: I dump canned beans, flaxseed, and breadcrumbs straight into a bowl—no draining, no chopping, no stress. The flaxseed binds everything together while you’re still deciding what to watch on TV.
- Crispy Magic: That paprika and garlic powder combo? It turns bland beans into something addictive—crunchy outside, tender inside, with a kick that lingers. Honestly, my kids think they’re chicken nuggets.
- Lunchbox Hero: Freeze half the batch for school lunches or work snacks—just reheat or eat straight from the freezer. No soggy sandwiches here; these hold up like a champ, even packed in a thermos.
- Pantry Goldmine: Two cans of beans and a bag of breadcrumbs last me weeks, cutting grocery costs in half. Between us, this recipe saved me $40 last month—while still tasting like a restaurant dish.
Step-by-step instructions for crispy kid-friendly bites
Here's how to make these golden, crunchy bean nuggets that kids will devour in minutes.
Prepare the Bean Mixture for Maximum Binding
In a food processor, combine the 1.5 cups drained and rinsed canned white beans, 0.5 cup ground flaxseed, 2 tbsp nutritional yeast, 2 tbsp vegan mayonnaise, 1 tbsp lemon juice, and 2 tbsp plant-based milk. Process until completely smooth—this ensures a tight, cohesive texture that won't fall apart when frying. The flaxseed acts as a natural binder, while the nutritional yeast adds that cheesy depth we all love.
Transfer the mixture to a mixing bowl and stir in 1 tbsp extra-virgin olive oil and 0.5 tsp sea salt. The oil helps create that crispy exterior, and the salt enhances all the flavors. If the mixture feels too wet, add 1-2 tbsp breadcrumbs to help absorb moisture. You're aiming for a thick, spreadable consistency that holds its shape when formed into nuggets.
Create the Crispy Coating
In a separate bowl, mix together 1.5 cups breadcrumbs, 1 tbsp garlic powder, and 1 tbsp paprika. The panko breadcrumbs are key here—they're lighter and create that perfect airy crunch. If you don't have panko, regular breadcrumbs will work, but they might make slightly denser nuggets. I like to add the spices directly to the breadcrumbs so they distribute evenly throughout the coating.
This is where the magic happens for that crispy texture. The garlic powder adds savory depth, while the paprika gives a subtle smoky warmth that kids often love without realizing it. Give the coating a good stir to make sure all the spices are evenly distributed—you want every bite to be perfectly seasoned.
Shape and Chill the Nuggets
Using your hands or a cookie scoop, form the bean mixture into 1-inch balls or nugget shapes—whatever your kids prefer. I find that slightly oblong shapes hold together better during frying. Place them on a parchment-lined baking sheet and gently press each one into the breadcrumb mixture, coating them completely. This double-coating ensures maximum crispiness.
Transfer the shaped nuggets to a plate and refrigerate for at least 30 minutes. This chilling step is crucial—it firms up the mixture so it holds its shape during frying and prevents them from falling apart. While they're chilling, preheat your oven to 400°F for the baking method, or heat 1 inch of oil in a deep skillet to 350°F for frying.
Bake or Fry for Perfect Crispiness
For oven-baked nuggets: Arrange the chilled nuggets in a single layer on a baking sheet lined with parchment paper. Spray or brush them lightly with extra-virgin olive oil to help the coating crisp up. Bake for 12-15 minutes, flipping halfway through, until they're golden brown and crispy. The edges should be slightly darker than the centers—this is your sign they're perfectly done.
For frying: Carefully place the chilled nuggets in the hot oil, working in batches to avoid overcrowding. Fry for 3-4 minutes per side until they're deep golden brown and floating to the top. Use a slotted spoon to remove them and drain on a paper towel-lined plate. The oil should be hot enough that they crisp up quickly—if they're not golden within 3 minutes, your oil needs to heat up more.
Serve with Dipping Sauce
Let the nuggets cool for 2-3 minutes before serving—this helps them set and makes them easier to handle. Serve immediately with the 0.5 cup vegan ranch dressing on the side for dipping. The contrast of the crispy exterior with the creamy ranch is what makes these nuggets irresistible. Store any leftovers in an airtight container in the refrigerator for up to 3 days, though I doubt they'll last that long!
Here's the thing—these nuggets are so crispy and flavorful that even picky eaters will ask for seconds. The key is that double-coating with breadcrumbs and the proper chilling time. Don't rush the process, and you'll get that perfect crunch every time. Enjoy your homemade, healthier alternative to store-bought nuggets!
Pro Tips For Making Bean Nuggets
- Drain and Pat Dry: White beans straight from the can are swimming in liquid—don’t skip draining them, and for heaven’s sake, pat them dry with a towel. I learned this after my first batch turned into a sad, mushy mess. Wet beans mean weak nuggets, and nobody wants that.
- Mix Flaxseed Last: Add the ground flaxseed right before shaping the nuggets, not when you first mix everything. It absorbs moisture fast, and if you let it sit, your dough will turn gummy. Stir it in, then work quickly—this isn’t a step you want to rush, but don’t overthink it either.
- Chill the Dough: Give the bean mixture a 15-minute rest in the fridge before frying. Cold dough binds better and releases cleaner in the pan. I used to skip this and ended up with crumbly, falling-apart nuggets—now I treat it like a rule.
- Use a Mix of Breadcrumbs: Split the breadcrumbs: use half panko for crunch and half regular for cohesion. Panko alone makes them too airy; plain breadcrumbs alone make them dense. This combo gives you the best of both worlds—and yes, I tested this the hard way.
Storing and reheating this bean nuggets
Refrigerator Storage
Store leftover bean nuggets in an airtight container lined with parchment paper to maintain crispiness.
They’ll keep fresh in the fridge for up to 4 days, though I’ve never had them last that long in my house! 🥫 The key is to let them cool completely before storing—this prevents condensation from making them soggy.
For extra crunch, place a paper towel on top of the nuggets before sealing the container.
Freezer Prep
Double batches are perfect for freezing—portion nuggets into single-serving bags or silicone molds before freezing. This way, you can grab just what you need without thawing the whole batch. They’ll stay crispy for up to 3 months if stored properly.
For best results, freeze them uncooked—just shape, chill, and freeze on a tray before transferring to a bag. When ready to eat, bake from frozen at 425°F for 15-18 minutes.
Reheating Methods
For oven reheating, spread nuggets on a baking sheet and bake at 400°F for 5-7 minutes until crispy again. The oven is my go-to because it restores that satisfying crunch without making them greasy.
If using an air fryer, heat at 375°F for 3-4 minutes—this works especially well if you froze them cooked. For a quick fix, the microwave (covered with a damp paper towel) will work, but expect slightly less crispiness.
Crispiness Hacks
If your reheated nuggets lose their crunch, try this trick: Toss them in 1 tbsp breadcrumbs and a spray of olive oil, then bake for 2-3 extra minutes. The extra coating locks in moisture while recreating that golden crust.
For air-fried nuggets, a light spray of oil before reheating ensures maximum crispiness. Pro tip: Never stack nuggets in the oven or air fryer—they’ll steam instead of crisp up. 🔥
Dipping Sauce Pairings
Reheated nuggets pair perfectly with warm dipping sauces—try a quick garlic aioli (mix 2 tbsp vegan mayo with 1 tsp garlic powder and lemon juice) or spicy ketchup (add ½ tsp cayenne to store-bought ketchup).
The contrast of warm nuggets with cool, creamy sauces makes every bite feel fresh. Store sauces separately in small containers to keep them from sogging the nuggets.
Make-Ahead Tips
Prep nuggets up to 2 days ahead by shaping and chilling them, then store in the fridge. On day two, they’re still easy to reheat—just add 1-2 extra minutes to the baking time. For freezer-friendly prep, assemble nuggets on a tray, freeze solid, then transfer to a bag.
This prevents them from sticking together. Label bags with the date to track freshness—trust me, you’ll forget they’re there! ⏰
Nutrition facts
Frequently asked questions
Can I make these bean nuggets without breadcrumbs?
For a gluten-free version, use crushed cornflakes or crushed vegan crackers instead. If you prefer a nutty texture, try chopped walnuts or almonds mixed with 1 tbsp cornstarch for extra crispiness. The key is to keep the coating dry to maintain that satisfying crunch.
Why are my nuggets falling apart when frying?
This usually happens if the mixture wasn't chilled long enough or the binder wasn't strong enough. Make sure to refrigerate the shaped nuggets for at least 30 minutes before cooking. For extra binding power, add 1 tbsp ground flaxseed or 1 tbsp chia gel to the mixture. Also, avoid overcrowding the pan—this can cause steam and make them soggy.
What's the best way to make these nuggets extra crispy?
For maximum crunch, double-coat the nuggets: roll them in breadcrumbs, then dip in a little vegan mayo or aquafaba, and coat again. Bake at 425°F instead of 400°F for 10-12 minutes, and use a wire rack instead of a baking sheet to allow air circulation. For air fryer fans, spray with light olive oil before cooking at 375°F for 6-8 minutes.
Can I use different types of beans for these nuggets?
White beans work best because of their mild flavor and creamy texture, but you can experiment with black beans or chickpeas for a different taste. For black beans, add 1 extra tbsp lemon juice to brighten the flavor. Chickpeas require slightly more breadcrumbs to absorb their moisture. Just remember—drain and rinse them thoroughly to avoid soggy results.
How do I keep these nuggets crispy when reheating?
Reheat in the oven at 400°F for 5-7 minutes on a wire rack (not a plate) to restore crispiness. For air fryer reheating, use 375°F for 3-4 minutes. If they still feel soft, toss in 1 tbsp fresh breadcrumbs and reheat for 1-2 extra minutes. Avoid microwaving—they'll lose all their crunch.