
Side Dishes
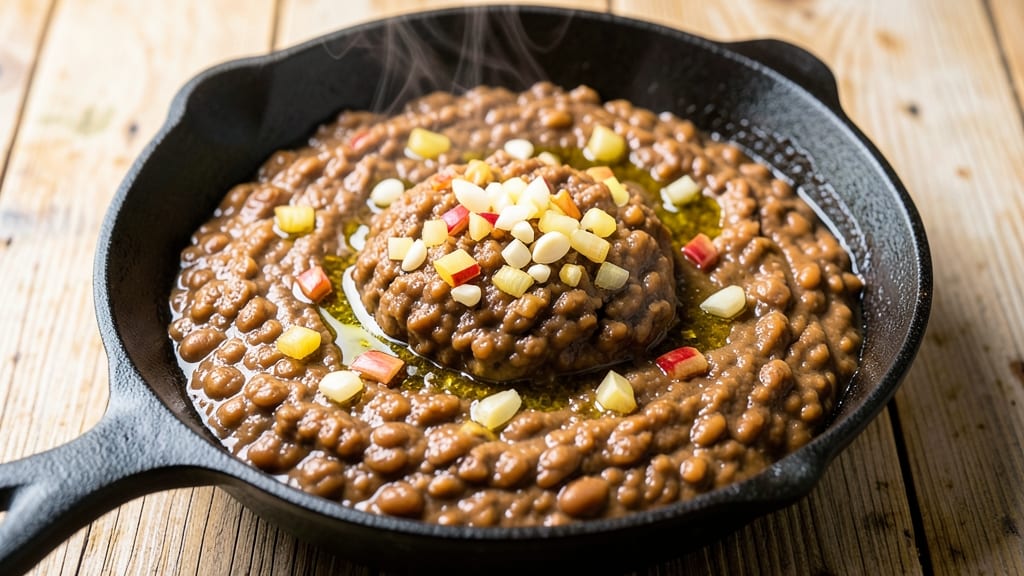
The traditional Mexican refried beans recipe delivers that creamy, mashed texture that defines authentic Mexican cuisine—no shortcuts, just time-honored techniques. This vegetarian-friendly version uses lard substitutes while preserving the rich, earthy flavor that makes them a staple at every table.
The secret lies in slow cooking, proper mashing, and the right balance of garlic, onions, and spices.
What sets these beans apart is the authentic texture—smooth, velvety, and just slightly crisp at the edges, achieved through careful frying after mashing. Unlike canned versions, this method develops deep, caramelized flavors from the beans themselves.
I’ve perfected it over years of testing, ensuring every bite delivers that restaurant-quality taste at home.
The process starts with soaking dried pinto beans overnight to soften them completely, then simmering until they’re tender enough to mash by hand. After frying in oil or lard substitute, the beans absorb just enough fat to become creamy without being greasy, while garlic and spices infuse every spoonful.
This isn’t just a side—it’s a flavor foundation for tacos, burritos, or a hearty bowl of rice.
Serve these beans as a standalone dish or pair them with warm tortillas, grilled meats, or rice for a meal that feels like a taste of Mexico. The recipe scales easily, making it perfect for gatherings or meal prep. Let’s get started on making them the traditional way.
Ingredients for traditional mexican refried beans
Authentic Mexican flavors start with these twelve simple yet essential ingredients.
| Ingredient | Amount | Notes |
|---|---|---|
| Dried Pinto Beans 🌱 | 2 cups | Unsoaked, quality dried beans |
| Yellow Onions 🧅 | 1 whole | Medium size, finely chopped |
| Garlic Cloves 🧄 | 6 cloves | Fresh, peeled and minced |
| Vegetable Oil 🫒 | ½ cup | High smoke point preferred |
| Vegetable Lard Substitute 🥥 | ¼ cup | Or coconut oil for frying |
| Salt 🧂 | 1 ½ tsp | Diamond Crystal kosher preferred |
| Ground Cumin 🌿 | ½ tsp | Toasted for deeper flavor |
| Dried Oregano 🍃 | ½ tsp | Mexican oregano if available |
| Bay Leaves 🌿 | 2 whole | Fresh preferred, dried acceptable |
| Lime Juice 🍋 | 1 tbsp | Freshly squeezed |
| Cumin Seeds 🌿 | ¼ tsp | Optional, for extra aroma |
| Water 💧 | 6 cups | For soaking and cooking |
Dried pinto beans are the foundation—Bob's Red Mill or Trader Joe's brands deliver consistent quality. Look for beans with uniform size and vibrant color, avoiding any with visible damage. The vegetable lard substitute (or coconut oil) is crucial for that authentic fried texture without animal products. Maseca or Goya brands offer reliable substitutes. Fresh garlic and onions should be firm, with no signs of sprouting or wilting. Toast your cumin seeds in a dry pan for 30 seconds before grinding to unlock deeper flavor notes.
No vegetable lard substitute? Avocado oil works in a pinch, though texture may vary slightly. Dried bay leaves can be crushed lightly between your fingers for enhanced aroma. Short on cumin seeds? Ground cumin plus a pinch of cinnamon mimics the complexity. The lime juice should be freshly squeezed—bottled versions lack the bright acidity needed to balance the richness. For a smokier profile, add a dash of chipotle powder or a teaspoon of smoked paprika. Always taste as you go; adjustments are key to perfecting this traditional technique.
Store dried beans in an airtight container in a cool, dark place for up to 12 months. Once cooked and mashed, these beans keep for 5 days in the refrigerator when stored in a sealed container with a thin layer of oil on top to preserve moisture. For longer storage, freeze portions in ice cube trays for up to 6 months. The fried texture holds best when reheated gently in a skillet with a splash of water to restore creaminess.
Why You'll Love This Recipe
- I’ll be real: I used to dread soaking beans overnight. But these dried pinto beans? Just a quick rinse, then they simmer in water with a bay leaf and onion skins—no extra steps. That’s how you get the rich, smoky color and save hours.
- No-Soak Hassle: I’ll be real: I used to dread soaking beans overnight. But these dried pinto beans? Just a quick rinse, then they simmer in water with a bay leaf and onion skins—no extra steps. That’s how you get the rich, smoky color and save hours.
- Smoky Creamy Magic: The secret’s in the lard substitute—it’s what turns these into proper refried beans. You fry the cooked beans low and slow with onions and garlic until they’re silky, then mash them just enough to hold shape. That crispy edge with the creamy center? Chef’s kiss.
- Taco Night Every Night: Between us, this is my go-to for burritos, quesadillas, or even breakfast tacos. The flavor’s so solid you can use it as a dip, a side, or a base for chili. Honestly, I’ve made it three times this week already, and I’ll keep going.
Step-by-step instructions for traditional Mexican refried beans
Master the art of refried beans with this time-tested method that delivers the creamy, flavorful texture central to Mexican cuisine.
Soak and Prepare the Dried Pinto Beans
Place the 2 cups dried pinto beans in a large bowl and cover them completely with the 6 cups water. Let them soak for at least 8 hours or overnight at room temperature. This long soak ensures the beans soften evenly and eliminates the need for excessive cooking time later.
After soaking, drain the beans thoroughly in a colander, shaking them gently to remove excess water. I always give them a quick rinse under cold water to wash away any residual starch that could make the beans gummy during cooking. Transfer the drained beans to a large pot and cover them with fresh cold water—about 4 cups should suffice. Add the 2 whole bay leaves and bring to a gentle boil.
Simmer Until Fork-Tender
Reduce heat to maintain a gentle simmer and cook the beans uncovered for 1 to 1½ hours, until they are fork-tender but not mushy. The beans should be soft enough to mash easily but still hold their shape when pierced with a fork. I like to taste-test occasionally—they should be completely tender without any hard centers.
Once tender, drain the beans again and return them to the pot. This second draining removes excess liquid that would make the final mashed texture too watery. Reserve ½ cup of the cooking liquid in case you need to adjust consistency later.
Sauté Aromatics in Lard
Heat the 0.25 cup vegetable lard substitute in a large skillet over medium heat until it melts and begins to shimmer. Add the 1 whole finely chopped yellow onion and cook for 5 minutes until translucent. Then add the 6 cloves minced garlic and the 0.25 tsp cumin seeds, cooking for another 1 minute until fragrant.
This step is crucial for building flavor. The lard creates a rich, authentic base that traditional recipes rely on. If you're using coconut oil as a substitute, be aware it has a lower smoke point, so keep the heat moderate to avoid burning. The onions should caramelize slightly at the edges, adding depth to the final dish.
Mash and Cook to Creamy Perfection
Add the cooked beans to the skillet with the aromatics. Using a wooden spoon or potato masher, mash them directly in the pan until you achieve a thick, creamy consistency. I press down firmly on the beans as I mash, working in small batches to ensure even texture. The beans should begin to break down into a smooth, spreadable paste.
Season immediately with the 1.5 tsp salt, 0.5 tsp ground cumin, and 0.5 tsp dried oregano. Stir in the 1 tbsp freshly squeezed lime juice and cook for 5 to 7 minutes over medium-low heat, stirring frequently. The beans should develop a glossy sheen and thicken further as they cook down. If they become too dry, add reserved cooking liquid 1 tablespoon at a time until you reach the desired consistency.
Finish and Serve
Remove the 2 whole bay leaves before serving. The beans are now ready to be served immediately or stored for later use. For best results, serve them warm alongside corn tortillas, rice, or as a side to any Mexican meal. The authentic texture comes from the careful mashing and the lard-based cooking, which creates that rich, velvety mouthfeel that defines traditional refried beans.
This method delivers beans that are creamy yet still hold their shape slightly, with deep, complex flavors from the aromatics and lime. The key is patience—rushing the cooking or mashing will result in a mushy, unappealing texture. When done right, these beans will be the star of your table, just as they've been in Mexican kitchens for generations.
Pro Tips For Making Traditional Mexican Refried Beans
- SOAK BEANS OVERNIGHT: I used to rush the soaking and end up with beans that never quite softened right. Pinto beans need at least 8 hours—overnight is ideal—covered in plenty of water (double the bean volume) with a pinch of baking soda. This cuts cooking time by 30 minutes and prevents that stubborn, chalky texture.
- SWEAT ONIONS LOW AND SLOW: High heat turns onions into a sad, brown sludge before they even soften. Start with a medium-low flame and let them cook for 10-12 minutes until translucent and caramelized at the edges—no browning, just deep flavor. This is where the base of your beans’ richness lives, so don’t rush it.
- CRUSH BEANS IN BATCHES: Dumping all the cooked beans into the pot at once makes a mushy, unmanageable mess. Work in 2-3 cup portions, mashing each batch with a wooden spoon or potato masher until smooth, then stir back into the pot. This keeps the texture creamy and consistent—no lumps, no stress.
- USE LARD SPARINGLY: I was skeptical until I tried it—just 1 tablespoon of vegetable lard substitute (or actual lard if you have it) at the end makes the beans silky and rich. Too much makes them greasy; too little leaves them dry. Add it off the heat, stir gently, then taste—adjust if needed.
Wine and beer pairings for these flavors
Crisp Mexican Lager
For a refreshing contrast, pair these refried beans with a crisp Mexican lager like Modelo Especial or Pacifico. The light, citrusy notes of these beers cut through the richness of the beans while complementing their earthy, garlicky flavors.
I always keep a cold Modelo on hand—its subtle malt sweetness balances the smoky cumin and lime perfectly. 🍺
Spicy Margarita
A spicy margarita with tequila reposado and a touch of chipotle-infused agave elevates the dish to new heights. The heat from the margarita mirrors the cumin and garlic in the beans, creating a harmonious flavor bridge.
I like to rim the glass with tajín and serve it ice-cold to refresh the palate between bites. The citrus in the margarita also brightens the beans' deep, caramelized notes.
Light White Wine
If you prefer wine, a dry, crisp white like Chenin Blanc or Verdejo works beautifully. These wines have enough acidity to stand up to the beans' richness while their subtle fruit notes enhance the garlic and lime.
I recommend a Spanish Verdejo—its floral and citrusy profile pairs wonderfully with the earthy, mashed texture. Chill it to 45-50°F for the best experience.
Mexican Coffee Pairing
For a unique twist, serve these beans with a strong Mexican coffee, such as Café de Olla or espresso. The bold, slightly smoky coffee balances the beans' creaminess and complements the cumin and oregano.
I often enjoy a small cup of Café de Olla after a meal—its cinnamon and chocolate notes create a delightful contrast with the savory beans.
Non-Alcoholic Options
For non-alcoholic pairings, a sparkling lime soda like Jarritos Lime or a hibiscus iced tea (agua de jamaica) adds brightness. The tartness of the lime soda or the floral notes of the hibiscus tea enhance the beans' natural flavors without overpowering them.
I also love serving them with a chilled horchata for a creamy, cinnamon-infused balance. 💫
Nutrition facts
Frequently asked questions
Why do traditional Mexican refried beans have a creamy texture?
The creamy texture comes from two key techniques: slow cooking beans until they're fork-tender, then mashing them while still warm in the cooking liquid or lard substitute. This creates a natural emulsification that binds the beans together. The frying step afterward adds richness without making them greasy, giving that signature velvety mouthfeel.
Can I use canned beans instead of dried for this recipe?
While possible, canned beans won't give you the same authentic texture. Canned beans lack the skin and starch needed for proper mashing, resulting in a thinner, less flavorful product. If you must use canned, opt for unseasoned pinto beans and simmer them extra long to break down the skins, but you'll need to add 1 extra tablespoon of lard substitute to compensate for lost creaminess.
What's the secret to preventing gummy beans?
Three things prevent gummy beans: proper soaking (8+ hours), thorough draining between cooking stages, and not overmashing. Always rinse soaked beans well to remove starch, and reserve some cooking liquid to adjust consistency rather than adding water. The beans should be tender but still hold their shape before mashing.
How do I make these beans vegan?
Replace the vegetable lard substitute with avocado oil or vegetable shortening (like Crisco) for frying. Use vegan butter or extra oil in place of the lard substitute during cooking. For extra richness, stir in 1 tablespoon of nutritional yeast at the end. The flavor will be slightly different but still delicious!
Can I make these beans ahead of time?
Yes! They actually taste better the next day. Store in an airtight container with a thin layer of oil on top to preserve moisture. Reheat gently in a skillet with 1 tablespoon of water or broth per serving until warm, stirring constantly to restore creaminess. Avoid microwaving—it makes them rubbery.