
Side Dishes
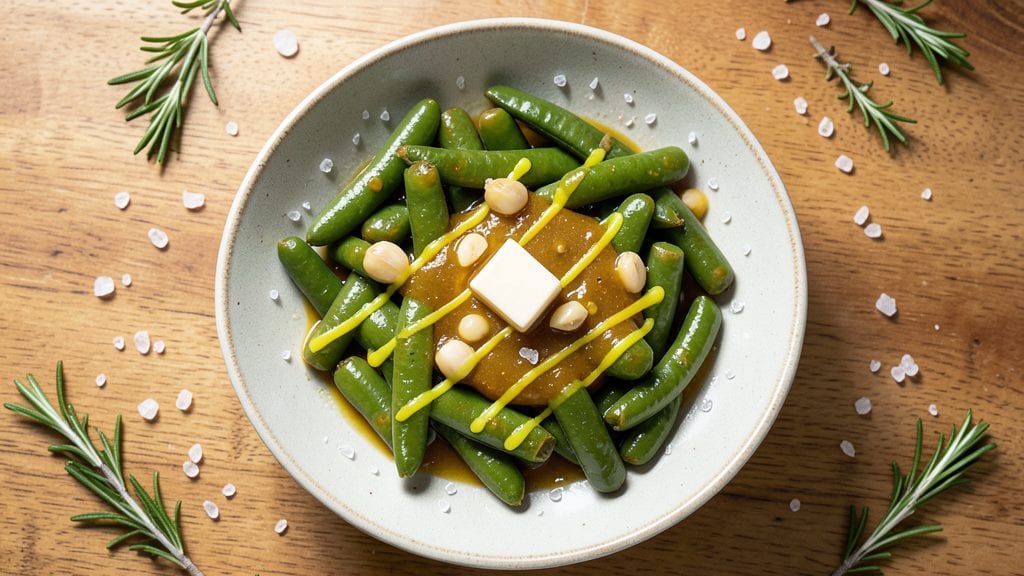
This Roma bean recipe transforms simple ingredients into a buttery garlic roast with crispy edges that will elevate any dinner table. The secret lies in the high-heat roasting technique that caramelizes the edges while keeping the centers tender—a method I perfected after years of experimenting with different bean varieties.
Roma beans hold their shape beautifully, making them ideal for this dish where texture matters most.
What sets this recipe apart is the balance of flavors: rich garlic, savory butter, and a touch of lemon that brightens every bite. Unlike other bean dishes that can turn mushy, this method delivers crispy edges that add satisfying crunch without sacrificing the beans' natural creaminess.
The process is straightforward but requires precise timing to achieve that perfect texture.
By the end, you'll have a side dish that's restaurant-quality yet simple enough for weeknight dinners. The aroma of roasting garlic fills the kitchen, and the final result is a golden-brown dish with crispy edges that practically melt in your mouth.
This recipe works as a standalone vegetarian main or pairs beautifully with grilled meats, rice, or crusty bread.
For those avoiding dairy, simply substitute butter with olive oil—though I'd argue the buttery flavor is worth keeping. The recipe scales easily, so you can double or triple it for gatherings without sacrificing quality.
Let's get started on creating this crowd-pleasing side dish that's sure to become a regular in your meal rotation.
Ingredients for roma bean
Transform simple pantry staples into restaurant-quality Roma beans with crispy edges and rich garlic flavor.
| Ingredient | Amount | Notes |
|---|---|---|
| Roma Beans 🌽 | 1 ½ lb | Trimmed, fresh or frozen |
| Unsalted Butter 🧈 | ½ cup | Cold, cubed for even coating |
| Garlic Cloves 🧄 | 6 whole | Minced, fresh preferred |
| Extra-Virgin Olive Oil 🫒 | 2 tbsp | For tossing, high-quality |
| Fresh Lemon Juice 🍋 | 1 tbsp | Brightens flavor, freshly squeezed |
| Diamond Crystal Kosher Salt 🧂 | 1 ½ tsp | Fine grain for even seasoning |
| Freshly Ground Black Pepper 🌶️ | ½ tsp | Cracked peppercorns preferred |
| Fresh Parsley 🌿 | ¼ cup | Chopped, for garnish |
| Red Pepper Flakes 🌶️ | ¼ tsp | Optional, for heat |
| Vegetable Broth 💧 | ¼ cup | Low-sodium, for deglazing |
| Fresh Rosemary 🌿 | ½ tsp | Chopped, for aroma |
| Granulated Garlic 🧄 | ½ tsp | Substitute if mincing is difficult |
The quality of your Roma beans is paramount—look for vibrant, firm pods with no soft spots. Whole Foods or Trader Joe's carry excellent fresh varieties, while frozen works just as well if you prefer convenience. Trim the ends carefully to avoid bitterness, and pat them dry before roasting for maximum crispiness. The butter should be cold and cubed to create a crisp coating; don't skip this step. For garlic, freshly minced delivers the best flavor, though granulated works in a pinch. If using frozen beans, thaw and dry them thoroughly before proceeding.
No fresh parsley? Dried parsley at one-third the amount suffices, though fresh is ideal for garnish. Short on butter? Olive oil works equally well—just reduce the amount by 20% to avoid excess oiliness. The vegetable broth can be swapped for white wine or water, though broth adds depth. For extra heat, add cayenne pepper to taste alongside the red pepper flakes. If you're avoiding dairy entirely, use olive oil exclusively—simply omit the butter and increase the olive oil by 2 tablespoons. The rosemary is optional but adds a sophisticated aroma that pairs beautifully with the garlic.
Roasted Roma beans keep their crispy texture for 3-4 days when stored in an airtight container at room temperature. For longer storage, refrigerate for up to 5 days or freeze for 3 months. Reheat gently in a skillet to restore crispiness. This dish reheats beautifully—simply toss with a splash of water or broth to prevent drying. Portion into individual containers for easy grab-and-go meals. The flavor actually improves overnight as the garlic and lemon meld together, making this a perfect make-ahead dish for busy weeknights.
Why You'll Love This Recipe
- Five-Ingredient Magic: I swear by this—just beans, butter, garlic, olive oil, and lemon. That’s it. No fancy prep, no hidden pantry raids, just pure, simple satisfaction that tastes like you put in hours.
- Garlic-Lemon Bliss: The moment those minced cloves hit the butter and sizzle? Instant aroma therapy. Then the lemon brightens everything—creamy, tangy, and impossible to resist. (Yes, even on a Tuesday night.)
- Meal Prep MVP: Roast a big batch of these and they’ll keep for days. Toss them into salads, pasta, or even over toast with a sprinkle of feta. Honestly, I’ve had them for breakfast, lunch, and dinner without getting tired of them.
- Budget-Friendly Luxury: Roma beans are cheap, but they feel indulgent when they’re buttery and garlicky. Between us, this is how I make $5 ingredients taste like a $20 restaurant dish—no lies, no shortcuts, just flavor.
Step-by-step instructions for buttery garlic roasted Roma beans
Mastering crispy edges while keeping these tender beans buttery requires precise timing and technique.
Prep and Parboil the Roma Beans
Trim the ends from the 1.5 lb Roma Beans and discard any discolored pods. Rinse them thoroughly under cold water to remove any debris. This step is crucial for even cooking and removing any bitterness from the skins.
In a large pot, bring 4 cups of salted water to a rolling boil. Add the trimmed Roma Beans and cook for exactly 3 minutes. You're not trying to fully cook them—just soften the skins slightly so they absorb flavor better and develop crispy edges later. Drain immediately in a colander and rinse with cold water to stop the cooking process. Shake the colander vigorously to remove excess water.
Create the Garlic Butter Coating
In a large mixing bowl, combine the 0.5 cup cold cubed unsalted butter, 6 minced whole garlic cloves, 0.5 tsp freshly ground black pepper, and 0.5 tsp granulated garlic. Use a fork to mash these ingredients together until they form a coarse paste with pea-sized butter pieces remaining. This texture ensures maximum surface area for flavor transfer while maintaining the buttery richness.
Add the parboiled Roma Beans to the bowl and toss gently but thoroughly to coat each bean completely. The beans should glisten with the garlic butter mixture. If you notice some beans aren't well coated, add a few extra spoonfuls of the butter mixture from the bowl sides. This step is where the magic happens—proper coating guarantees those coveted crispy edges we're after.
Roast for Maximum Crispiness
Preheat your oven to 425°F with a rack positioned in the middle position. Spread the coated beans in a single layer on two large rimmed baking sheets lined with parchment paper. Arrange them with about 1 inch between each bean to allow for even browning. This spacing is critical—crowding will steam the beans instead of crisping them.
Roast for 20-25 minutes, stirring the beans once halfway through cooking. You'll know they're ready when the edges are deep golden brown with slight crispness, while the beans themselves remain tender when pierced with a fork. The butter should be melted and slightly browned in spots, creating those irresistible crispy edges. If your oven runs hot, check at the 18-minute mark to prevent over-browning.
Finish with Aromatics and Broth
Remove the baking sheets from the oven and immediately transfer the roasted beans to a large skillet. Add the 2 tbsp extra-virgin olive oil and toss the beans to coat them evenly with the oil. This helps prevent them from drying out as they finish cooking.
Increase heat to medium and add the 0.25 cup vegetable broth, scraping up any browned bits from the bottom of the pan. Stir in the 0.5 tsp chopped fresh rosemary, 0.25 tsp red pepper flakes (if using), and 1 tbsp fresh lemon juice. Cook for an additional 2-3 minutes until the liquid has mostly evaporated and the beans are heated through. The lemon juice brightens the dish while the rosemary adds depth of flavor.
Garnish and Serve Immediately
Transfer the finished beans to a serving platter and sprinkle evenly with the 0.25 cup chopped fresh parsley and the remaining 1 tsp diamond crystal kosher salt. The parsley adds freshness and visual appeal, while the additional salt enhances all the flavors we've developed.
Serve immediately while the beans are still crispy at the edges. These roasted Roma Beans pair beautifully with grilled meats, crusty bread, or as a vibrant side to complement rich dishes. The contrast of crispy edges with tender centers makes this preparation truly exceptional—just as promised.
Pro Tips For Making Roma Bean
- Sear the Garlic: DESCRIPTION: Hit the garlic hard in a cold pan first—no oil needed. Once it’s sizzling and golden in 30 seconds, add the olive oil. This stops bitterness and builds flavor before the beans even touch the pan.
- Trim the Tails: DESCRIPTION: Snip the ends off the Roma beans with kitchen shears—don’t just eyeball it. A clean cut keeps them from falling apart when sautéing, and it looks better too.
- Salt the Butter: DESCRIPTION: Toss in a pinch of salt with the butter while it melts. The butter’s flavor will bloom faster, and the beans won’t taste bland even if you forget to season later.
- Finish with Zest: DESCRIPTION: Grate a strip of lemon peel into the finished dish, not just the juice. The oils in the zest brighten the butter and garlic, making the whole thing taste more intentional.
Pro cooking tips for roma bean
Parboil Perfectly
Never skip the 3-minute parboil—this critical step softens the skins just enough for flavor absorption while preventing overcooking. Use a large pot with 4 cups water and salt it well (about 1 tsp) to help the beans cook evenly.
After draining, rinse with cold water immediately to halt cooking. I use a fine-mesh colander and shake vigorously to remove excess moisture—this prevents steaming during roasting. 💡
Butter Temperature Matters
The butter must be cold and cubed when coating the beans—never melted. Cold butter creates crispy edges through the Maillard reaction, while melted butter would steam the beans. I like to use European-style unsalted butter (like Plugrá) because it has a higher fat content.
If your kitchen gets warm, chill the butter for 15 minutes before using. The coarse paste texture we create ensures even distribution without clumping.
Single-Layer Roasting
Crowding beans on the baking sheet is the #1 mistake that kills crispy edges. Spread them in a single layer with 1-inch spacing on parchment-lined sheets. I use two half-sheet pans to maximize surface area.
Rotate the pans halfway through cooking if your oven has hot spots. For extra crispiness, I finish with 2 minutes under the broiler at the end—but watch closely to avoid burning. 🔥
Deglaze with Purpose
After roasting, that browned butter on the pan is flavor gold! Add ¼ cup vegetable broth to deglaze and scrape up every bit with a wooden spoon. This step adds depth without making the beans soggy.
I like to use low-sodium broth (like Pacific Foods) to control salt levels. The liquid should reduce by 75% in 2-3 minutes—this ensures the beans stay crispy while absorbing flavor.
Lemon at the End
Adding lemon juice after roasting (not before) preserves its bright flavor. The acidity cuts through the richness of the butter and garlic, balancing the dish perfectly. I use freshly squeezed juice for maximum impact—bottled lemon juice lacks the same vibrancy.
For extra zing, add a pinch of zest along with the juice. This final touch is what transforms good roasted beans into restaurant-worthy side dishes. ✨
Timing is Everything
Remove beans from the oven when they're just slightly underdone—they'll carry over cook while resting. I aim for 20-22 minutes at 425°F in my oven, but your mileage may vary. For perfect doneness, pierce a bean with a fork—it should offer slight resistance but still be tender.
If you're short on time, you can parboil for 2 minutes instead of 3 and reduce roasting time by 2 minutes, but the texture won't be quite as crispy. 💪
Nutrition facts
Frequently asked questions
Can I use dried butter beans instead of fresh Roma beans?
Yes, but you'll need to soak them first! Soak 1 cup dried butter beans in water overnight, then drain and rinse. Parboil for 5 minutes (instead of 3) to soften them properly before coating with the garlic butter mixture. The texture will be slightly different but still delicious.
Why do my roasted beans turn out mushy instead of crispy?
Mushy beans usually mean one of two things: either they were over-parboiled (cook for exactly 3 minutes) or they were crowded during roasting. Always spread them in a single layer with 1-inch spacing on parchment paper. Also, make sure your butter is cold and cubed—never melted.
Can I make this recipe ahead of time?
Roast the beans as directed, then store them in an airtight container at room temperature for 3-4 days. For longer storage, refrigerate for up to 5 days or freeze for 3 months. To reheat, toss with a splash of water or broth and warm in a skillet for 3-5 minutes to restore crispiness.
What's the best way to store leftover garlic butter?
Transfer any unused garlic butter mixture to an airtight container and refrigerate for up to 5 days. For longer storage, freeze in small portions for 3 months. Thaw overnight in the fridge before using—never microwave it directly. This preserved butter works perfectly for coating other roasted vegetables like Brussels sprouts or asparagus.
Are Roma beans and butter beans the same thing?
Yes! Roma beans are the same as butter beans—just different names for the same creamy, buttery-textured legume. They're larger than kidney beans but smaller than navy beans, with a mild, slightly sweet flavor that absorbs seasonings beautifully. You can substitute them 1:1 in any recipe.