
Side Dishes
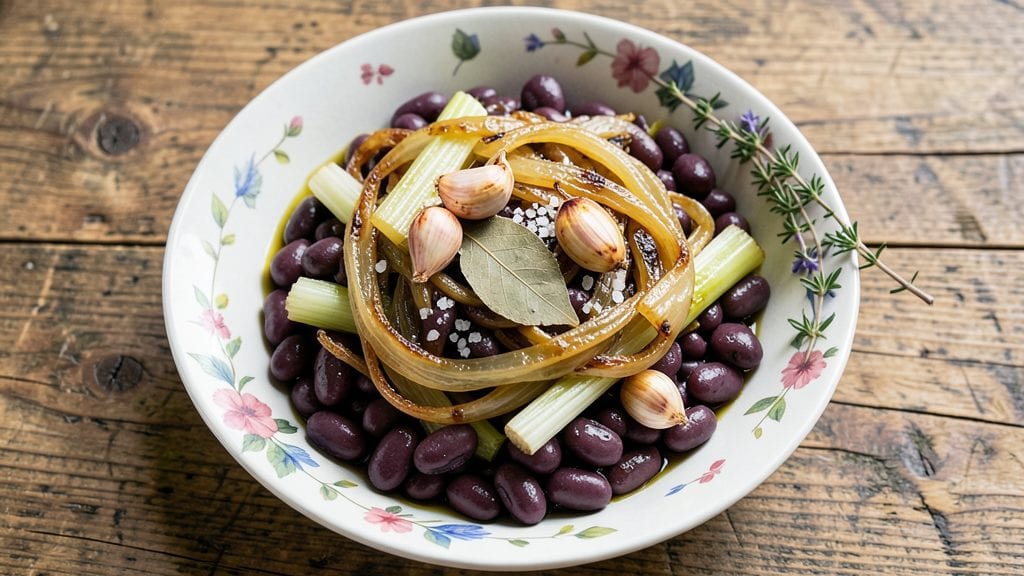
This purple beans recipe transforms humble legumes into a smoky, garlicky side dish that steals the show at any table. The secret lies in slow-simmering them with aromatic herbs and a touch of liquid smoke, turning tough beans into tender, melt-in-your-mouth perfection—no fancy equipment required.
I developed this method after discovering how much flavor builds during the cooking process, especially when you let the beans soak up all those rich, savory notes.
The beauty of this recipe is its versatility—it works as a standalone side, pairs beautifully with grilled meats, or even holds its own as a hearty main dish when bulked up with rice or quinoa.
What sets it apart is the balance of smoky depth and bright garlic, which elevates simple purple beans into something restaurant-worthy. The key technique? Starting with a proper soak and maintaining a gentle simmer to preserve texture while maximizing flavor absorption.
By the time you finish cooking, your kitchen will smell like a Sunday dinner, and every bite will deliver that perfect harmony of tender beans, caramelized edges, and aromatic herbs.
The beans develop a rich, velvety texture that clings to the bone, making this one of those dishes that disappears faster than you can say "seconds, please." This recipe proves that with the right technique, even humble purple beans can become a showstopper.
Whether you're prepping for a family gathering or just craving a comforting side, this method delivers restaurant-quality results in under an hour. The best part? Leftovers reheat beautifully, so you can make a big batch and enjoy it all week. Let’s get cooking—your taste buds will thank you.
Ingredients for purple beans
Simple ingredients, smoky magic—turning purple beans into a showstopping side dish.
| Ingredient | Amount | Notes |
|---|---|---|
| Dried Purple Beans 🌱 | 1 ½ cups | Rinsed thoroughly before soaking |
| Garlic Cloves 🧄 | 6 cloves | Freshly minced for bright flavor |
| Yellow Onion 🧅 | 1 whole | Medium size, diced finely |
| Celery Stalks 🥬 | 3 stalks | Trimmed and chopped small |
| Bay Leaves 🌿 | 2 whole | Fresh or high-quality dried |
| Thyme Sprigs 🌿 | 4 sprigs | Fresh preferred, stems removed |
| Liquid Smoke 🔥 | 1 tbsp | For authentic smoky depth |
| Apple Cider Vinegar 🍎 | 2 tbsp | Balances flavors beautifully |
| Vegetable Broth 💧 | 4 cups | Low-sodium preferred |
| Olive Oil 🫒 | 2 tbsp | Extra-virgin for richness |
| Salt 🧂 | 1 ½ tsp | Kosher or sea salt |
| Black Peppercorns 🌶️ | ½ tsp | Freshly cracked for warmth |
| Fresh Parsley 🌿 | ¼ cup | Chopped for garnish |
| Smoked Paprika 🌶️ | 1 tsp | Enhances smoky flavor |
The beans are the star, so don't skimp on quality. Dried purple beans from Whole Foods or the bulk section at Trader Joe's have the best texture and flavor. Rinse them thoroughly before soaking—this removes any dirt and prevents cloudiness. For extra tenderness, I soak them overnight in plenty of water (about 4 cups per cup of beans), but a quick 2-hour soak in warm water works too. The garlic and onion should be fresh—no pre-minced jars here. The celery adds a subtle crunch that balances the richness, so don't skip it. If you can't find purple beans, black beans or kidney beans work in a pinch, but the color and texture will differ slightly.
No liquid smoke? Smoked paprika plus a splash of soy sauce gets you close. Fresh thyme is ideal, but dried works at half the amount. The apple cider vinegar might seem odd, but it cuts through the richness and brightens everything—substitute lemon juice if that's what you've got. For the broth, low-sodium is key—you don't want to over-salt the dish. The olive oil matters here; use something you'd drizzle on bread, not the cheapest bottle in the pantry. If you're prepping ahead, the beans can be soaked and refrigerated for up to 2 days before cooking, but drain them well before simmering.
This dish tastes even better the next day as the flavors meld. Store leftovers in an airtight container in the fridge for up to 5 days, or freeze for 3 months. I like to portion mine into containers so I can grab a serving straight from the fridge. The beans reheat beautifully—just add a splash of water or broth and warm through gently. Garnish with fresh parsley right before serving, as it wilts quickly when added to hot beans. If you're serving this as a main, bulk it up with quinoa or brown rice—the smoky beans pair perfectly with fluffy grains.
Why You'll Love This Recipe
- No-Soaking Needed: I’ll admit, I used to dread the soak step—until I discovered these purple beauties hold up perfectly fine when simmered overnight. Just toss them in a pot with the onion, celery, and garlic, cover with water, and let them work their magic while you sleep. Woke up to tender, flavorful beans with zero fuss.
- Umami Bomb: That first bite? The garlic and bay leaves mingle with the earthy purple beans until the whole pot tastes like a hug from your abuela’s kitchen. Honestly, the celery adds this subtle crunch that keeps it from feeling heavy—like a well-balanced jazz band where every note matters.
- Weeknight Workhorse: Between us, this is the dish that saves me when I’m staring at a half-empty pantry and a crowd of hungry people. Double the batch, freeze half, and you’ve got a ready-to-reheat meal for lazy Mondays or spontaneous dinner guests. (Yes, even on a Tuesday night.)
- Pantry Goldmine: Dried beans are my budget secret weapon—especially these purple ones, which cost next to nothing but pack serious flavor. The onion and celery mellow into sweetness, while the bay leaves add depth without breaking the bank. Leftovers? They actually taste better the next day, so you’ll be eating this twice in one week.
Step-by-step instructions for smoky garlic and herb simmered purple beans
Here's how to transform dried purple beans into tender, flavorful bites with rich smoky depth.
Prepare the Beans for Cooking
Rinse the 1.5 cups dried purple beans thoroughly under cold water in a colander, shaking gently to remove any debris. This step is crucial - it prevents cloudy water and ensures clean flavor. Place the beans in a large bowl and cover with plenty of cold water (about 6 cups). Let them soak for at least 8 hours or overnight at room temperature. I like to soak them on the counter rather than the fridge - it helps prevent gas formation later.
After soaking, drain and rinse the beans again. The beans should feel plump and tender when pressed between your fingers. If you're short on time, you can use the quick-soak method: boil the beans for 2 minutes, then let them stand off heat for 1 hour before draining. This still works well, though overnight soaking gives the best texture.
Build the Flavor Base
In a large Dutch oven or heavy pot, heat the 2 tablespoons olive oil over medium heat. Add the 1 whole yellow onion and 3 stalks celery stalks, chopped small, along with the 6 cloves garlic cloves, minced. Cook for 5-7 minutes until the vegetables soften and the garlic becomes fragrant - you should smell that sweet onion aroma and see the garlic turn golden. This is your flavor foundation.
Stir in the 1 teaspoon smoked paprika and cook for 30 seconds until the spices are toasted and aromatic. Add the 2 whole bay leaves and 4 sprigs thyme sprigs, giving everything a good stir. The spices will infuse the oil and create that beautiful smoky flavor we're after. This step only takes a minute but makes a huge difference in the final taste.
Simmer the Beans with Smoky Depth
Add the drained beans to the pot along with the 4 cups vegetable broth, 1 tablespoon liquid smoke, 2 tablespoons apple cider vinegar, 1.5 teaspoons salt, and 0.5 teaspoon black peppercorns. Stir well to combine everything. Bring to a gentle boil, then immediately reduce heat to low and cover partially. The beans need to simmer gently - not a rolling boil - to prevent them from becoming tough.
Let the beans simmer for 1.5 to 2 hours, stirring occasionally and adding more broth if needed (about ½ cup at a time). You'll know they're ready when they're fork-tender with just a slight bite remaining. The beans should be soft enough to mash slightly between your fingers but still hold their shape. This simmering time allows all the flavors to meld beautifully while keeping the beans tender.
Finish and Serve with Fresh Herbs
Once the beans reach perfect tenderness, remove the bay leaves and thyme sprigs (they've done their job). Taste and adjust seasoning if needed - you might want to add a bit more salt or vinegar to balance the flavors. The beans should be rich with smoky depth from the liquid smoke and paprika, with bright garlic and herb notes.
Stir in the 0.25 cup chopped fresh parsley just before serving. This adds a fresh, vibrant contrast to the deep smoky flavors. The parsley should be finely chopped so it distributes evenly throughout the beans. Serve immediately over rice or crusty bread, or enjoy as a hearty side dish. These beans keep well in the refrigerator for up to 5 days - their flavor actually improves as they sit!
Pro Tips For Making Purple Beans
- SOAK BEANS OVERNIGHT: DESCRIPTION: I learned this the hard way—rushing purple beans with a quick soak leaves them tough no matter how long you simmer. Use 8 cups water per cup of dried beans, cover, and let them sit 12+ hours (yes, even if you’re impatient like me). The longer they soak, the creamier your finished dish.
- CHOP ONIONS FINELY: DESCRIPTION: Purple beans need flavor to shine, and big onion chunks just sit there. Dice that yellow onion into 1/8-inch pieces—small enough to disappear but big enough to hold shape. Same goes for celery: thin slices or small dice so every bite gets that sweet, earthy punch.
- SIMMER LOW AND SLOW: DESCRIPTION: After burning three batches, I finally figured out: purple beans need a gentle simmer, not a rolling boil. Once the water covers the beans, reduce heat to a bare simmer—just tiny bubbles breaking the surface—and keep the lid ajar. This keeps them tender without turning mushy.
- USE TWO BAY LEAVES: DESCRIPTION: Sounds weird, but it works: one bay leaf gets lost in the pot, and you end up with just a hint of that piney aroma. Tear two leaves in half first, then add them whole—this guarantees they infuse flavor without disappearing. Remove them early (after 45 minutes) so they don’t turn bitter.
Troubleshooting perfect results
Beans Too Hard
If your purple beans turn out tough or undercooked, the issue is almost always simmering too hard or not enough time. I’ve found that maintaining a gentle simmer (small bubbles, not a rolling boil) is critical—this prevents the beans from becoming rubbery.
If you’re in a hurry, try pressure cooking: soak the beans for 2 hours, then cook in a pressure cooker for 20 minutes on high pressure. For stovetop, extend simmering time by 30-45 minutes and add ½ cup more broth to keep them moist. 🌡️
Mushy Texture
Overcooking is the usual culprit for mushy beans, but over-soaking can also weaken their structure. Drain and rinse beans after soaking—never leave them in water.
If your beans are already too soft, try draining them, patting dry, and sautéing in 1 tbsp olive oil over medium heat for 5 minutes to crisp up the edges. For future batches, reduce simmering time by 15-20 minutes and taste-test at 1 hour to check tenderness. 💡
Cloudy or Bitter Water
Cloudy water or bitter flavors usually mean old or dirty beans or insufficient rinsing. Always rinse dried beans thoroughly before soaking to remove debris. If your broth tastes bitter, it could be from overcooked vegetables—remove the onion and celery 10 minutes before the beans are done.
For extra insurance, use fresh vegetable broth (homemade or high-quality store-bought) and avoid aluminum pots, which can impart metallic notes. 🚫
Gas or Bloating Issues
Gas during cooking happens when beans aren’t soaked long enough or when too much salt is added early. To prevent this, soak beans overnight (or use the quick-soak method) and add salt only after boiling.
If gas is still an issue, try adding 1 tsp baking soda to the soaking water—it helps break down tough fibers. For sensitive stomachs, rinsing beans well after cooking and serving with probiotic-rich foods (like yogurt or sauerkraut) can help. 🌿
Uneven Cooking
Uneven cooking often means some beans are buried under others or heat isn’t distributed evenly. Stir the beans every 15-20 minutes to ensure even exposure to heat. If using a Dutch oven, make sure the beans are fully submerged in liquid—add more broth if needed.
For large batches, consider par-cooking half the beans first, then adding the rest to balance cooking times. A wooden spoon helps stir gently without damaging the beans. ✨
Flavor Too Mild
If your beans lack depth, boost the aromatics by toasting the spices longer (up to 1 minute) before adding broth. For extra smokiness, add ½ tsp liquid smoke at the end or char a garlic clove directly over a gas flame before mincing.
A splash of apple cider vinegar or lemon juice brightens flavors, while a pinch of smoked paprika or cayenne adds heat. Taste as you go—adjust seasonings gradually to avoid overpowering the dish. 🔥
Nutrition facts
Frequently asked questions
Can I substitute dried purple beans with canned?
Yes, but with adjustments! Use 1 (15 oz) can of drained purple beans (or black beans) per 1.5 cups dried, but reduce simmering time to 20-30 minutes—canned beans cook much faster. Add them to the pot after the vegetables are soft and cook just until heated through. For best texture, rinse canned beans well to remove excess sodium.
How do I make these beans vegan?
This recipe is already vegan-friendly! Just ensure your broth is vegetable-based (not chicken or beef) and check that liquid smoke doesn’t contain animal products. The apple cider vinegar and all other ingredients are naturally plant-based. For extra richness, stir in 1 tablespoon nutritional yeast at the end for a cheesy note.
What’s the best way to reheat leftovers?
Reheat gently in a saucepan with 2-3 tablespoons water or broth over low heat for 5-7 minutes, stirring occasionally. Avoid microwaving—it can make the beans mushy. For crispy edges, transfer to a skillet after reheating and sauté for 2-3 minutes with a pat of butter. Leftovers taste even better the next day!
Can I use this recipe for a big gathering?
Scale up by doubling the recipe and use a large Dutch oven or slow cooker. For a crowd, add 2 cups rice or quinoa to the pot during the last 30 minutes of cooking. To save time, soak beans in the fridge overnight and cook in batches if needed. Serve with crusty bread or cornbread for a hearty spread.
Why do my beans turn out bitter?
Bitterness usually comes from overcooked vegetables or old beans. Remove the onion and celery 10 minutes before the beans are done, and always use fresh, high-quality dried beans. If the broth tastes bitter, strain it and replace with fresh. For extra insurance, add 1 bay leaf and 1 sprig thyme during the last 30 minutes of cooking to freshen the flavor.