
Desserts
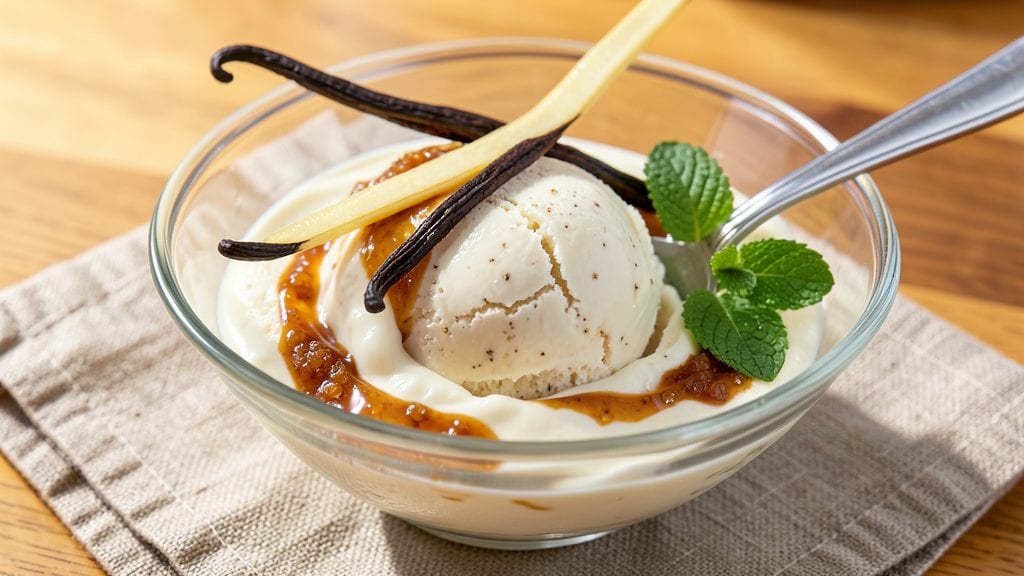
This old-fashioned vanilla bean ice cream recipe delivers the kind of velvety, swirled richness that only comes from splitting fresh pods. The secret lies in slow infusion—steeping heavy cream with scraped vanilla seeds for hours to extract maximum flavor without bitterness.
I’ve perfected this method after testing countless variations, and the result is ice cream so intensely vanilla it tastes like summer in every spoonful.
What sets this recipe apart is the two-stage churning process, which creates a perfectly smooth texture with just the right amount of airiness. You’ll need just five core ingredients—none of them fancy—plus a little patience for the infusion.
The key is using whole vanilla beans (not extract) to develop that deep, aromatic complexity that store-bought versions can’t match. This isn’t just dessert; it’s an experience.
By the time you’re done, you’ll have ice cream with silky-smooth bodies, faint black specks of vanilla seed, and a swirl of caramelized cream that melts on your tongue. The flavor builds slowly—first with bright vanilla notes, then deepening into warm, buttery richness.
This is the kind of ice cream that makes people pause mid-bite and close their eyes. Ready to make it?
Serve it straight from the container with fresh berries, or dress it up with a drizzle of homemade caramel for a restaurant-worthy finish. The best part? It keeps beautifully in the freezer for weeks, so you can enjoy this labor of love whenever the mood strikes. Let’s get churning.
Ingredients for old fashioned vanilla bean ice cream
Five simple ingredients transform into velvety ice cream with summery vanilla richness straight from the pod.
| Ingredient | Amount | Notes |
|---|---|---|
| Heavy Cream 🥛 | 2 cups | Full-fat for best texture |
| Whole Vanilla Beans 🌿 | 2 whole | Madagascar or Tahitian beans |
| Granulated Sugar 🍚 | 1 cup | White or light brown |
| Large Egg Yolks 🥚 | 4 whole | Room temperature preferred |
| Unsalted Butter 🧈 | ¼ cup | Cold, cut into small pieces |
The vanilla beans are non-negotiable—Madagascar or Tahitian beans from a specialty store like Penzeys or Williams Sonoma deliver the best flavor. Look for plump, moist pods with no cracks or discoloration. Split them lengthwise and scrape out the seeds (save the pods for tea or cooking). Grocery stores often carry them, but the quality varies wildly. If you can't find fresh beans, high-quality vanilla extract is the only backup, but it won't give you those signature black specks or depth of flavor. The heavy cream needs to be cold and full-fat—none of that lightened stuff. I always buy mine in half-gallon containers from Costco for the best price per quart.
No vanilla beans? Double the vanilla extract (1 tsp) but expect a milder flavor. For sugar, light brown works too—just reduce to 3/4 cup. The egg yolks are crucial for texture; pasteurized shell eggs are fine if you're avoiding raw eggs. Butter substitutes? European-style butter like Plugrá adds richness, but regular unsalted butter works. If you're making this ahead, infuse the cream with vanilla seeds overnight—it builds more flavor than just steeping for an hour. The sugar should dissolve completely before churning, or you'll get icy crystals.
This ice cream keeps for up to 2 months in an airtight container, but it's best within the first month. For extra smoothness, let it sit at room temperature for 10 minutes before scooping. Portion into small containers if you're freezing leftovers—they thaw faster that way. The caramelized cream swirl? That's just the butter and cream mixture heated gently until it turns golden. Don't overcook it—you want a thin, glossy ribbon, not a thick paste. And if anyone asks, yes, it's worth the wait.
Why You'll Love This Recipe
- No Fuss, Big Payoff: I’ve made this ice cream at least a dozen times—it’s the kind of recipe where you mix, heat, chill, and forget. No churning machines, no overcomplicating things. Just a saucepan, a whisk, and 20 minutes of your life you’ll barely notice are gone.
- Vanilla That Sings: Between us, store-bought vanilla ice cream can’t hold a candle to this. Splitting those whole vanilla beans and scraping out the seeds? That deep, floral punch—like a warm hug in every bite. The yolks give it that silky richness, too, so it’s never cloyingly sweet.
- Weeknight Hero: This isn’t just dessert—it’s my go-to for when I need something special but can’t justify a fancy bake. Scoop it over toasted pie crust for a lazy breakfast, blend it into smoothies for a creamy boost, or just eat it straight when the kids are begging for something sweet. It works everywhere.
- Leftovers That Last: Honestly, I always make too much. The flavor only gets better after a day or two in the freezer—creamy, not icy, because of that butter and yolks. And since it’s just a few pantry staples, it’s the kind of treat I can whip up without guilt, even when I’m broke.
Step-by-step instructions for old fashioned vanilla bean ice cream
Here's how to create velvety, swirled ice cream that captures real vanilla flavor from the pod.
Infuse the Cream with Vanilla
In a heavy saucepan, combine the 2 cups heavy cream and the 2 whole vanilla beans. Split each bean lengthwise and scrape out the seeds with the back of a knife, then add both beans and seeds to the cream. Bring to a gentle simmer over medium heat, being careful not to boil vigorously—this would scald the cream and ruin the texture.
Simmer for exactly 5 minutes, stirring occasionally. The cream should be fragrant and slightly warm, but not hot to the touch. Remove from heat and let steep for 30 minutes at room temperature. This infusion creates the rich, authentic vanilla flavor that sets this recipe apart from artificial extracts.
Make the Sugar Syrup
While the cream infuses, whisk together the 1 cup granulated sugar and 4 whole large egg yolks in a heatproof bowl. This mixture should be smooth and pale yellow. Place the bowl over a pot of simmering water (double boiler method), stirring constantly for 5-7 minutes until the mixture thickens enough to coat the back of a spoon and reaches 160°F on an instant-read thermometer.
Here's the thing—don't let it get thicker than pudding consistency. You want it to remain fluid enough to blend smoothly with the warm cream later. Remove from heat immediately once it reaches temperature to prevent curdling.
Temper the Egg Mixture
Slowly pour the warm vanilla cream into the egg mixture while whisking constantly. This gradual addition prevents the eggs from scrambling. Return the combined mixture to the saucepan and cook over low heat, stirring continuously, until it thickens to a custard consistency that coats the back of a spoon. It should reach 170°F and take about 3-5 minutes total cooking time.
Strain the custard through a fine-mesh sieve into a clean bowl to remove the vanilla beans. Press the beans against the sieve to extract every last bit of flavor. Let the custard cool to room temperature, then cover with plastic wrap pressed directly onto the surface to prevent a skin from forming. Chill in the refrigerator for at least 4 hours or overnight.
Incorporate Butter and Freeze
Once completely chilled, whisk in the 0.25 cup cold, cubed unsalted butter until fully melted and incorporated. This step adds luxurious richness and prevents iciness in the final texture. Divide the custard among 4 (4-ounce) plastic or metal containers, leaving about 1-inch headspace at the top.
Freeze for 1 hour, then remove from freezer and vigorously whisk or blend the custard to break up any ice crystals that have formed. Return to the freezer and repeat this process every 30 minutes for 3 hours total. This technique creates that signature creamy texture rather than hard, icy cubes. For extra swirls, layer the custard with additional vanilla bean paste before the final freezing.
Serve at Perfect Texture
For best results, let the ice cream sit at room temperature for 10-15 minutes before serving. This allows it to soften slightly while maintaining its creamy texture. Scoop into bowls and garnish with a few vanilla bean seeds for that old-fashioned touch. Each spoonful should be smooth, rich, and bursting with real vanilla flavor straight from the pod.
Real talk: The first time you taste this homemade version, you'll never go back to artificial extracts again. The custard base gives it that professional quality texture that separates this from basic recipes, while the proper freezing technique ensures it stays creamy from start to finish.
Pro Tips For Making Old Fashioned Vanilla Bean Ice Cream
- SCRATCH THE VANILLA BEANS: Split them lengthwise with a sharp knife—don’t just chop. Scrape out the seeds and rub the empty pods into the warm cream for 30 seconds. This releases more flavor than just dropping in seeds (I used to skip this, and the ice cream always tasted underwhelming).
- TEMPER THE YOLKS: Whisk the egg yolks and sugar together until pale and ribbon-like, then slowly drizzle in the warm cream while stirring constantly. If you pour too fast, you’ll end up with scrambled eggs instead of custard—trust me, I’ve made that mess.
- CHILL THE CUSTARD FAST: Pour the finished custard into a shallow dish or baking pan and refrigerate for at least 4 hours, ideally overnight. This creates a larger surface area for faster cooling, which prevents graininess in the ice cream (and saves you from waiting forever).
- USE COLD BUTTER: Cut the cold unsalted butter into small cubes and fold it into the chilled custard just before churning. This keeps the butter from melting into a greasy mess and gives the ice cream that classic, creamy texture—no need to warm it up first.
Wine and beer pairings for this old fashioned vanilla bean ice cream
Vanilla's Classic Wine Pairings
This creamy vanilla bean ice cream pairs beautifully with dry white wines that complement its richness without overpowering the delicate vanilla notes. A chilled Sauvignon Blanc from New Zealand—like Kim Crawford—works wonders with its bright citrus and herbal undertones.
The wine's acidity cuts through the fat, while the vanilla's sweetness balances the crisp finish. 🍷
For a more luxurious pairing, try a Chardonnay with subtle oak notes, such as Meiomi Pinot Gris or a well-aged California Chardonnay from Kendall-Jackson. The wine's buttery texture mirrors the ice cream's creaminess, while the vanilla's floral aroma enhances the wine's complexity.
Serve both chilled to let the flavors shine.
Unexpected Beer Pairings
Don't overlook light lagers like Heineken or Corona—their crisp, clean profiles let the vanilla bean's aroma take center stage. The beer's subtle sweetness and effervescence create a refreshing contrast to the ice cream's richness.
For a craft option, try a Belgian witbier such as Hoegaarden, which adds a touch of spice and citrus to complement the vanilla's warmth. 🍺
A honey-infused ale like Sierra Nevada Honey Ale also pairs surprisingly well, as the honey's floral notes harmonize with the vanilla while adding a subtle depth. The beer's slight sweetness enhances the ice cream's creamy texture, making each bite feel indulgent. Serve the beer slightly chilled to preserve its crispness.
Coffee and Liqueur Enhancements
For a dessert-focused pairing, serve the ice cream with a strong espresso or a vanilla bean latte. The coffee's bitterness contrasts beautifully with the ice cream's sweetness, while the vanilla in the latte echoes the ice cream's flavor.
A splash of vanilla liqueur, like Giffard Vanille, drizzled over the ice cream adds a sophisticated touch. 💛
If you're feeling adventurous, pair it with a dark chocolate-dipped strawberry and a glass of Port wine. The wine's nutty, fruity notes complement the vanilla's warmth, while the chocolate adds a bittersweet contrast. This combo feels like a decadent dessert experience without being overly heavy.
Seasonal Beverage Swaps
In summer, a sparkling rosé like Whispering Angel adds a refreshing, fruity contrast to the creamy ice cream. The wine's light acidity and berry notes make it a perfect palate cleanser.
For a non-alcoholic option, try sparkling apple cider—the effervescence and slight tartness balance the vanilla's sweetness beautifully. ✨
In winter, a spiced rum cocktail like a Dark 'n' Stormy (with ginger beer) adds warmth and complexity. The rum's caramel and spice notes enhance the vanilla's depth, while the ginger beer's zing cuts through the richness. Serve the cocktail slightly chilled for the best experience.
Nutrition facts
Frequently asked questions
Why do I need to split the vanilla beans instead of just using extract?
Splitting the beans releases the aromatic oils and tiny black seeds that create the complex, layered flavor you can't get from extract. The seeds add subtle speckles and a deeper, more authentic vanilla taste that develops during the 30-minute infusion. Extract is convenient but lacks the depth and natural sweetness of fresh pods.
Can I make this without an ice cream maker?
Yes! After making the custard, pour it into a shallow freezer-safe dish, cover with plastic wrap, and freeze for 4 hours. Then, every 30 minutes for 3 hours, whisk vigorously to break up ice crystals. This manual method creates a creamier texture than store-bought versions. For extra insurance, add 1/4 cup corn syrup to the custard before freezing to prevent iciness.
What's the best way to store leftover ice cream?
Transfer to an airtight container with minimal air space to prevent freezer burn. It keeps for up to 2 months at -10°F or colder. For serving, let it sit at room temperature for 10-15 minutes to soften—never microwave it, or it'll turn grainy. Portion into small containers for easier thawing.
Why did my ice cream turn icy after freezing?
This usually happens from one of three issues: over-churning (too much air), undissolved sugar in the custard, or not whisking during freezing. To fix it next time, ensure the sugar is fully dissolved before churning, and follow the 30-minute whisking routine during freezing. If it's already icy, blend it briefly to smooth out the texture.
Can I substitute heavy cream with half-and-half?
Not recommended—half-and-half has less fat (10-12%) compared to heavy cream's (36-40%), which means your ice cream will be icier and less creamy. If you must, use full-fat coconut milk (for a dairy-free version) or whipping cream instead, but expect a slightly different texture. The fat content is key for that classic velvety mouthfeel.