
Side Dishes
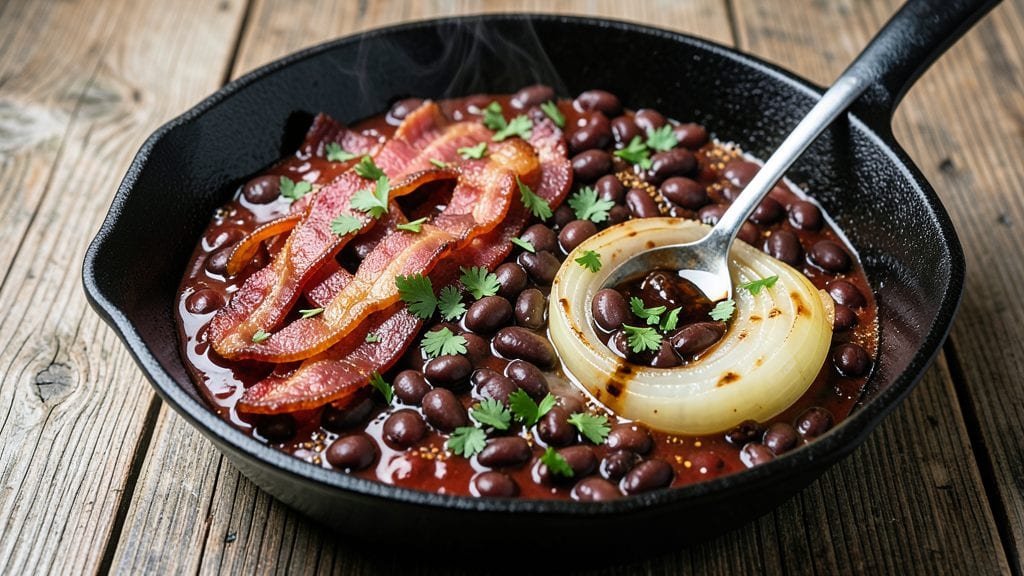
My mom's baked beans recipe is the one dish that always brings back memories of Sunday dinners and that unmistakable smoky-sweet aroma filling the kitchen.
This isn't just a side—it's a centerpiece, slow-simmered until the beans are tender, the bacon crisp, and every bite carries that perfect balance of sweetness and savory depth.
The secret lies in the slow baking process, which transforms tough beans into something rich and velvety, with a caramelized top that begs to be broken through.
What makes this recipe truly special is how it combines traditional techniques with simple ingredients to create restaurant-quality results. You'll start with navy beans simmered in a rich broth of brown sugar, molasses, and a blend of spices that includes smoked paprika for that signature smoky flavor.
The bacon isn't just an addition—it's the star, adding a satisfying crunch that contrasts beautifully with the soft beans. This method ensures the beans stay moist while developing deep, complex flavors over time.
The final product is a dish that's hearty enough to stand alone but perfect as a side for barbecue, grilled meats, or even as a standalone meal. The beans will be fall-apart tender, the sauce thick and glossy, and the bacon bits scattered throughout for that irresistible crunch.
It's the kind of recipe that improves with time, as the flavors meld and deepen with each passing hour in the oven.
Whether you're making it for a family gathering or a cozy weeknight dinner, this baked beans recipe delivers comfort in every bite. The best part?
It's a dish that feels like a hug—warm, inviting, and packed with the kind of flavors that make you want to slow down and savor the moment. Let's get started on recreating this timeless classic.
Ingredients for mom's baked beans
Simple pantry staples transform into the most comforting dish—smoky, sweet, and packed with bacon crunch.
| Ingredient | Amount | Notes |
|---|---|---|
| Navy Beans 🌱 | 2 cups | Dried, soaked overnight |
| Thick-Cut Bacon 🥓 | 12 oz | Chopped into small pieces |
| Brown Sugar 🍯 | ½ cup | Light or dark preferred |
| Molasses 🍯 | ¼ cup | Unsulphured for best flavor |
| Ketchup 🍅 | ½ cup | High-quality, no additives |
| Yellow Onion 🧅 | 1 whole | Diced, yellow or white |
| Garlic Cloves 🧄 | 4 cloves | Minced, fresh preferred |
| Smoked Paprika 🌶️ | 1 tbsp | For that signature smoky flavor |
| Ground Mustard 🌿 | 1 tbsp | Dry, not prepared |
| Black Pepper 🌶️ | ½ tsp | Freshly ground for best flavor |
| Salt 🧂 | 1 ½ tsp | Kosher or sea salt |
| Apple Cider Vinegar 🍏 | 1 tbsp | For tangy brightness |
| Beef Broth 🥫 | 1 cup | Low-sodium preferred |
| Butter 🧈 | 2 tbsp | Unsalted, for richness |
The bacon is non-negotiable here—thick-cut gives the best crunch, and Costco or local butcher sections are your best bets for quality. Look for applewood-smoked if you can find it, but regular bacon works too. The navy beans? Dried is a must—canned beans just don’t have the same texture. Soak them overnight in plenty of water, then drain well. For the molasses, unsulphured is key—it’s sweeter and has that deeper, richer flavor that makes this dish sing. If you can’t find unsulphured, regular molasses will work, but you might need to add a pinch more sugar to balance it out.
No smoked paprika? Substitute half the amount with regular paprika plus a dash of liquid smoke—it’s a game-changer. Running low on molasses? Maple syrup works in a pinch, though it’ll be slightly less rich. The ketchup can be swapped for tomato paste plus a splash of vinegar if you’re avoiding additives. For the onions, yellow or white both work, but red adds a pretty color if you’re feeling fancy. The beef broth can be bouillon powder mixed with water if that’s all you’ve got—just make sure it’s low-sodium so you don’t over-salt the whole dish.
This dish tastes even better the next day, so make it ahead if you can. Store leftovers in the fridge for up to 5 days, covered tightly to keep that caramelized top intact. Reheat gently in the oven at 300°F until warmed through—microwaving makes the bacon soggy. For freezing, portion into airtight containers and keep for up to 3 months. Pro tip: Sprinkle a little extra bacon on top before baking if you’re serving it immediately—it’ll crisp up beautifully and add that irresistible crunch.
Why You'll Love This Recipe
- One-Pan Magic: I swear by this recipe because it’s literally one pot, one oven. Toss in the soaked beans, crispy bacon bits, and that sweet-spicy sauce, then let the oven do the work—no stirring, no stress. (Yes, even on a Tuesday night.)
- Sweet-Savory Balance: That molasses and brown sugar combo? It’s ridiculously good—deep, caramelized, with just enough tang from the ketchup to cut through. The bacon adds this smoky richness that makes every bite feel like a hug.
- Leftovers That Don’t Suck: Between us, most baked beans dry out or get mushy. Not these. The sauce clings to the beans, and they reheat perfectly—whether straight from the fridge or microwaved. I make a double batch just for this reason.
- Budget-Friendly Crowd-Pleaser: Navy beans and bacon stretch for miles, and the pantry staples (ketchup, molasses) won’t break the bank. It’s the dish I pull out for game days, potlucks, or when the kids’ friends show up hungry—no one leaves disappointed.
Step-by-step instructions for mom's baked beans
Here's how to create that perfect balance of smoky, sweet, and savory flavors everyone will beg for.
Cook the Bacon Until Crispy
Place the 12 oz of thick-cut bacon in a large Dutch oven over medium heat. Let it cook slowly for about 10 minutes, stirring occasionally, until it reaches that beautiful golden-brown color and crispy texture. You want the fat to render out completely—this is what gives those rich, smoky layers to your beans.
Once the bacon is perfectly crisp, use a slotted spoon to transfer it to a paper towel-lined plate, leaving all that delicious bacon fat in the pot. Don't drain the fat—this is where all the flavor lives. Real talk: This step makes or breaks your beans, so don't rush it.
Sauté Onions and Garlic in Bacon Fat
In the same Dutch oven with the bacon fat, add the diced yellow onion. Cook over medium heat for about 5 minutes, stirring occasionally, until the onions become translucent and just starting to caramelize. This process builds even more flavor into your beans.
Add the 4 cloves of minced garlic and cook for another 30 seconds until fragrant. Here's the thing—you want the garlic to be aromatic but not browned. If it starts to darken too quickly, reduce the heat slightly. This step is the flavor foundation for everything that follows.
Combine All Ingredients for the Perfect Base
Add the soaked navy beans, 0.5 cup brown sugar, 0.25 cup molasses, 0.5 cup ketchup, 1 tablespoon smoked paprika, 1 tablespoon ground mustard, 0.5 teaspoon black pepper, and 1.5 teaspoons salt to the Dutch oven. Stir everything together until the beans are well coated with the sweet and savory mixture.
Pour in the 1 cup beef broth and add the crispy bacon back to the pot. The bacon will release more flavor as it rehydrates slightly. Stir in the 2 tablespoons butter and 1 tablespoon apple cider vinegar. This combination of ingredients creates that perfect balance of sweet, smoky, and tangy flavors that make these beans so addictive.
Simmer Until Tender and Flavorful
Bring the mixture to a boil, then reduce the heat to low. Cover the Dutch oven and let it simmer for about 2 hours. You'll know it's done when the beans are fork-tender and the sauce has thickened to a perfect consistency. I know it seems like a long time, but trust me—this slow cooking is what develops that deep, rich flavor.
About 30 minutes before the beans are done, give them a good stir and check the liquid level. If it's too thin, uncover the pot and let it reduce slightly. If it's too thick, add a splash of water or broth. The sauce should coat the back of a spoon but still be spoonable. This is where you'll taste all that hard work paying off.
Rest and Serve with Bacon on Top
Once the beans are perfectly tender, remove the pot from heat and let them rest for 10 minutes. This resting period allows the flavors to meld together and gives you a chance to clean up your kitchen before serving.
Transfer the beans to a serving dish and top with extra crispy bacon if you're feeling fancy. The contrast of the warm, sweet beans with the crunchy bacon on top is what makes these beans unforgettable. Serve immediately with cornbread or crusty rolls to soak up all that delicious sauce.
Pro Tips For Making Mom'S Baked Beans
- CRACK THE BEANS FIRST: Navy beans need a good soak—at least 8 hours or overnight—but I learned the hard way that skipping this makes them turn to mush. Use a big pot and cold water, then drain and rinse before cooking. No shortcut here unless you’re okay with gummy beans.
- COOK THE BACON LOW AND SLOW: Thick-cut bacon takes patience. Don’t rush it—render it on medium heat until crispy, then drain all the grease (keep it for another use). The fat’s what makes these beans rich, but too much leaves them greasy. Save the crispy bits for topping.
- DON’T SKIP THE SIMMER: After mixing everything, simmer uncovered for 20-30 minutes. This isn’t just about reducing—it’s where the flavors meld. Stir occasionally, and if it looks too thin, let it bubble away. Trust me, the longer it sits, the deeper the molasses-ketchup-bacon harmony gets.
- UPGRADE WITH A SPLASH OF VINEGAR: A tablespoon of apple cider vinegar brightens the sweetness of the brown sugar and molasses. I was skeptical until I tried it—it cuts through the richness and keeps the beans from tasting cloying. Add it with the ketchup, and don’t overthink it.
Regional styles of this recipe
Southern-Style Comfort
This is the version my mom made every Thanksgiving, slow-cooked until the beans are so tender they practically melt in your mouth. The secret here is the slow oven bake at 300°F for 3-4 hours—not just the stovetop simmer.
I use applewood-smoked bacon from the local butcher, and the key is to brown the onions until deeply caramelized before adding the beans. The molasses gives that rich, almost buttery sweetness that's signature to Southern baked beans. 🍯
Texas BBQ Twist
For a smokier, bolder take, I swap the brown sugar for 1 cup of dark brown sugar and add 1 tbsp of chipotle powder along with the smoked paprika. Texas-style baked beans often include diced jalapeños for heat and a splash of hot sauce at the end.
I like to serve these with grilled brisket—the smoky flavors from the beef and beans complement each other perfectly. The slow cooker works great for this version too.
New England Sweetness
Up north, they keep things sweeter and simpler. New England baked beans often use maple syrup instead of molasses (about ½ cup) and add a pinch of cinnamon for warmth. I've seen recipes that include diced apples or pears for natural sweetness and texture.
The bacon is still essential, but they might use thin-cut bacon for a different crunch. These beans pair beautifully with roasted turkey or cornbread—classic New England comfort food.
Slow Cooker Adaptation
My favorite shortcut is the slow cooker version—just combine all ingredients, cook on low for 6-8 hours, then finish with 30 minutes in the oven at 375°F to crisp the top. I use liquid smoke (about ½ tsp) for that smoky depth when I'm short on time.
The slow cooker keeps the beans perfectly tender while letting the flavors meld. Perfect for game day or when you need a hands-off meal. 🔥
Vegan Version
For a plant-based take, I replace the bacon with smoked tempeh (cubed and pan-fried) and use vegetable broth instead of beef. The molasses stays for sweetness, but I add 1 tbsp of soy sauce for umami depth.
A dash of liquid smoke helps mimic that smoky flavor. These beans are great with grilled veggie burgers or as a hearty side for any plant-based meal. The texture is just as satisfying—promise!
Holiday Leftovers Upgrade
Got leftover baked beans? Don't let them go to waste! I like to reheat them in the oven at 350°F for 20 minutes with a sprinkle of extra bacon bits on top.
For a fun twist, mix them into bean and cheese burritos or serve them as a dip with tortilla chips. The flavors only get better after the first day, so don't hesitate to make extra for leftovers. 💫
Nutrition facts
Frequently asked questions
Why do I need to soak the beans overnight?
Soaking reduces cooking time and prevents tough, dry beans. The navy beans will soften properly and absorb flavors better. For a shortcut, use the quick-soak method: boil beans for 2 minutes, then let them sit covered in hot water for 1 hour before draining.
Can I use canned beans instead of dried?
Yes, but texture will differ. Use 2 (15 oz) cans of navy beans, drained and rinsed. Skip the soaking step, but add 1 extra cup of broth since canned beans have less moisture. The beans will be softer but still delicious—just less traditional.
How do I prevent the sauce from getting too thin?
Simmer uncovered for the last 15-20 minutes to thicken naturally. If needed, mix 1 tbsp cornstarch with 2 tbsp water, stir into the beans, and simmer 5 minutes more. Never add flour directly—it won't dissolve properly.
What's the best way to reheat leftovers?
Oven reheating preserves texture best: cover with foil and bake at 300°F for 20-25 minutes. For microwave reheating, use 30-second intervals on low power, stirring between each. Always add a splash of water or broth to prevent drying out.
Can I make these beans in a slow cooker?
Combine all ingredients (except bacon) in the slow cooker, cook on low for 6-8 hours, then stir in crispy bacon. For extra richness, finish with 30 minutes in a 375°F oven to crisp the top. The slow cooker version tastes even better the next day!