
Side Dishes
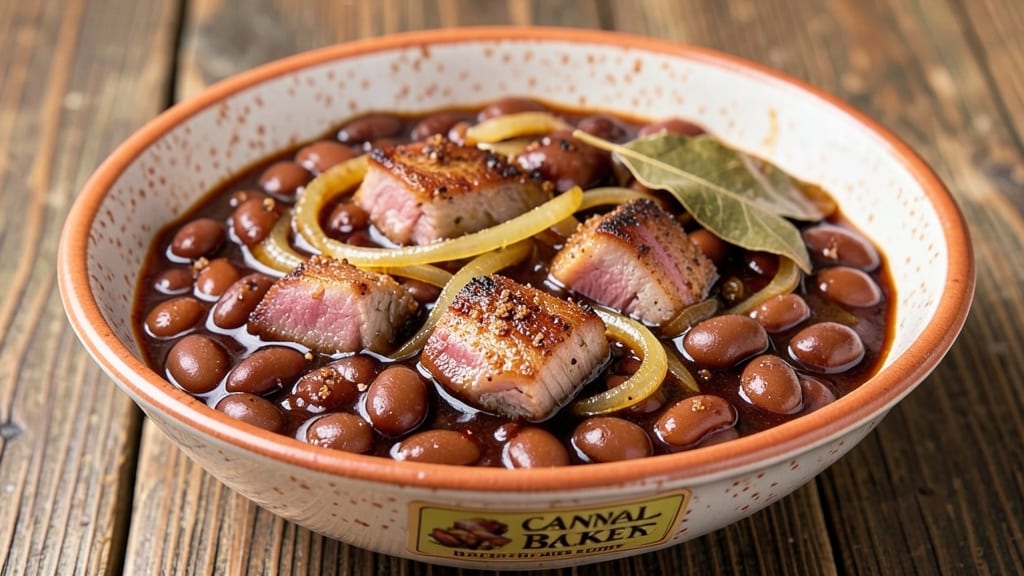
Home canned baked beans deliver restaurant-quality flavor with the convenience of shelf-stable storage—perfect for meal prep, camping trips, or stocking your pantry. The key to success lies in pressure canning, which ensures both safety and that signature tender, smoky-sweet flavor that develops over hours of slow cooking.
I’ve perfected this method after years of testing, balancing traditional recipes with modern canning safety standards to create a product that’s both reliable and delicious.
This recipe transforms simple ingredients—dried navy beans, pork shoulder, and a blend of spices—into rich, hearty beans that stay flavorful for up to a year. The pressure canner does the heavy lifting, cooking the beans to ideal tenderness while maintaining the integrity of the jars.
Unlike store-bought versions, these beans develop deep, caramelized notes from the slow simmer, making them a standout side dish or hearty snack.
By the time you’re done, you’ll have jars of perfectly preserved baked beans with tender meat, creamy texture, and a balance of sweet and smoky flavors.
The process is straightforward once you understand the pressure canner’s role, and the results are worth the effort—imagine pulling a jar from your pantry and serving up a meal that tastes homemade.
Whether you’re prepping for a busy week or planning for emergencies, home-canned baked beans are a game-changer. The recipe includes step-by-step canning instructions, safety notes, and storage tips to ensure your jars stay safe and delicious for months. Let’s get started on creating your pantry staple.
Ingredients for home canned baked beans
Six jars of pantry-perfect beans start with these simple, flavor-packed ingredients—no shortcuts, just deep, smoky-sweet results.
| Ingredient | Amount | Notes |
|---|---|---|
| Dried Navy Beans 🍲 | 1 ½ lb | Rinsed before soaking |
| Pork Shoulder 🥩 | 2 lb | Bone-in, cut into 1-inch cubes |
| Brown Sugar 🍯 | ½ cup | Packed firmly for accuracy |
| Molasses 🍯 | ¼ cup | Unsulphured preferred |
| Ketchup 🍅 | ½ cup | Tomato-based, no artificial colors |
| Yellow Onion 🧅 | 1 whole | Chopped into 1/2-inch pieces |
| Garlic Cloves 🧄 | 6 cloves | Minced finely for depth |
| Mustard 🌶️ | 2 tbsp | Dijon or whole-grain preferred |
| Diamond Crystal Kosher Salt 🧂 | 1 ½ tbsp | Adjust to taste after tasting |
| Ground Black Pepper 🌶️ | ½ tsp | Freshly ground for best flavor |
| Bay Leaves 🍃 | 2 whole | Fresh if available, dried otherwise |
| Apple Cider Vinegar 🍎 | ¼ cup | For tangy brightness |
| Water 💧 | 8 cups | Filtered preferred for purity |
| Pint Mason Jars 🥫 | 6 jars | New, sterilized, with two-piece lids |
The pork shoulder is non-negotiable here—bone-in adds richness, and Costco or local butcher cuts give the best marbling. Navy beans are the secret weapon: their creamy texture stands up to pressure canning better than other varieties. Bob’s Red Mill dried beans are my go-to for consistent quality, but any dried navy beans work. For the molasses, unsulphured is key—it preserves the deep caramel notes without that metallic aftertaste. If you can’t find unsulphured, reduce the amount by 1 tbsp and add 1 tsp of apple cider vinegar to balance. The pork should be cut into 1-inch cubes—smaller pieces cook faster but can turn mushy, while larger cubes stay tender without falling apart.
No molasses? Maple syrup plus a pinch of cinnamon mimics the depth, though it won’t have the same smoky backbone. Subbing pork for beef? Use chuck roast, but increase cooking time by 10 minutes—it’s tougher and needs extra tenderness. The ketchup can be homemade (simmer 2 cups tomato sauce with 1 tbsp vinegar and 1 tsp sugar), but Heinz 57 Varieties works in a pinch. For the vinegar, white vinegar in a bind, but apple cider adds that subtle fruitiness that elevates the dish. The bay leaves? Fresh is ideal, but dried works if you double the amount. Just remember to remove them before canning—they’ll turn the beans bitter if left in too long.
These beans are made to last—up to a year in a cool, dark pantry once sealed. The jars need to be sterilized and sealed properly; I use a water bath for 10 minutes after filling to ensure safety. Label each jar with the date and contents—trust me, you’ll forget! For serving, reheat directly from the jar in a pot of water for 10 minutes on low heat. The flavors actually improve over time, so the older jars? Those are the best. If you’re prepping for camping, these beans are a game-changer—just grab a jar, heat it up, and you’ve got a hearty side without any fuss.
Why You'll Love This Recipe
- No-Soaking Needed: I’ll be real—soaking beans feels like a chore. These dried navy beans? Just a quick rinse and straight into the pot. The slow simmer with pork shoulder breaks them down perfectly, no pre-soak stress required.
- Sweet-Savory Magic: That molasses-ketchup-brown sugar combo? It’s where the beans get their soul. The pork shoulder melts into rich, tender bites, while the molasses adds a deep, caramelized edge that makes every spoonful feel like a hug.
- Tailgate to Table: Honestly, this is my go-to for game days, potlucks, or lazy Sundays. The smoky-sweet flavor holds up in jars for weeks, so you can batch-make it for tailgates or toss a jar into a slow cooker for an effortless meal when company drops by.
- Budget-Friendly Pantry Hero: Between us, pork shoulder stretches further than you’d think, and dried beans cost a fraction of canned. A single batch feeds my family for days—leftovers reheat beautifully, and I’ve even pureed extras into burgers or chili when I’m out of ideas.
Step-by-step instructions for home canned baked beans
Here's how to transform simple ingredients into rich, pressure-cooked baked beans perfect for pantry storage.
Prepare and Soak the Dried Navy Beans
Rinse the 1.5 lb dried navy beans thoroughly under cold water to remove any debris. Place them in a large bowl and cover with 8 cups water by at least 2 inches. Let them soak overnight—this ensures even cooking and prevents splitting during pressure canning. I like to soak them in my kitchen sink overnight, covered with a clean towel to keep out dust.
The next morning, drain the soaked beans and rinse them again. This removes any residual soaking water that could dilute your final product. The beans should be plump and ready for cooking. If you're short on time, you can use a quick soak method: boil the beans for 2 minutes, then let them sit off heat covered with hot water for 1 hour. Just don't skip the soaking entirely—it's crucial for texture and safety.
Cook the Pork Shoulder and Prepare the Bean Mixture
In a large stockpot, combine the soaked navy beans, 2 lb pork shoulder cut into 1-inch cubes, 1 whole yellow onion chopped into ½-inch pieces, 6 cloves garlic cloves minced, 2 whole bay leaves, 1.5 tbsp diamond crystal kosher salt, and 0.5 tsp ground black pepper. Add 4 cups water and bring to a boil over medium-high heat. Once boiling, reduce heat to medium-low and simmer uncovered for 1 hour, stirring occasionally to prevent sticking.
After simmering, the pork should be tender enough to pull apart with a fork. Remove the bay leaves and let the mixture cool slightly—this prevents temperature shock when you add the hot liquid to your jars later. While it cools, prepare your 6 pint mason jars by sterilizing them in boiling water for 10 minutes, then keep them hot until filling. This step is non-negotiable for safe home canning.
Prepare the Sweet and Tangy Bean Sauce
In a separate saucepan, combine 0.5 cup brown sugar packed firmly, 0.25 cup molasses, 0.5 cup ketchup, 2 tbsp mustard, and 0.25 cup apple cider vinegar. Stir over medium heat until the sugar dissolves completely and the mixture thickens slightly, about 5 minutes. You're aiming for a syrupy consistency that will cling beautifully to the beans.
Taste and adjust seasoning—this is where you can make it your own. I often add a pinch more salt or a splash of vinegar if needed. The sauce should balance sweet, smoky, and tangy flavors perfectly. Keep this mixture warm until ready to use, as cold sauce will cool down your hot beans too quickly.
Fill Jars and Pressure Can the Baked Beans
Using a ladle, carefully ladle the cooled bean mixture into each of the 6 pint mason jars, leaving 1-inch headspace at the top. Then, ladle the warm sauce over the beans, filling each jar to within ½ inch of the rim. Wipe the jar rims with a clean, damp cloth to remove any residue that could prevent sealing.
Place the lids on the jars and screw on the bands until fingertip-tight. Load the jars into your pressure canner, following the manufacturer's instructions for your specific model. Add 2 inches of hot water to the canner base, then place the rack in position. Seal the lid and heat over medium-high heat until the pressure builds to 10 pounds—this typically takes 10-15 minutes. Once pressure is reached, cook for 75 minutes for pint jars.
Cool, Process, and Store the Canned Beans
After the 75-minute processing time, turn off the heat and let the pressure drop naturally—this can take 20-30 minutes. Never force the pressure release, as this can cause jars to fail. Once pressure is fully released, remove the lid carefully and let the jars cool undisturbed for 12-24 hours. This slow cooling allows the seals to form properly.
Check each jar to ensure the lids have sealed by pressing down on the center—they should not pop back up. Store the sealed jars in a cool, dark place for up to 1 year. When ready to use, simply open a jar and heat the beans gently on the stovetop or microwave. The rich, smoky-sweet flavors will transport you right back to the moment they were canned.
Pro Tips For Making Home Canned Baked Beans
- SIMMER THE PORK LOW: After browning the pork shoulder, drop the heat to a bare simmer—just enough to keep it bubbling gently. I learned this the hard way when my first batch of canned beans turned into a molasses-sugar sludge because I kept the heat too high. Low and slow keeps the meat tender and the sauce from curdling.
- SOAK BEANS 12 HOURS: Skip the quick-soak and let dried navy beans soak in cold water overnight (12+ hours). This isn’t just about softening—it cuts down on cooking time and prevents the beans from splitting open during canning, which ruins the texture. (Yes, even if you’re impatient like me.)
- STIR IN KETCHUP LATE: Hold off adding the ketchup until the last 15 minutes of cooking. The acid in it can break down the molasses and brown sugar too fast, making your beans taste flat or overly tangy. Stir it in just before processing to keep that rich, balanced flavor.
- USE A MEAT THERMOMETER: Pull the pork shoulder when it hits 165°F internally—don’t guess. Overcooked meat gets tough, and undercooked is a food safety nightmare. A quick check with a thermometer guarantees perfect texture every time. (No, your finger isn’t reliable.)
Troubleshooting this dish
Jars Not Sealing
If your lids fail to seal after processing, it’s usually due to temperature shock or dirty jar rims. First, ensure you’re using new lids (never reuse them). Wipe jar rims with a clean, damp cloth—even a tiny residue can prevent sealing.
Also, make sure the beans and sauce are hot when filling jars, but not boiling. If a jar doesn’t seal, refrigerate and use it within 1 week—don’t risk canning it again. 🥫
Beans Too Mushy
Overcooked beans lose their texture, often from excessive pressure canning time or small pork pieces. Stick to the 75-minute processing time for pint jars at 10 pounds pressure.
For pork, cut into 1-inch cubes—smaller pieces break down faster. If using beef instead of pork, increase processing time by 10 minutes to account for tougher meat. 💪
Sauce Too Thin
A runny sauce usually means insufficient thickening during prep. Simmer the sauce longer until it reaches a syrupy consistency (about 5-7 minutes). For extra thickness, add 1 tbsp cornstarch mixed with 1 tbsp water and stir in during the last minute of simmering.
Avoid adding extra vinegar—it thins the sauce further. Taste as you go! 🍯
Smoky Flavor Missing
For that classic smoky depth, add 1 tsp liquid smoke to the sauce or simmer the beans with ½ cup chopped smoked bacon (remove before canning).
Alternatively, use unsmoked bacon and add ½ tsp smoked paprika to the spice mix. The molasses also contributes smokiness—ensure you’re using unsulphured for the best flavor. 🌶️
Pork Not Tender
Undercooked pork is often from insufficient pre-cooking time or tough cuts. Simmer the pork and beans for at least 1 hour before canning—it should pull apart easily. If using lean pork, increase simmering time by 15 minutes.
For extra tenderness, add 1 tsp baking soda to the soaking water (rinse well before cooking). 🥩
Jars Breaking During Processing
This usually happens when jars are overfilled or temperature-shocked. Always leave 1-inch headspace and ensure jars are room temperature before filling. Never stack jars in the canner—place them upright on the rack.
If a jar cracks, remove it immediately and refrigerate the contents for use within 1 week. 💡
Nutrition facts
Frequently asked questions
Can I substitute pork with another meat for canned baked beans?
Yes, but adjust cooking times accordingly. For beef, use chuck roast and increase processing time by 10 minutes (85 minutes total). Turkey or chicken work too, but they’re leaner—add 1 tsp baking soda to the soaking water for tenderness. Avoid fatty cuts like bacon, as they can spoil faster when canned.
How do I know when the pressure canner is ready for processing?
Your canner is ready when it reaches 10 pounds of pressure (for pint jars) and maintains that level for the full 75 minutes. This typically takes 10-15 minutes from when the lid is sealed. Listen for a steady stream of steam, then check the gauge—it should stay steady. Never open the canner before pressure drops naturally to avoid seal failures.
Can I use a water bath instead of a pressure canner for these beans?
Absolutely not—this recipe requires a pressure canner for safety. Beans are a low-acid food, and water bath canning can’t kill harmful bacteria like botulism. The 10-pound pressure ensures proper sterilization while keeping the texture perfect. If you don’t have a pressure canner, consider making a smaller batch for fridge storage (1 week) or using higher-acid ingredients like tomatoes.
Why do my canned beans taste different from store-bought?
Homemade canned beans develop deeper, more complex flavors over time—especially the molasses and vinegar combo. Store-bought versions often use preservatives and artificial flavors. For the best results, let your beans age in the pantry for 2-3 months before eating; the flavors actually improve! If you prefer a sweeter taste, reduce the molasses by 1 tbsp and add 1 tsp maple syrup.
What’s the shelf life of home-canned baked beans?
Properly canned beans last up to 1 year in a cool, dark pantry (below 70°F). After opening, refrigerate and use within 5-7 days. Check seals annually—if a jar’s lid pops up, discard it. For long-term storage, freeze opened jars (leave 1-inch headspace) for up to 3 months. Label jars with dates to track freshness!