
Side Dishes
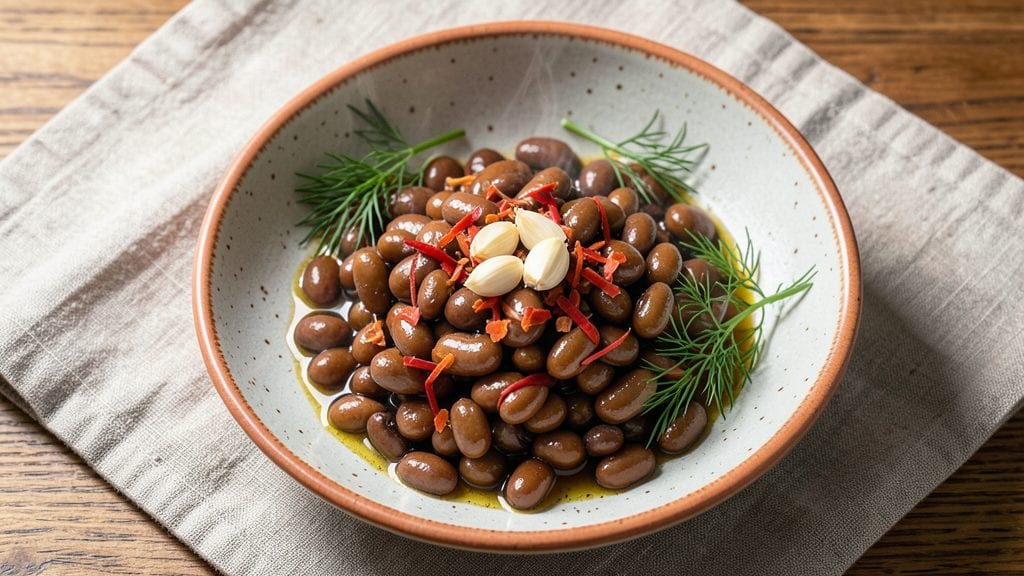
This fermenting beans recipe unlocks a world of tangy, umami-rich flavor, turning humble legumes into a bold condiment or side dish.
After just 5 days of fermentation, these beans develop complex, savory notes that elevate soups, stews, and even salads—think Korean jang, Japanese miso, or Mexican frijoles fermentados. The process is straightforward but requires precision in hygiene and temperature control to ensure safety and consistency.
This recipe starts with soaking beans overnight to soften them, followed by a simple saltwater brine that kickstarts fermentation. You’ll need just 2 ingredients—beans and non-iodized salt—and a clean fermentation vessel, like a mason jar or fermentation crock.
The key lies in maintaining a cool, dark environment (65–75°F) to encourage beneficial bacteria while preventing mold or spoilage.
By day 5, your beans will have developed a bright, acidic tang with deep umami undertones—perfect for adding depth to dishes without overpowering them. Use them as a condiment, stir them into soups, or blend them into spreads.
The flavor only intensifies over time, making this a pantry staple worth mastering.
For best results, start with dried beans (black, adzuki, or navy work well) and follow strict hygiene practices—sterilize jars, use filtered water, and keep surfaces clean. Optional variations include adding garlic, chili, or herbs during fermentation for extra layers of flavor. Let’s get fermenting!
Ingredients for fermenting beans
Two core ingredients and optional flavor boosters transform simple beans into fermented umami gold.
| Ingredient | Amount | Notes |
|---|---|---|
| Dried Black Beans 🌱 | 1 lb | Organic preferred for fermentation |
| Non-Iodized Sea Salt 🧂 | 1 ½ tbsp | Diamond Crystal preferred |
| Filtered Water 💧 | 4 cups | Room temperature preferred |
| Garlic Cloves 🧄 | 4 cloves | Optional, for flavor variation |
| Red Chili Flakes 🌶️ | 1 tsp | Optional, for heat variation |
| Fresh Dill Sprigs 🌿 | 4 whole | Optional, for herb variation |
| Mason Jars 🥫 | 2 whole | Quart-sized, sterilized required |
| Fermentation Weights 🔆 | 2 whole | Glass or ceramic preferred |
The dried beans form the foundation—opt for organic black beans from Whole Foods bulk section or high-quality brands like Patagonia Provisions for optimal fermentation. Non-iodized salt is critical as iodine inhibits beneficial bacteria growth; Diamond Crystal kosher salt delivers consistent results. Sterilize your quart-sized mason jars by boiling them for 10 minutes—this prevents mold contamination during fermentation. For the optional flavor variations, garlic cloves should be peeled but left whole, while chili flakes and dill sprigs can be added directly to jars after packing the beans.
No organic beans? Conventional dried beans work fine if thoroughly rinsed first. Short on salt? Morton kosher salt in a pinch, though it may require slight taste adjustments. Want extra umami without garlic? Add 1 tbsp soy sauce or 2 tbsp nutritional yeast to the brine. For heat, substitute cayenne pepper at half the amount—it disperses more evenly. The fermentation weights keep beans submerged; if unavailable, use sterilized stones wrapped in cheesecloth as a substitute. All optional ingredients can be omitted for a classic fermented bean base.
Store fermented beans in a cool, dark place (65-75°F) for optimal flavor development. They'll be ready in 5-7 days but continue improving for up to 3 weeks. Once opened, transfer to the refrigerator and consume within 2 weeks. For long-term storage, freeze portions in airtight containers for up to 6 months. The brine can be reused for subsequent batches, though flavor may mellow after the first fermentation cycle.
Why You'll Love This Recipe
- No-Soaking Needed: I’ll be real—soaking beans for hours is a relic of the past. These dried black beans ferment so well they barely need prepping; just rinse, salt, and let them work their magic. My lazy Sundays just got a whole lot easier.
- Umami Bomb: That first bite? The garlic and chili flakes punch through the fermented tang like a flavor grenade. It’s not just "good"—it’s the kind of taste that makes you pause mid-chew, like, "Wait, why isn’t this in everything?"
- Meal Prep MVP: I toss these into rice bowls, wrap them in tortillas, or just eat them straight with lime—no two meals feel the same. Honestly, the only limit is your imagination (and maybe your fridge space).
- Pantry Goldmine: A bag of dried beans costs less than a coffee run, and this method turns them into a probiotic powerhouse. Plus, the leftovers? They keep for weeks, so I’m basically printing money in flavor. (Okay, not really, but close.)
Step-by-step instructions for fermenting beans
Transform ordinary dried black beans into tangy, probiotic-rich fermented beans with this precise method.
Prepare the Beans and Brine Solution
Rinse the 1 lb dried black beans thoroughly under cold water to remove any debris. Place them in a large bowl and cover with the 4 cups filtered water. Let them soak for at least 12 hours, or ideally overnight, until they've doubled in size and feel tender when pressed between your fingers. This hydration step is critical—under-soaked beans won't ferment evenly.
Drain and rinse the soaked beans again. In a separate bowl, dissolve the 1.5 tbsp non-iodized sea salt completely in 1 cup of the filtered water. This creates a saturated brine solution that will preserve and flavor the beans during fermentation. The salt concentration is precise—too little risks spoilage, while too much can inhibit fermentation.
Sterilize Equipment and Assemble Jars
Thoroughly wash and sterilize the 2 quart-sized mason jars by boiling them in water for 10 minutes. This eliminates any existing bacteria that could compete with your desired fermentation cultures. While still hot, fill each jar about halfway with the soaked black beans, dividing them evenly between both containers.
Add 2 of the garlic cloves and 2 of the fresh dill sprigs to each jar. The garlic introduces antimicrobial properties while adding depth of flavor, and the dill contributes bright, herbal notes. Distribute the 1 tsp red chili flakes evenly between the jars for subtle heat. Pack the ingredients tightly but don't press down—this creates space for the liquid to cover the beans completely.
Create the Fermentation Environment
Pour the prepared brine solution over the beans in each jar until they're completely submerged by at least 1 inch. This liquid coverage prevents mold growth and ensures anaerobic conditions for proper fermentation. Place the fermentation weights on top of the beans to keep them submerged as gases are produced during fermentation.
Leave about 1 inch of headspace at the top of each jar. This prevents overflow as the beans expand and gases form. Seal the jars loosely—either with their regular lids slightly ajar or with fermentation-specific lids that allow gas escape. Place the jars in a location that maintains a consistent temperature between 68-72°F, such as a pantry or countertop away from direct sunlight.
Monitor and Maintain Fermentation
After 24 hours, you'll notice bubbles forming in the jars and some liquid overflow. This indicates active fermentation. Check the jars daily and ensure the beans remain completely submerged by topping off with additional brine if needed. The fermentation process should produce a noticeable tangy aroma after 3-4 days.
After 5 days, taste-test the beans. They should have developed a pleasant tanginess and slight sourness. The flavor will continue developing for several more days, but the texture will become mushy if left too long. For optimal results, consume within 7-10 days. Store any remaining fermented beans in the refrigerator to slow further fermentation and preserve freshness.
Use and Store Fermented Beans
Use the fermented beans immediately in recipes or store them in airtight containers in the refrigerator for up to 3 weeks. Their tangy, umami-rich flavor makes them perfect for soups, stews, or as a condiment. When cooking, reduce the salt in your recipes as these beans are already salt-cured.
For best results, always use clean utensils when handling the fermented beans to prevent contamination. If you notice any signs of mold, off odors, or excessive fizzing, discard the batch immediately. Proper fermentation should yield beans with a vibrant color, pleasant aroma, and complex flavor profile that elevates any dish they're added to.
Pro Tips For Making Fermenting Beans
- SOAK BEANS TWICE: Drain and rinse them mid-soak after 4 hours—this cuts down on the gassy, bloated feeling later. I learned this the hard way after a batch left me doubled over at the dinner table.
- SALT THE WATER: Add the sea salt to the soaking water (about 1.5 tablespoons per pound of beans) to soften them faster and prevent skin splitting. Sounds weird, but it works—your beans will absorb flavor while they hydrate.
- SKIP THE BOIL: Simmer, don’t boil, when cooking fermented beans—boiling turns them mushy and ruins the texture. Start with a gentle bubble, then cover and let them cook low and slow for 45-60 minutes.
- CRUSH GARLIC FIRST: Smash the garlic cloves with the flat of your knife before adding them—this releases more flavor without burning. I was skeptical until I tried it; now I never go back.
Make-ahead tips for this fermenting beans
Prep Ahead Timeline
Start by soaking your 1 lb dried beans overnight (at least 12 hours) to soften them properly. This step can be done the night before, saving you time on day one.
I like to set a timer on my phone so I remember to drain and rinse them first thing in the morning. This preparation ensures your beans will ferment evenly and develop optimal texture. 🌱
Fermentation Scheduling
Plan for a 5-day fermentation window at room temperature (68-72°F) before transferring to the fridge. I recommend setting aside a dedicated spot in your kitchen—like a pantry corner—to maintain consistent conditions.
Mark your calendar with the start date so you remember to taste-test after 5 days and again at 7 days for peak flavor. This advance planning prevents forgetting about your fermenting beans.
Equipment Prep
Sterilize your quart-sized mason jars and fermentation weights the day before you start. Simply boil them for 10 minutes and let them air-dry on a clean towel. I store them in a sealed container until ready to use.
This pre-preparation eliminates last-minute stress and ensures your fermentation environment is pristine. Keep a small bowl of filtered water nearby for quick rinsing of tools during the process. ✨
Flavor Variations Prep
If using optional flavorings like garlic, chili, or dill, prepare them the night before. Peel the garlic cloves and store them in a small bowl covered with plastic wrap. Rinse and dry the dill sprigs thoroughly and place them in a sealed container.
This advance prep makes assembling your jars faster on day one. I find this especially helpful when hosting dinner parties where I want to incorporate fermented beans into multiple dishes. 🧄
Storage Prep
Have airtight containers ready for storing your fermented beans after the 5-day mark. I prefer glass containers with snap-on lids for easy stacking in the refrigerator. Label them with the date and contents to track freshness.
For long-term storage, prepare freezer-safe bags by measuring and portioning your fermented beans ahead of time. This organization makes it easy to grab just what you need for recipes without transferring large quantities. ❄️
Safety Checklist
Create a quick safety checklist to follow during the process: sterilize all equipment, use filtered water, maintain proper temperature, and keep beans submerged. I print this out and tape it to my fridge as a reminder.
Also, prepare a backup plan for any potential issues—like having extra jars on hand if one develops mold. This proactive approach ensures your fermentation stays safe and successful from start to finish. 💡
Nutrition facts
Frequently asked questions
Can I use canned beans instead of dried for fermenting?
No, canned beans won't work for fermentation—they're already cooked and lack the proper texture and microbial activity needed. Dried beans contain live cultures on their surface that kickstart fermentation. Always start with high-quality dried beans like black, adzuki, or navy for best results.
What if my fermented beans smell bad or have mold?
Discard them immediately if you notice foul odors (like rotten eggs) or visible mold. These are signs of harmful bacteria or spoilage. Always maintain a clean workspace, use sterilized equipment, and keep beans submerged in brine to prevent contamination. When in doubt, throw it out—fermentation gone wrong can cause foodborne illness.
How do I know when the beans are fully fermented?
After 5 days, your beans should have a bright, tangy aroma and slightly sour taste. Look for bubbles in the jar and a noticeable reduction in the brine level. The texture will be tender but still hold its shape. Taste-test daily after day 3—flavor peaks around 7-10 days before becoming too soft.
Can I add other vegetables or proteins to ferment with the beans?
Yes! Try fermenting with carrots, bell peppers, or mushrooms for added nutrition. For proteins, use tofu or tempeh—just ensure everything is properly submerged and sterilized. Avoid raw meats or dairy as they can spoil quickly. The key is maintaining balance: beans should be the primary ingredient (at least 50% of the jar) for optimal fermentation.
How long can I store fermented beans in the fridge?
Fermented beans stay fresh in the refrigerator for up to 3 weeks in airtight containers. The flavor will continue developing but slows significantly when cold. For longer storage, freeze portions in airtight containers for up to 6 months. Label with dates to track freshness—older batches may become more sour or mushy over time.