Side Dishes
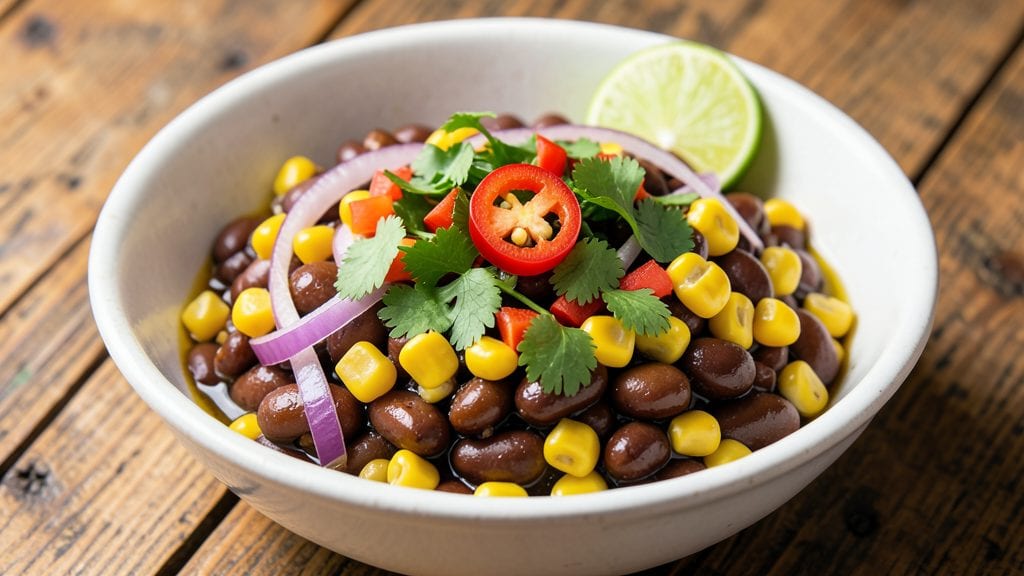
This canned black bean and corn salsa recipe delivers restaurant-quality flavor with zero cooking required—just chop, mix, and taste the difference in 10 minutes. The secret lies in balancing canned beans and corn with fresh lime, cilantro, and a pinch of salt, creating a texture that’s creamy yet bright.
I developed this after craving fresh salsa without the hassle of fresh produce, and it’s become my go-to for quick meals or last-minute appetizers.
The beauty of this recipe is its versatility—it works as a dip, taco topping, or even a filling for veggie wraps. Canned beans and corn cut prep time dramatically while delivering the same satisfying bite as fresh versions.
A splash of lime juice keeps the flavors vibrant, while chopped cilantro adds freshness that elevates every spoonful.
What you’ll end up with is a zesty, no-cook salsa that’s creamy from the beans, slightly crunchy from the corn, and packed with bright, tangy flavor. The acidity from lime and vinegar cuts through the richness, making it perfect for balancing spicy dishes or standing alone with tortilla chips.
No cooking means no cleanup—just assemble and enjoy.
For extra depth, add a dash of hot sauce or diced jalapeños, but keep it mild for a crowd-friendly option. Serve immediately or store in the fridge for up to 3 days—though it rarely lasts that long. Let’s make this salsa!
Ingredients for canned black bean and corn salsa
Nine simple ingredients transform into creamy, zesty salsa with no cooking required.
| Ingredient | Amount | Notes |
|---|---|---|
| Canned Black Beans 🌽 | 1 ½ cups | Drained and rinsed thoroughly |
| Canned Corn Kernels 🌽 | 1 cup | Drained and rinsed |
| Fresh Lime 🍋 | 1 whole | Juiced, seeds removed |
| Fresh Cilantro 🌿 | ½ cup | Chopped, stems removed |
| Red Onion 🧅 | ¼ cup | Finely diced |
| Jalapeño Pepper 🌶️ | 1 whole | Seeds removed, finely diced |
| Red Vinegar 🍶 | 1 tbsp | For tangy brightness |
| Sea Salt 🧂 | ½ tsp | Adjust to taste |
| Avocado Oil 🫒 | 1 tbsp | For creaminess |
| Garlic Cloves 🧄 | 2 cloves | Minced |
| Hot Sauce 🔥 | ½ tbsp | Optional, for heat |
| Tortilla Chips 🍟 | 2 cups | For serving (optional) |
The black beans are the heart of this salsa—look for no-salt-added cans at Trader Joe's or Whole Foods for the best flavor. The corn should be sweet and tender; if using frozen, thaw and drain well. Fresh lime is a must—its juice brightens everything. I always grab extra cilantro because it wilts fast, and Mexican cilantro from the Latin market has a more citrusy kick. Red onions add a sharp bite, so don’t skip them. The jalapeño? Use seeds for heat or remove them for a milder salsa.
No fresh lime? Lemon juice works in a pinch, but it’s not the same. Running out of cilantro? Fresh parsley at half the amount keeps things green. The avocado oil adds creaminess—olive oil works too, but it’s stronger. Want more depth? Add a pinch of smoked paprika. The hot sauce is optional, but if you add it, start with just a few drops and taste as you go. The tortilla chips are for serving, but this salsa is great on tacos, tostadas, or even as a topping for veggie bowls.
This salsa keeps beautifully in an airtight container in the fridge for 3-4 days. The flavors actually get better after a night in the fridge as everything melds. I like to portion it into small jars for easy grab-and-go lunches. If you make extra, freeze it in ice cube trays—perfect for quick topping additions later. The chips? Store them in a sealed bag to keep them crispy.
Why You'll Love This Recipe
- Pantry to Plate: I swear by this—no fresh produce aisle stress, just open cans and chop. The black beans and corn are already cooked, so I’m mixing, squeezing lime, and done in 10 minutes flat. Honestly, my lazy Sundays have never been happier.
- Zesty Kick: That lime juice cuts through the richness like a cool breeze. The cilantro’s bright punch and red onion’s sharp bite make every spoonful feel fresh, even if I’m using last week’s tortilla chips.
- Game for Any Meal: Slather it on tacos, fold it into scrambled eggs, or just eat it straight with a spoon. I’ve served it at BBQs, packed it in lunches, and even tossed it into soup when I was out of ideas. It’s the chameleon of snacks.
- Budget-Friendly Hero: A can of beans and corn lasts me ages, and I’m not spending extra on fancy ingredients. Plus, leftovers? They taste just as good three days later—perfect for when I forget to meal prep. My wallet and taste buds win.
Step-by-step instructions for canned black bean and corn salsa
Here's how to make this vibrant, no-cook salsa in minutes—no fancy skills required.
Prepare the Base Ingredients
Start by draining and rinsing the 1.5 cups canned black beans and 1 cup canned corn kernels thoroughly under cold water. Pat them dry with a clean kitchen towel to remove any excess moisture—this keeps your salsa from getting watery. I like to use my hands for this step because it helps me feel the texture and ensures everything is properly dried.
Next, finely dice the 0.25 cup red onion and remove the seeds from the 1 whole jalapeño pepper, then dice it as well. The smaller you cut these, the more evenly distributed the flavors will be in each bite. I keep a small bowl nearby to collect the diced ingredients as I go—it makes the next steps much cleaner.
Build the Flavor Foundation
In a large mixing bowl, combine the drained black beans, corn kernels, diced onion, and jalapeño. Add the 2 cloves minced garlic and 0.5 cup chopped cilantro to the mix. Give everything a good stir with a wooden spoon to distribute the ingredients evenly. This is where the textures start to come together—you'll notice the corn and beans create a nice contrast with the soft onion and jalapeño.
Now it's time for the bright, tangy elements. Squeeze the juice from the 1 whole lime (about 2 tablespoons juice) and pour it over the mixture. Add the 1 tablespoon red vinegar and 0.5 teaspoon sea salt, then drizzle in the 1 tablespoon avocado oil. Stir everything together again, making sure the oil coats all the ingredients—this helps bind the flavors and adds a lovely creaminess.
Finish with Heat and Balance
Taste your salsa at this point. If you'd like a little kick, add the 0.5 tablespoon hot sauce and stir well. I always taste as I go because everyone's heat preference is different—you can adjust the amount to suit your taste. Let the salsa sit for 5 minutes while you prepare your serving bowls or tortilla chips. This short rest allows all the flavors to meld together beautifully.
Give the salsa one final stir before serving. The texture should be chunky but well-combined, with bright pops of lime and vinegar cutting through the richness of the beans and corn. If it seems too thick, add 1-2 teaspoons of water to loosen it up. The salsa is ready to enjoy immediately—no cooking required!
Serve with Crunch
Transfer the salsa to serving bowls and top with an extra sprinkle of chopped cilantro for freshness. Serve it alongside the 2 cups tortilla chips for scooping, or use it as a topping for grilled meats, tacos, or even as a dip for fresh vegetables. The contrast of the crunchy chips with the creamy, zesty salsa makes every bite exciting.
This salsa keeps well in the refrigerator for up to 4 days, though I find it's best enjoyed fresh. If you have leftovers, store them in an airtight container and give them a quick stir before serving to revive the flavors. The beauty of this recipe is its simplicity—just a few ingredients coming together to create something truly delicious.
Pro Tips For Making Canned Black Bean And Corn Salsa
- Drain and Rinse Beans: Skip the soak, but don’t skip rinsing those canned black beans—even if the label says “no salt added.” A quick cold-water rinse removes any residual starch that’ll turn your salsa gummy. I learned this after one batch turned into a sad, gluey mess.
- Roast the Onion First: Toss the diced red onion in a dry skillet over medium heat for 8–10 minutes until soft and slightly caramelized. The sweetness cuts through the acidity, and it adds depth without extra prep. (Yes, even if you’re impatient like me.)
- Zest the Lime: Don’t just juice—zest the lime too. A teaspoon of that bright green zest adds aroma and balances the flavors. I was skeptical until I tried it; now I double the zest and halve the juice for extra punch.
- Toast the Corn: Drain the canned corn, pat it dry, and give it a quick 3–4 minutes in a dry skillet until the edges turn golden. The nuttiness elevates the whole dish—no one will guess it came from a can. (Your future self will notice the difference.)
Pro cooking tips for perfect results
Texture Control
Draining and drying the beans and corn thoroughly is non-negotiable—this prevents a watery salsa. I use a clean kitchen towel to pat them dry after rinsing, which removes excess moisture far better than paper towels.
For extra insurance, I gently press the beans between my fingers to squeeze out any lingering liquid. This step makes all the difference in achieving that perfect creamy-yet-chunky texture. 💧
Flavor Layering
The secret to balanced flavor lies in adding ingredients in the right order. Start with the base (beans, corn, onion, jalapeño), then add the aromatic garlic and cilantro. Finally, introduce the acidic components (lime juice, vinegar) and oil.
This progression lets each flavor develop properly—acidity brightens the beans' earthiness while the oil binds everything together. Taste as you go and adjust salt or lime to your preference.
Heat Management
Jalapeño seeds contain most of the heat, so remove them for a milder salsa. For extra kick, add hot sauce gradually—start with just ¼ teaspoon and taste before adding more. I keep a small bowl of hot sauce nearby so I can adjust easily.
The key is balance: the acidity from lime and vinegar should complement, not overpower, the heat. 🌶️
Equipment Shortcuts
No food processor needed—this salsa comes together with basic tools. A sharp chef's knife and cutting board work perfectly for dicing onions and jalapeños. For mincing garlic, I find a microplane works faster than a knife.
A large mixing bowl with a wooden spoon is ideal for combining ingredients. If you're short on time, pre-chopped onions and jalapeños from the store save 5-7 minutes of prep.
Flavor Boost Hacks
Want deeper flavor without extra ingredients? Toast the corn kernels in a dry skillet over medium heat for 2-3 minutes before adding to the salsa. This caramelizes natural sugars, adding subtle sweetness.
For smoky depth, add ¼ teaspoon smoked paprika to the mix. Both tricks elevate the salsa without changing its fundamental simplicity. ✨
Serving Temperature
Serve this salsa at room temperature for the best flavor experience. The ingredients mingle more harmoniously when not chilled. If you've refrigerated it, let it sit at room temperature for 10-15 minutes before serving.
The contrast between the cool chips and room-temperature salsa creates the perfect texture play. For parties, I keep it in a bowl at room temp and refill from a refrigerated batch as needed. 🍽️
Nutrition facts
Frequently asked questions
Can I make this salsa without fresh cilantro?
If you're out of cilantro, substitute with 0.25 cup chopped parsley or 1 tablespoon dried oregano for a similar earthy note. For extra flavor, add 1 teaspoon dried dill or a pinch of smoked paprika to compensate for the missing freshness. The salsa will still taste great—just with a slightly different herbal profile.
How do I adjust the spice level for kids or sensitive palates?
Skip the jalapeño entirely and omit the hot sauce. The red onion already adds mild sharpness, and the lime/vinegar balance keeps flavors bright without heat. For extra mildness, use 1/4 cup diced bell pepper instead of jalapeño—it adds color and sweetness without spice. Always taste as you go to adjust salt or lime instead.
Can I use frozen corn instead of canned?
Yes, but thaw and drain it thoroughly first! Frozen corn often has excess moisture that makes salsa watery. After thawing, pat the corn dry with a paper towel and squeeze out any extra liquid. For best texture, toast the thawed corn in a dry skillet for 2-3 minutes before mixing to enhance its natural sweetness.
What's the best way to store leftovers?
Transfer to an airtight container and refrigerate for up to 4 days. The flavors actually improve overnight as ingredients meld. For longer storage, freeze in 1-cup portions—thaw in the fridge overnight before serving. To revive texture, stir in 1 teaspoon lime juice and a pinch of salt when reheating. The beans and corn hold up well to freezing.
Can I make this salsa ahead for a party?
Perfect for meal prep! Make it 1-2 days ahead and store in the fridge. Bring to room temperature before serving for best flavor. For parties, keep a batch in the fridge and transfer to a serving bowl 30 minutes before guests arrive—the contrast with room-temperature chips is unbeatable. Garnish with extra cilantro just before serving for freshness.