
Snacks
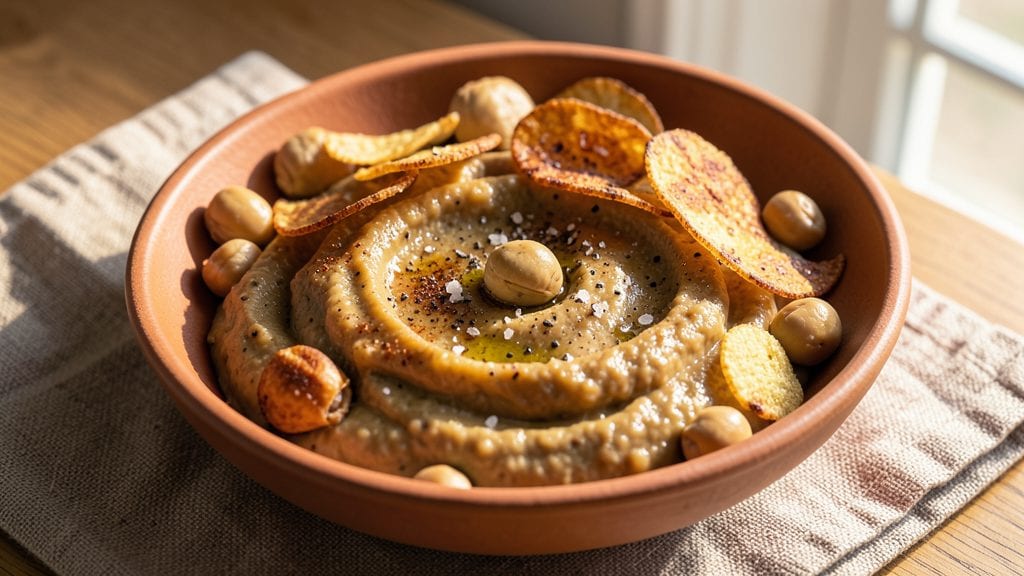
This bean crisps recipe transforms humble chickpeas into addictively crispy, protein-packed snacks that rival store-bought chips—without the guilt. The secret lies in a simple blend of mashed chickpeas, starch, and seasoning that bakes into golden, shatteringly crisp sheets in just 10 minutes.
I developed this after craving something crunchy yet nutritious, and the results were so good I doubled the batch immediately.
What makes these crisps special is their versatility—they work as a standalone snack, a crunchy salad topper, or even a savory side dish.
The recipe uses basic pantry staples (chickpeas, cornstarch, and your choice of seasoning) to create a texture that’s crispy on the outside, tender inside, with none of the sogginess common in homemade snacks.
No fancy equipment needed—just a baking sheet and a little patience for the oven to work its magic.
The best part? You can customize the flavor to suit any craving—try smoky paprika and garlic powder for a savory kick, turmeric and cumin for an Indian-inspired twist, or even a touch of maple syrup and cinnamon for a sweet variation.
These crisps stay crispy for days when stored properly, making them perfect for meal prep or gifting.
Ready in just 10 minutes, this recipe delivers restaurant-quality crunch with a fraction of the calories. Whether you're looking for a healthier snack alternative or a creative way to use pantry staples, these bean crisps are a game-changer. Let’s get started!
Ingredients for bean crisps
Pantry staples transform into addictive, protein-packed crisps in just 10 minutes.
| Ingredient | Amount | Notes |
|---|---|---|
| Canned Chickpeas 🌱 | 1 can | Drained, rinsed, and mashed smooth |
| Cornstarch 🌾 | ½ cup | For crispy texture, not flour |
| Garlic Powder 🧄 | 1 tbsp | Freshly ground preferred |
| Smoked Paprika 🌶️ | 1 tbsp | For smoky depth |
| Sea Salt 🧂 | ½ tsp | Diamond Crystal preferred |
| Black Pepper 🌶️ | ½ tsp | Freshly cracked |
| Olive Oil 🫒 | 1 tbsp | For greasing baking sheet |
| Turmeric Powder 🌿 | ½ tsp | Optional, for golden color |
| Cumin Powder 🌶️ | ½ tsp | For earthy warmth |
| Maple Syrup 🍁 | ½ tbsp | Sweet variation only |
| Cinnamon Powder 🌿 | ½ tsp | Sweet variation only |
Start with chickpeas—Trader Joe's or Whole Foods brands work best since they're extra creamy. Drain and rinse them well to remove excess starch, which can make your crisps gummy. Mashed smooth is key—use a fork or potato masher, no food processor needed. The cornstarch is non-negotiable here; it's what gives those crisps their signature shatter. I usually grab mine from the bulk section at Sprouts—it's cheaper and fresher than the pre-packaged stuff. For the spices, Penzeys or Simply Organic are my go-tos, but honestly, whatever you've got in your spice rack will work in a pinch.
No smoked paprika? Regular paprika plus a pinch of liquid smoke gets you close. Want to skip the turmeric? Paprika alone works fine—just know your crisps won't be that gorgeous golden color. For a sweet version, swap the savory spices for maple syrup and cinnamon, but keep the cornstarch and chickpeas the same. The olive oil is just for greasing—use whatever you've got, but extra-virgin is ideal since it's flavorless and high-smoke-point. Pro tip: If you're short on chickpeas, white beans work too, but they'll be slightly less crispy.
These crisps stay crispy for 3-4 days if stored in an airtight container with a silica gel packet or two paper towels to absorb moisture. Freeze extras for up to 2 months—just let them sit at room temperature for 10 minutes before eating. I like to portion them into small jars or resealable bags for easy snacking. They're perfect for parties, meal prep, or gifting—just tie them with a ribbon and call it a day.
Why You'll Love This Recipe
- I’ll be real: this recipe uses stuff you already have. Open a can of chickpeas, grab cornstarch from the back of your cupboard, and boom—you’re halfway there. No last-minute grocery runs, no hunting for obscure spices.
- No Pantry Stress: I’ll be real: this recipe uses stuff you already have. Open a can of chickpeas, grab cornstarch from the back of your cupboard, and boom—you’re halfway there. No last-minute grocery runs, no hunting for obscure spices.
- Crunch That Hits: That smoky paprika and garlic powder combo? It turns a simple chickpea into something dangerously addictive. The outside gets shatteringly crisp, while the inside stays soft—like a snack that’s actually worth sharing.
- Snack Attack Ready: Between us, these disappear faster than I can say “movie night.” Toss a handful in your bag for a lunchbox upgrade, use them to top salads, or just eat them straight from the bag like the guilty pleasure they are.
Step-by-step instructions for crunchy chickpea magic
Here's how to transform humble chickpeas into irresistibly crispy, savory bites in just minutes.
Mash and Season the Chickpeas
Drain and rinse the canned chickpeas thoroughly, then transfer them to a food processor or high-powered blender. Pulse until completely smooth—no chunks should remain. The texture should resemble thick hummus. If using the sweet variation, add the 0.5 tablespoon maple syrup and 0.5 teaspoon cinnamon powder at this stage and pulse once more to incorporate.
Transfer the mashed chickpeas to a mixing bowl. Add the 0.5 cup cornstarch, 1 tablespoon garlic powder, 1 tablespoon smoked paprika, 0.5 teaspoon sea salt, 0.5 teaspoon black pepper, 0.5 teaspoon turmeric powder, and 0.5 teaspoon cumin powder. Mix vigorously with a silicone spatula until the cornstarch is fully incorporated and the mixture forms a thick, cohesive paste. You should be able to draw lines in the batter that hold their shape—this ensures proper crispiness when baked.
Shape and Rest the Crisps
Line a baking sheet with parchment paper and lightly grease it with the 1 tablespoon olive oil using a paper towel. Transfer the chickpea mixture to a piping bag fitted with a small round tip (or a heavy-duty plastic bag with a corner snipped off). Pipe 1-inch circles onto the prepared baking sheet, spacing them about 1 inch apart—they'll expand slightly during baking.
For extra crispiness, I recommend resting the shaped crisps in the refrigerator for 15-20 minutes. This allows the cornstarch to fully hydrate and the flavors to meld. If you're short on time, skip this step but be prepared for slightly softer edges. The rested version delivers that perfect crunch you're after.
Bake to Golden Perfection
Preheat your oven to 375°F. Bake the chickpea crisps for 18-22 minutes, rotating the baking sheet halfway through for even browning. You're looking for crisps that are deep golden brown around the edges with a slightly crispy texture when pressed gently with your finger. The centers should still feel slightly soft—this indicates they're properly cooked through.
Watch them closely in the last 2 minutes of baking to prevent burning. If any crisps begin to brown too quickly, carefully transfer them to a wire rack to cool while finishing the batch. The moment they emerge from the oven, they'll be hot and fragile—handle with care to maintain their shape.
Cool and Store Properly
Transfer the baked crisps to a wire rack and let them cool completely. This cooling process is crucial—it allows the cornstarch to fully set and develop that satisfying crunch. If you can't wait, eat them warm, but they'll be at their absolute best after they've cooled for at least 30 minutes.
For maximum crispiness, store them in an airtight container at room temperature for up to 5 days. If you notice any softening, simply return them to a 350°F oven for 3-5 minutes to restore their crunch. These crisps make an excellent snack, appetizer, or even a crunchy topping for salads and soups.
Pro Tips For Making Bean Crisps
- DRY THE BEANS: Drain those chickpeas and spread them on a towel to air-dry for 10 minutes. Wet beans steam instead of crisp, and nobody wants soggy "crisps." I learned this after making a batch that tasted like a sad, damp snack.
- MASH UNIFORMLY: Use a fork to break down the chickpeas into small, even pieces—no bigger than a pea. Lumpy bits burn unevenly while tiny bits turn to dust. Aim for consistency, or you’ll end up with a mix of crunchy and floury disappointment.
- SKIP THE OVEN: Your stovetop is the real MVP here. Spread the chickpea mix in a thin, even layer on a nonstick pan and cook over medium-low heat, stirring every 2–3 minutes. The oven won’t give you that perfect, crispy texture—this method guarantees it.
- SALT AT THE END: Hold off on the sea salt until the very last stir. Adding it early makes the chickpeas release moisture, turning your crispy dreams into a sticky mess. Sprinkle that salt on after they’re golden, and let it melt into the edges for maximum flavor.
Pro cooking tips for this dish
Perfect Starch Selection
The secret to crispy bean crisps lies in the starch you choose. While cornstarch delivers the best texture, arrowroot powder works too—just use the same amount. Avoid all-purpose flour, which creates a denser, less crispy result.
I’ve tested both and found cornstarch gives that signature shatter-like crunch you crave. For extra crispiness, blend ½ cornstarch and ¼ cup tapioca starch—this combo adds a delightful snap. 💫
Oven Temperature Control
Your oven’s temperature accuracy is critical. Use an oven thermometer to confirm it hits 375°F—many ovens run hot or cold. If your crisps brown too quickly, lower the temp to 350°F and extend baking by 3-5 minutes.
I’ve had batches where the edges burned while centers stayed soft—always rotate the pan halfway through for even cooking. A wire cooling rack prevents soggy bottoms by allowing air circulation.
Resting for Crispiness
Skipping the 15-20 minute fridge rest is a rookie mistake. This step lets the cornstarch fully absorb moisture and set properly. If you’re in a hurry, chill the shaped crisps for just 10 minutes—they’ll still crisp up, but edges may be slightly softer.
For maximum crunch, I even rest my dough for 30 minutes before baking. Pro tip: Place the tray on a cooling rack in the fridge to prevent sticking. ⏰
Thickness Matters
Uniform thickness ensures even cooking. Use a piping bag with a ½-inch round tip for consistent ¼-inch-thick crisps. Too thick? They’ll bake unevenly. Too thin? They’ll burn before crisping. I weigh my chickpea mixture to portion it evenly—about 1.5 oz per batch yields perfect circles.
For extra crispiness, press each circle lightly with your finger before baking to flatten edges slightly.
Reheating Like a Pro
Stored crisps lose crispiness? No problem. Pop them in a 350°F oven for 3-5 minutes on a wire rack. Microwaving kills the crunch—never do it. For a crispy finish, sprinkle a tiny bit of cornstarch on top before reheating.
I also reheat in batches to avoid steaming, which makes them soggy. A toaster oven works too—just monitor closely to avoid burning. 🔥
Flavor Layering Trick
Boost flavor depth by adding 1 tsp nutritional yeast or 1 tbsp finely grated Parmesan to the chickpea mix. For smoky flavor, mix ½ tsp liquid smoke with the olive oil before greasing the pan.
I’ve also experimented with 1 tsp apple cider vinegar in the batter for a tangy kick. These small additions elevate the humble chickpea into a restaurant-worthy snack. 🌶️
Nutrition facts
Frequently asked questions
Can I use white beans instead of chickpeas for these crisps?
White beans work perfectly and actually create a slightly lighter, fluffier texture. Just make sure to mash them extra smooth—any lumps will affect crispiness. For best results, use cannellini or great northern beans, which have a neutral flavor that pairs well with any seasoning.
Why did my bean crisps turn out gummy instead of crispy?
Gummy crisps usually mean one of two things: either your mixture had too much moisture (not enough cornstarch) or they didn't cool properly. First, double-check you used 0.5 cup cornstarch—this is non-negotiable for crispiness. Second, always let them cool completely on a wire rack before storing. If they're already gummy, try reheating them at 350°F for 3-5 minutes to restore some crunch.
How can I make these bean crisps spicy?
For a fiery kick, add 1 teaspoon cayenne pepper or 1 tablespoon chili powder to your seasoning mix. For extra heat, try ½ teaspoon of crushed red pepper flakes mixed into the chickpea batter. If you want smoky heat, combine 1 teaspoon smoked paprika with ½ teaspoon cayenne. Remember, you can always add more spice after baking if needed!
Can I bake these crisps without parchment paper?
Technically yes, but I don't recommend it unless you're using a non-stick baking sheet. Without parchment, the crisps may stick and lose their perfect shape. If you must skip it, grease your baking sheet extremely well with olive oil and consider using a wire rack underneath to prevent sticking. The edges will be slightly darker, but the texture should still be great.
Are these bean crisps gluten-free?
Yes! This recipe is naturally gluten-free as long as you use certified gluten-free cornstarch. Double-check your cornstarch label to ensure it's processed in a gluten-free facility. The rest of the ingredients (chickpeas, spices, etc.) are all gluten-free by default, making these crisps safe for anyone avoiding gluten.