Desserts
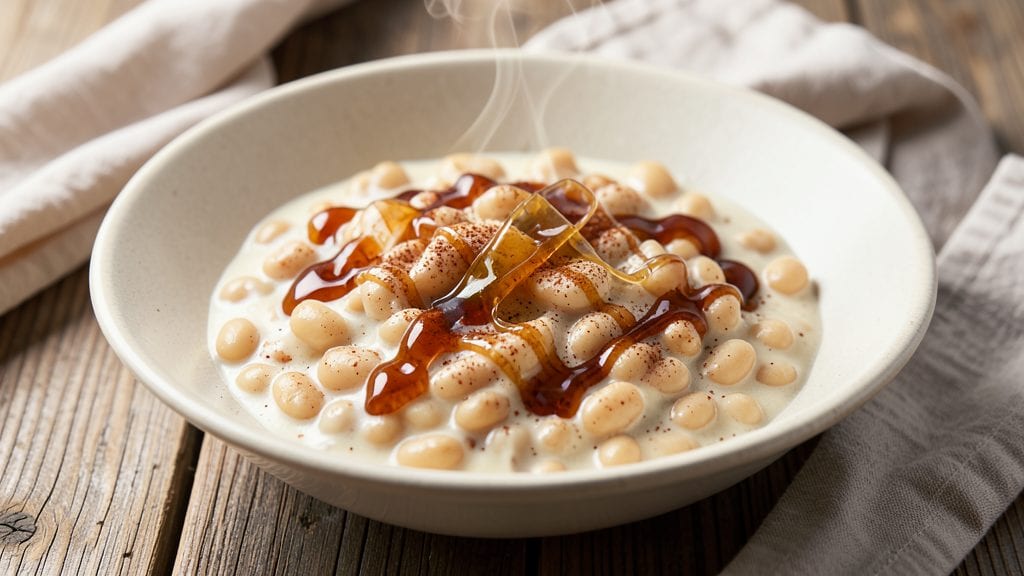
This sweetened beans recipe transforms humble white beans into a silky caramelized dessert that tastes like a cross between fudge and custard—vegan, rich, and ready in just 20 minutes. 💛 I first discovered it while searching for a plant-based alternative to sweet potato pie, and the results were so unexpectedly decadent that I’ve made it every holiday season since.
The secret lies in slow-simmered coconut milk and maple syrup, which meld into a velvety sauce that coats each bean perfectly.
What makes this recipe work is the balance of textures and flavors—creamy beans, caramelized edges, and a hint of cinnamon that feels like a warm hug.
Unlike traditional desserts that require hours of baking, this version relies on a one-pot method that’s foolproof for beginners but impressive enough for dinner guests. The beans absorb the sweetened coconut mixture while developing a glossy sheen, making them irresistible straight from the pot or chilled for a firmer texture.
By the end, you’ll have a dessert that’s naturally sweetened, protein-rich, and effortlessly elegant—perfect for potlucks, holiday tables, or a cozy weekend treat. The aroma alone will have everyone gathering around the kitchen, and the first bite delivers that perfect harmony of sweet, nutty, and slightly spiced flavors.
Serve it warm with a sprinkle of toasted coconut or a dollop of coconut whipped cream for the full experience.
This recipe is also naturally gluten-free, dairy-free, and refined-sugar-free, making it a guilt-free indulgence that still satisfies serious sweet cravings. Whether you’re hosting a gathering or just craving something special, this dessert proves that plant-based doesn’t mean sacrificing richness. Let’s get cooking!
Ingredients for sweetened beans
Six simple ingredients transform white beans into a luxurious vegan dessert with caramelized edges and velvety texture.
| Ingredient | Amount | Notes |
|---|---|---|
| Great Northern White Beans 🌱 | 2 cups | Drained and rinsed thoroughly |
| Full-Fat Coconut Milk 🥥 | 13 ½ oz | Canned, full-fat preferred |
| Pure Maple Syrup 🍯 | ½ cup | Grade B for deeper flavor |
| Ground Cinnamon 🌿 | 1 ½ tsp | Freshly toasted for warmth |
| Vanilla Extract 💧 | 1 tsp | Pure Madagascar preferred |
| Sea Salt 🧂 | ½ tsp | Diamond Crystal preferred |
| Unsweetened Coconut Flakes 🥥 | ¼ cup | Toasted for garnish |
| Coconut Oil 🫒 | 1 tbsp | For glossy finish |
| Fresh Ginger 🌿 | 1 tsp | Finely grated, fresh only |
| Lemon Zest 🍋 | 1 tsp | Brightens the flavor |
| Coconut Whipped Cream 🥛 | ¼ cup | Store-bought or homemade |
| Dark Chocolate Chips 🍫 | ¼ cup | Vegan, 70% cocoa |
The coconut milk is non-negotiable—full-fat canned from Thai Kitchen or Native Forest delivers the richest flavor. Look for cans with no additives, just pure coconut. The maple syrup should be Grade B for its deeper, more complex notes—Wholesale Suite or New England Maple brands excel here. Fresh ginger and lemon zest elevate the dish beyond basic sweetness, so don't skip them. For the beans, Great Northern or cannellini work best—their texture holds up beautifully to the caramelization process.
No full-fat coconut milk? Light coconut milk plus 1 tbsp coconut cream gets you close, though the texture will be slightly thinner. Substituting maple syrup? Agave nectar or date syrup works at a 1:1 ratio, but maple's unique flavor is ideal. The vanilla extract matters—imitation vanillaEnjoy Life brandchilled coconut milk whipped with powdered sugar mimics the texture.
This dessert reheats beautifully—simply warm in a saucepan with a splash of coconut milk. Stores for 5 days in the fridge, though the texture becomes firmer. For longer storage, freeze portions for up to 3 months
Why You'll Love This Recipe
- Here’s what sold me: this works everywhere. Stir it into yogurt for a sweet breakfast, dollop it on toast with a sprinkle of flaky salt, or serve it warm with crusty bread when unexpected guests show up. (Yes, even on a Tuesday night.)
- Five-Ingredient Magic: I swear, this is the kind of recipe where you almost feel guilty for how little effort it takes. Canned beans, coconut milk, and a drizzle of maple syrup—that’s it. No chopping, no fuss, just simmer until the cinnamon and vanilla turn your kitchen into a warm hug.
- Maple-Coconut Dream: Between us, this combo is dangerously good. The creamy richness of full-fat coconut milk with that deep, caramelized sweetness of maple syrup? It’s like dessert had a makeover as a savory side. The cinnamon doesn’t overpower—it just lingers like a good memory.
- Breakfast to Dessert: Here’s what sold me: this works everywhere. Stir it into yogurt for a sweet breakfast, dollop it on toast with a sprinkle of flaky salt, or serve it warm with crusty bread when unexpected guests show up. (Yes, even on a Tuesday night.)
Step-by-step instructions for silky caramelized dessert
This velvety sweetened bean dessert transforms simple ingredients into a luxurious treat with minimal effort.
🍳 Step 1: Simmer the Bean-Coconut Base
In a medium saucepan, combine the 2 cups Great Northern White Beans (drained and rinsed) with 13.5 oz Full-Fat Coconut Milk and 0.5 cup Pure Maple Syrup. Bring to a gentle boil over medium heat, then immediately reduce to a simmer. You'll see small bubbles form at the edges—this is your signal to maintain low heat for 10 minutes. The mixture should thicken noticeably as moisture evaporates, creating a luscious, pudding-like consistency.
I stir occasionally with a silicone spatula, scraping the bottom to prevent sticking. This step builds the dessert's foundation—don't rush it. The beans will break down slightly, releasing their natural starches that create that signature silky texture. If the mixture looks too thin after 10 minutes, simmer uncovered for another 2-3 minutes until it coats the back of a spoon.
👨🍳 Step 2: Infuse with Warm Spices and Aromatics
In a small bowl, whisk together 1.5 tsp Ground Cinnamon, 1 tsp Vanilla Extract, 0.5 tsp Sea Salt, 1 tsp Fresh Ginger (finely grated), and 1 tsp Lemon Zest. This spice blend is the secret to balancing sweetness with bright, warming notes. Add the mixture to the simmering bean-coconut base and stir gently to combine. Let it cook for 5 minutes on low heat, allowing the spices to bloom and infuse their flavors.
Here's where it gets interesting—the lemon zest will dissolve slightly, adding a subtle citrus brightness that cuts through the richness. The ginger adds a gentle warmth that enhances the maple syrup's depth. Taste the mixture now—it should be sweet but not cloying, with a perfect balance of spice and acidity. If you need more sweetness, add 1 tablespoon of maple syrup at this stage, but trust the initial measurement first.
🔥 Step 3: Finish with Richness and Texture
Remove the saucepan from heat and stir in 1 tbsp Coconut Oil and 0.25 cup Dark Chocolate Chips. The coconut oil adds a velvety sheen and helps emulsify the mixture for that restaurant-quality finish. Let the chocolate chips melt gently into the warm base—this takes about 3 minutes while you prepare the next components. The chocolate should dissolve completely, creating dark flecks throughout the dessert.
While the chocolate melts, toast 0.25 cup Unsweetened Coconut Flakes in a dry skillet over low heat for 2-3 minutes until golden and fragrant. Watch them closely—they'll darken quickly. Remove immediately to prevent burning, then set aside to cool slightly. This toasting step adds a delightful crunch contrast to the silky base.
🥘 Step 4: Assemble and Chill for Perfect Texture
Divide the warm bean mixture evenly among 6 serving dishes (about ⅓ cup each). Immediately top each with a dollop of 0.25 cup Coconut Whipped Cream and sprinkle generously with the toasted coconut flakes. The whipped cream adds a light, airy contrast to the dense bean base, while the coconut flakes provide that satisfying crunch with every bite.
Refrigerate for at least 1 hour before serving—this chilling time is crucial. It allows the flavors to meld completely and the textures to set properly. When ready to serve, garnish each portion with an additional sprinkle of cinnamon and a few extra chocolate shavings if desired. The dessert should be cool but not cold, with a perfect balance of silky, creamy, and crunchy elements in every spoonful.
Pro Tips For Making Sweetened Beans
- SOAK BEANS OVERNIGHT: I learned this the hard way—skipping the soak leaves your beans tough no matter how long you simmer. Use 4 cups water to 1 cup beans, cover, and let them sit 12+ hours. The longer they soak, the creamier the final texture, and you’ll save 45 minutes of simmering time later.
- SIMMER LOW AND LONG: After burning three batches, I finally figured out: this isn’t a quick dish. Once the beans are tender, reduce heat to a bare simmer (just tiny bubbles) and let them cook another 30-45 minutes. That’s when the flavors meld—coconut milk stops tasting like water, and the maple syrup caramelizes just enough to deepen the sweetness.
- WHISK THE COCONUT MILK: Full-fat coconut milk separates like a diva if you’re not careful. Before adding it to the pot, give the can a good shake, then whisk it vigorously in the pot for 30 seconds. This keeps the creaminess intact and prevents that dreaded oil slick on top.
- TASTE BEFORE SWEETENING: I skip this when I’m lazy, but the dish is noticeably better when I don’t. After simmering the beans with cinnamon and vanilla, taste the base mixture first—it’ll likely need more salt (beans absorb water, diluting flavor). Adjust seasoning before adding maple syrup, or you’ll end up with a cloyingly sweet, underseasoned mess.
Make-ahead tips for this dish
Prep Ahead Basics
Start by prepping your beans and spices the night before—rinse and drain the 2 cups Great Northern White Beans and store them in an airtight container in the fridge.
Toast your 0.25 cup Unsweetened Coconut Flakes ahead of time and keep them in a sealed jar for up to 5 days.
I like to measure out all my spices—1.5 tsp cinnamon, 1 tsp vanilla, and 0.5 tsp salt—into a small jar so they're ready to whisk together in minutes. This saves you from scrambling during the actual cooking process. 💡
Make-Ahead Magic
This dessert actually tastes better the next day! After assembling your servings, cover them tightly with plastic wrap and refrigerate for up to 5 days. The flavors deepen as the spices meld together, and the texture becomes even more velvety.
For a quick holiday treat, I often make this dessert 2 days ahead—it's perfect for potlucks where you want something impressive but low-stress. Just add a dollop of coconut whipped cream before serving.
Freezer-Friendly
For longer storage, divide the fully assembled dessert into individual portions and freeze for up to 3 months. Use freezer-safe containers or heavy-duty plastic wrap to prevent freezer burn.
When ready to serve, thaw in the fridge overnight, then warm gently in a saucepan with a splash of coconut milk. The texture remains creamy, though slightly firmer than fresh. This is my go-to strategy for holiday gifting—just pop it in the freezer and hand out portions as needed! ❄️
Portioning Perfection
Use 6-ounce ramekins or small mason jars for individual servings—they're perfect for holiday parties or office potlucks. Fill each container about ⅔ full with the bean mixture, then top with whipped cream and toasted coconut.
Seal with parchment paper and store right-side up in the fridge. This keeps everything contained and makes for easy grab-and-go serving. I also like to label them with the date for tracking freshness.
Reheating Secrets
If you prefer your dessert warm, reheat individual portions in a small saucepan with 1 tablespoon of coconut milk over low heat for 3-4 minutes. Stir constantly to prevent sticking and maintain that silky texture.
For microwave reheating, cover with a damp paper towel and heat on 50% power for 1 minute. The microwave method is quicker but can make the coconut flakes slightly soggy—so I prefer the stovetop approach for special occasions. 🔥
Garnish Like a Pro
Keep your garnishes separate until serving time to maintain crispness. Store the toasted coconut flakes in a small jar with a tight lid, and keep the dark chocolate chips in their original bag in the pantry.
Just before serving, sprinkle fresh coconut flakes and a pinch of cinnamon over each portion. For extra flair, melt some chocolate and drizzle it over the top—this adds a professional restaurant touch that your guests will love.
The contrast of warm spices and cool chocolate creates a perfect balance of flavors. ✨
Nutrition facts
Frequently asked questions
Can I use any type of bean for this recipe?
Great Northern or cannellini beans work best—their sturdy texture holds up beautifully to caramelization. Avoid delicate varieties like black beans or lentils, as they'll break down too much and create a mushy texture. If you're using dried beans, soak them overnight first for perfect results.
Why does my mixture look too thin after simmering?
Simmering too long or using light coconut milk can make the mixture thin. Reduce heat to low and cook uncovered for 2-3 extra minutes—the moisture will evaporate and thicken naturally. For a quicker fix, stir in 1 tsp cornstarch mixed with 1 tbsp water and simmer for 1 minute more.
Can I make this dessert without coconut products?
Swap coconut milk for full-fat cashew cream (blend soaked cashews with water) and use maple syrup for sweetness. For the whipped topping, try coconut-free whipped cream or a cashew-based alternative. The texture will be slightly different but still delicious—just expect a nuttier flavor profile.
How do I prevent the coconut flakes from burning?
Toast them over low heat in a dry skillet, stirring constantly for 2-3 minutes. Watch closely—they darken quickly! Remove immediately when golden. For extra safety, toast in 30-second intervals until fragrant, letting them cool between batches. Store cooled flakes in an airtight container for up to 5 days.
Is this recipe suitable for people with nut allergies?
Only if you use coconut-free alternatives (like cashew cream) and verify all ingredients. Standard coconut milk and flakes contain tree nuts. For strict nut-free versions, check labels carefully—some brands process in nut-free facilities. Always ask guests about allergies before serving.