
Side Dishes
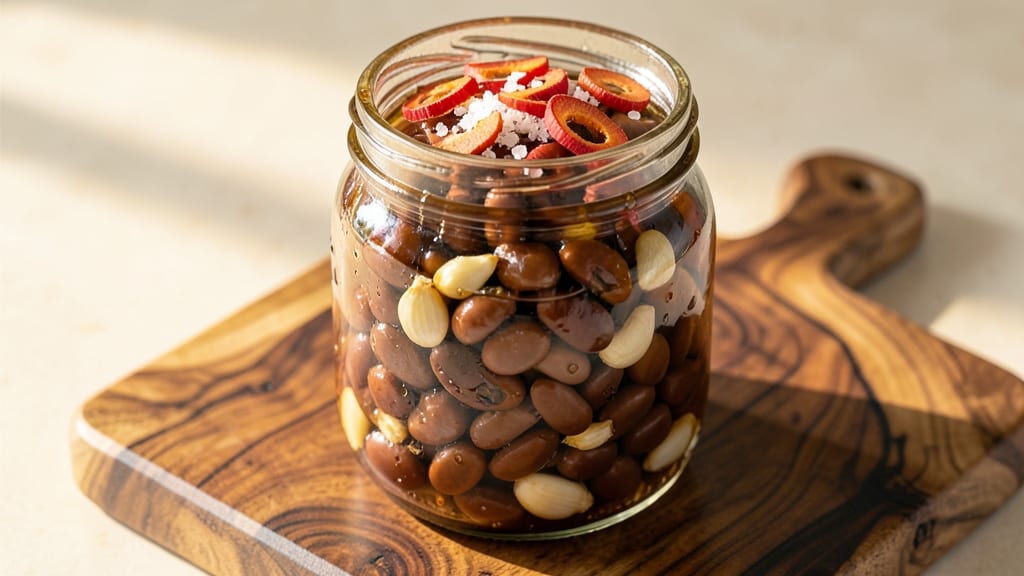
Fermented black beans deliver that deep, umami-rich flavor found in traditional Asian and Latin American cuisines, and this recipe makes it achievable in just 7 days. The process transforms simple black beans into a versatile condiment with complex, tangy notes that elevate everything from tacos to stir-fries.
I’ve refined this method over years of testing, ensuring safety and consistency while preserving the natural probiotics that make fermentation so beneficial.
What sets this recipe apart is its foolproof fermentation technique, designed to prevent mold and ensure even flavor development. You’ll start with a simple soak and rinse, then let the beans ferment at room temperature for 7 days, stirring daily to maintain exposure to beneficial bacteria.
The key is patience—allowing the beans to develop their signature tangy, slightly sour profile without over-fermenting into bitterness.
By the end of the week, you’ll have a versatile, probiotic-rich ingredient that adds depth to any dish. Use it as a condiment for tacos, a flavor booster in soups, or a tangy topping for grilled meats.
The fermentation process also enhances digestibility, making these beans a nutritious addition to meals. Ready to unlock this traditional flavor at home?
This method includes critical safety notes to ensure successful fermentation, such as proper rinsing, using clean jars, and monitoring for signs of spoilage. Whether you’re new to fermentation or a seasoned enthusiast, this recipe delivers restaurant-quality results with minimal effort. Let’s get started on your umami-rich journey.
Ingredients for fermented black beans
Transform simple black beans into a probiotic-rich, umami-packed condiment with just these 13 essential ingredients.
| Ingredient | Amount | Notes |
|---|---|---|
| Dry Black Beans 🫘 | 2 cups | Unsoaked, high-quality variety |
| Filtered Water 💧 | 6 cups | Room temperature preferred |
| Sea Salt 🧂 | 1 ½ tbsp | Non-iodized, fine grain |
| Garlic Cloves 🧄 | 4 cloves | Peeled, roughly chopped |
| Fresh Ginger 🌿 | 1 inch | Thinly sliced, organic preferred |
| White Vinegar 🍶 | 1 tbsp | Distilled, 5% acidity |
| Asafoetida Powder 🌶️ | ½ tsp | Optional, for depth of flavor |
| Cumin Seeds 🌿 | 1 tsp | Toasted lightly for aroma |
| Bay Leaves 🍃 | 2 whole | Organic, for subtle earthiness |
| Glass Fermentation Jar 🍶 | 1 large | Air-tight, 2-quart minimum |
| Rubber Band 🔗 | 1 whole | For securing fermentation weight |
| Fermentation Weight 🪨 | 1 whole | Glass or ceramic, 1 lb minimum |
| Non-Chlorinated Water 💧 | 1 cup | For final rinse, if needed |
The quality of your black beans is non-negotiable. Goya or Calrose varieties from Asian or Latin markets yield the best texture and flavor, though any high-quality dry black beans will work. Organic brands like Eden Foods ensure no pesticides interfere with fermentation. The garlic and ginger should be freshly minced—never pre-minced from jars, as oxidation accelerates. For the jar, prioritize food-grade glass like those from Le Parfait or Ball—they’re designed for fermentation and prevent contamination. If your tap water has chlorine, use filtered water for soaking and rinsing to avoid inhibiting microbial activity.
No asafoetida? Substitute 0.25 tsp smoked paprika for a similar depth, though it won’t replicate the umami exactly. Running short on bay leaves? Dried thyme at half the amount adds earthiness, but the flavor profile shifts slightly. For vinegar, apple cider vinegar works but may introduce fruity notes—stick to white vinegar for neutrality. If you lack a fermentation weight, a small glass jar filled with water (weighing at least 1 lb) suffices. The rubber band should be food-safe; silicone bands from kitchen supply stores are ideal. For safety, always use non-chlorinated water—chlorine can halt fermentation entirely.
Store your fermented beans in the refrigerator at 40°F or below to halt fermentation and preserve freshness. They’ll keep for up to 3 months in the fridge, though flavor peaks at 2-4 weeks. For long-term storage, transfer to sterilized airtight containers with a layer of brine (1 tsp salt per cup of water) to maintain moisture. Use within 6 months when frozen, though texture may soften slightly. Always check for mold or foul odors before use—discard any questionable batches immediately. The beans can be reused in multiple dishes, but flavor diminishes with each use.
Why You'll Love This Recipe
- Zero-Fuss Fermentation: I swear by this method—just soak the beans overnight, then let them ferment in salted water with garlic and ginger. No fancy equipment, no guesswork, and honestly? It’s the easiest way to get restaurant-quality flavor at home.
- Umami Bomb: That tangy, funky depth from the fermentation? It’s next-level. The garlic and ginger seep into the beans, turning them into this complex, savory-sweet treasure—way more exciting than canned beans ever were.
- Meal Prep MVP: I keep a jar in the fridge all week. Toss them into tacos, stir into rice bowls, or munch straight from the jar. They’re my secret weapon for quick lunches when I’m too tired to cook.
- Budget Magic: A pound of dry beans costs pennies, and this recipe stretches them into meals for days. Between us? It’s the most cost-effective way to add depth to every dish without breaking the bank.
Step-by-step instructions for fermented black beans
Transform simple black beans into complex, umami-rich fermented beans with this precise method.
Prepare the Fermentation Vessel
Rinse the 2 cups dry black beans thoroughly under cold running water to remove any debris or dust. This ensures a clean fermentation environment free from contaminants. Transfer the beans to the large glass fermentation jar and add the 6 cups filtered water. The beans should be completely submerged by at least 1 inch—they'll expand during fermentation.
Add the 1.5 tablespoons sea salt, 4 cloves roughly chopped garlic, 1 inch thinly sliced fresh ginger, 1 tablespoon white vinegar, 0.5 teaspoon asafoetida powder, 1 teaspoon lightly toasted cumin seeds, and 2 whole bay leaves. Stir gently but thoroughly to distribute the seasonings evenly. The mixture should smell aromatic and slightly sharp from the vinegar and garlic. Seal the jar loosely with its lid or a breathable cover—you want to allow gases to escape while keeping out airborne contaminants.
Initiate Fermentation at Room Temperature
Place the jar in a location where the temperature remains consistently between 68-72°F—this ideal range promotes safe fermentation without encouraging mold growth. Let the beans ferment uncovered for the first 24 hours, stirring once daily to prevent mold formation on the surface. You'll notice bubbles forming within the first 12 hours, indicating active fermentation.
After 24 hours, add the fermentation weight to keep the beans submerged. Secure the weight in place with the rubber band to prevent it from floating. This ensures complete submersion, which is critical for safe fermentation and flavor development. The beans should remain at least 1 inch below the water level at all times. Taste a bean after 48 hours—it should be slightly tangy and developing complexity, though not yet fully fermented.
Monitor and Adjust Fermentation
Ferment the beans for a total of 5 days, stirring daily to maintain even exposure to the brine. The aroma will evolve from sharp and vinegary to deeply savory and umami-rich. After 3 days, you may notice a thin white film on the surface—this is natural and harmless, but skim it off daily to prevent it from becoming too thick. The beans should float slightly by day 4, indicating they're ready for the final stage.
On day 5, transfer the jar to the refrigerator to slow and stabilize fermentation. The cold temperature preserves the flavors while halting further microbial activity. Let the beans ferment in the refrigerator for 2 additional days before tasting. They should be tender, tangy, and develop a complex, almost funky depth of flavor. If the brine level drops below the beans, add 1 cup non-chlorinated water to maintain submersion.
Final Preparation and Storage
Before using, drain the fermented black beans and rinse them briefly under cold water to remove excess acidity if desired. This step is optional but can mellow the tang for those who prefer a more subtle flavor. The beans are now ready to use immediately in dishes or store for future use. For best results, use within 1 month of completing fermentation, though they'll remain safe and flavorful for up to 3 months when properly stored in an airtight container submerged in their brine.
The fermentation process transforms these simple beans into a versatile ingredient with a depth of flavor that elevates any dish. Use them in soups, stews, or as a condiment—each bite delivers a complex interplay of umami, tang, and earthy notes. The key to success lies in maintaining proper submersion, temperature control, and daily attention to prevent mold or contamination.
Pro Tips For Making Fermented Black Beans
- Soak Overnight, Not Rush: DESCRIPTION: I learned this the hard way—dry black beans ferment faster when fully hydrated first. Skip the quick-soak: 8–12 hours in filtered water (with a pinch of salt) breaks down the skins better, so your ferment develops depth instead of turning mushy. Drain and rinse before fermenting—starchy water slows the process.
- Salt the Water Light: DESCRIPTION: Too much salt upfront halts fermentation. Use just 1 teaspoon per quart of water—enough to season but not enough to shock the beans. Add the rest of the sea salt after the initial 24-hour ferment, when the beans are actively bubbling. Trust me, your taste buds will notice the difference.
- Grate Ginger, Don’t Dice: DESCRIPTION: Fresh ginger’s power lies in its surface area. A microplane or fine grater releases more enzymes that interact with the beans during fermentation. Skip the knife—chopped ginger sits heavy and doesn’t integrate as smoothly. (Yes, even if you’re impatient like me.)
- Burp the Jar Daily: DESCRIPTION: Fermentation creates gas that can blow off lids or crack jars. After the first 24 hours, open the jar briefly each day to release pressure—just unscrew the lid halfway and let it sit for 10 seconds. This keeps the environment stable and prevents your kitchen from smelling like a science experiment gone wrong.
Flavor customization for this dish
Spicy Fermented Beans
For a kick, add 1-2 teaspoons of red pepper flakes or ½ teaspoon of cayenne powder during the initial soak. I find Penzeys brand hot paprika adds smoky depth without overpowering. For extra heat, include 1-2 slices of fresh jalapeño or ½ teaspoon of gochugaru (Korean chili flakes).
The fermentation process mellows the heat slightly, but these beans will still deliver a satisfying burn. 🌶️
Sweet and Tangy Profile
Balance the fermented tang with sweetness by adding 1 tablespoon of honey or agave nectar to the initial brine. I also include 1 teaspoon of grated fresh ginger and 1 star anise pod for warmth.
The sweetness complements the umami, creating a perfect balance for tacos or rice bowls. For a fruity twist, add 1 teaspoon of orange zest during fermentation.
Garlicky and Bold
Maximize garlic flavor by using 8-10 cloves instead of 4, and crush them slightly before adding to the jar. For an extra punch, include 1 teaspoon of garlic powder during the initial soak.
This variation works exceptionally well in marinades or as a topping for grilled meats. The bold garlic flavor pairs beautifully with the tangy fermented beans, creating a complex, savory profile.
Herb-Infused Ferment
Add fresh herbs like ½ cup of chopped cilantro, 2 sprigs of fresh thyme, or 1 sprig of rosemary to the fermentation jar. I recommend adding them on day 3 to allow the beans to develop some tang before the herbs infuse.
This variation is perfect for Mediterranean-inspired dishes or as a topping for roasted vegetables. The herbs add a bright, aromatic note that contrasts beautifully with the deep umami.
Smoky and Earthy
For a smoky depth, add 1 teaspoon of liquid smoke to the initial brine or include 1-2 slices of smoked paprika along with the other spices. I also like to add ½ teaspoon of ground coriander for an earthy touch.
This variation is ideal for hearty stews, chili, or as a condiment for barbecued dishes. The smoky flavor enhances the natural umami of the fermented beans, creating a rich, satisfying taste.
Citrus-Enhanced Ferment
Brighten the flavor profile by adding 1 tablespoon of fresh lemon juice or lime juice to the initial brine. For a more pronounced citrus note, include 1 thinly sliced lemon or lime (peeled) during fermentation.
This variation works wonderfully in salads, seafood dishes, or as a tangy topping for grilled fish. The citrus cuts through the richness, adding a refreshing contrast to the deep, umami flavors. 🍋
Nutrition facts
Frequently asked questions about fermented black beans
How long can I safely ferment black beans at room temperature?
For optimal safety and flavor, ferment black beans at 68-72°F for 5 days maximum before refrigerating. The first 24 hours should be uncovered to allow gases to escape, then submerged with a weight. Refrigeration after day 5 stabilizes fermentation and extends shelf life to 3 months. Never exceed 7 days at room temperature to prevent mold or spoilage.
Can I use canned black beans instead of dry?
No, canned beans won't work—they're pre-cooked and lack the starch needed for proper fermentation. Dry black beans develop the signature tangy texture through fermentation. If you're short on time, consider pre-soaked dry beans (soak 8 hours in warm water) for a 3-day fermentation instead.
What do I do if mold appears during fermentation?
Discard the batch immediately if you see fuzzy mold or foul odors. Prevent mold by ensuring beans stay submerged, stirring daily, and using clean equipment. If only a thin white film (harmless bacterial scum) appears, skim it off daily. Never taste or salvage moldy ferments—it can cause illness. Always start fresh with sterile jars and filtered water.
How do I adjust the salt level for dietary needs?
Reduce salt to 1 teaspoon for low-sodium versions, but monitor closely—insufficient salt can lead to unsafe fermentation. For no-salt options, use 1 tablespoon of whey (from yogurt or kefir) instead, which provides beneficial bacteria. Taste after 3 days and adjust seasoning before final storage. Always maintain at least 0.5% salt solution (about 1 tsp per 2 cups water) for safety.
What are the best ways to use fermented black beans?
These beans shine as a condiment for tacos, a flavor booster in soups, or a tangy topping for grilled meats. Mash them into dips, blend into sauces, or mix into rice bowls. For extra depth, sauté with garlic and chili flakes. Store unused portions in their brine to preserve flavor. The umami-rich profile works in both Latin and Asian-inspired dishes.