Side Dishes
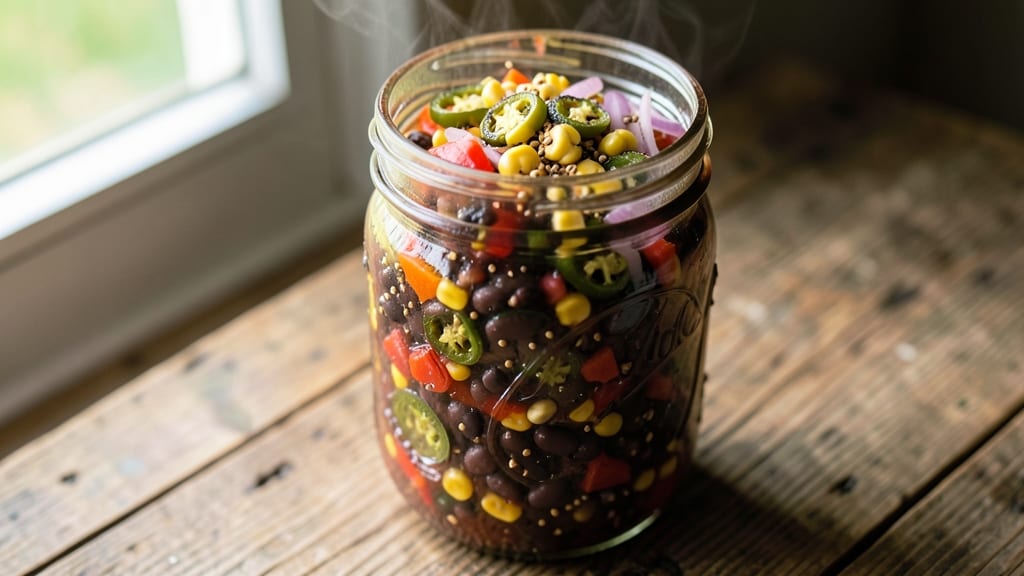
Preserving summer’s bright flavors in jars of zesty corn and bean salsa is one of the most rewarding canning projects you’ll ever try. This vegan recipe transforms fresh garden produce into a versatile condiment that stays vibrant for months—perfect for dips, tacos, or salads.
The key lies in proper sterilization and processing times to ensure both safety and flavor retention.
What sets this recipe apart is its balance of sweet corn, hearty beans, and tangy vinegar, all combined with aromatic spices that develop deeper flavor over time. Unlike store-bought salsas, this version maintains crisp texture and bold taste thanks to precise canning techniques.
The process is straightforward but demands attention to detail—especially when it comes to headspace and processing times.
By following these instructions, you’ll end up with jars of restaurant-quality salsa that taste like summer all year round. The acidity from vinegar and lime preserves the flavors while extending shelf life, and the proper canning method ensures safety for long-term storage.
Whether you’re prepping for winter or stocking your pantry, this recipe delivers professional results with minimal effort.
Ready to preserve your harvest? This method works equally well for water bath canning (for high-acid salsas) or pressure canning (for added safety with lower-acid versions). Let’s get started on creating your pantry staples the right way.
Ingredients for corn and bean salsa canning
Nine simple ingredients transform summer harvest into vibrant canned salsa for months of flavor.
| Ingredient | Amount | Notes |
|---|---|---|
| Fresh Corn Kernels 🌽 | 3 cups | Cut from 3 ears or canned no-salt-added |
| Black Beans 🫘 | 1 ½ cups | Canned, drained and rinsed |
| Red Bell Pepper 🌶️ | 1 whole | Diced, seeds removed |
| Red Onion 🧅 | 1 whole | Diced, medium size |
| Jalapeño Pepper 🌶️ | 1 whole | Seeded and finely chopped |
| White Vinegar 💧 | ½ cup | White distilled preferred |
| Lime Juice 🍋 | ¼ cup | Freshly squeezed |
| Olive Oil 🫒 | 2 tbsp | Extra-virgin for richness |
| Cumin Seeds 🌿 | 1 tsp | Toasted lightly for aroma |
| Salt 🧂 | 1 ½ tsp | Kosher or canning salt |
The freshness of the corn and beans is everything here. Choose corn at peak ripeness—bright yellow kernels that pull back easily from the cob. For beans, low-sodium canned varieties prevent excess salt buildup during storage. The red bell pepper adds natural sweetness, so pick one that's firm and vibrant. Trader Joe's and Whole Foods often carry the best quality produce for canning. If using frozen corn, thaw and drain thoroughly to avoid excess moisture in your jars.
No fresh corn? Canned no-salt-added corn works perfectly, but drain it well. Swap black beans for kidney beans or pinto beans if preferred. The jalapeño can be omitted entirely for a milder salsa, or increase to 2 peppers for extra heat. White vinegar is critical for acidity—never substitute lemon juice as it lacks sufficient acidity for safe canning. For extra depth, add 1 tsp smoked paprika to the spice blend. Always use freshly squeezed lime juice; bottled versions lack the necessary acidity and freshness.
This salsa keeps beautifully for 12-18 months when processed correctly. Store sealed jars in a cool, dark place away from direct sunlight. For best flavor, wait 2-3 weeks before opening—this allows the flavors to meld. If you notice any softening or unusual odors, discard immediately. The vinegar preserves the texture, so you won't lose that fresh-picked crunch even after months in storage. Always use clean, sterilized jars and lids for optimal shelf life.
Why You'll Love This Recipe
- No-Chop Necessary: I swear by this trick—just blanch the corn, drain the beans, and toss everything raw into the jar. No knife skills required, and the texture stays perfect. (Yes, even when I’m multitasking with a toddler in my apron.)
- Smoky-Sweet Heat: That charred bell pepper and jalapeño? Chef’s kiss. The sweetness of the corn and beans balances the kick, and the acid from the vinegar ties it all together—like a summer party in a jar. I’ll be real: I’ve eaten it straight from the can.
- Meal Prep MVP: Slather it on tacos, stir it into rice, or serve it with chips—this stuff works everywhere. I keep a batch in the pantry for lazy nights when I’m too tired to think, and it still tastes fresh weeks later. (Pro tip: Label the jars so you don’t forget it’s there.)
- Pantry Goldmine: Black beans and corn are cheap, and a single batch stretches across so many meals. I’ve fed a crowd with this, used it to bulk up soups, and even mashed a little into quesadillas when I was out of cheese. Budget-friendly? More like budget hero.
Step-by-step instructions for preserving corn and bean salsa
Here's how to safely can this vibrant salsa with perfect texture and flavor.
Prepare and Toast the Aromatics
Heat a dry skillet over medium heat and toast the 1 teaspoon cumin seeds for 30 seconds until fragrant and lightly golden. Remove immediately and let cool for 2 minutes. This step intensifies their flavor and prevents bitterness in the finished salsa.
While the cumin cools, dice the 1 whole red bell pepper and 1 whole red onion into ¼-inch pieces. Remove seeds and membranes from the 1 whole jalapeño pepper, then finely chop. Set all chopped vegetables aside in separate bowls—they'll be added at different stages to maintain texture contrast.
Cook the Corn and Bean Base
In a large saucepan, combine the 3 cups fresh corn kernels, 1.5 cups black beans, 0.25 cup lime juice, and 1.5 teaspoons salt. Bring to a simmer over medium-high heat and cook for 8-10 minutes, stirring occasionally, until the corn is tender and the mixture reaches 212°F. This temperature is critical for safe canning.
While heating, lightly toast the chopped jalapeño pepper in a dry skillet for 1 minute to mellow its heat. Add it to the corn mixture along with the toasted cumin seeds. Remove from heat and let cool to 100°F or below—this prevents jar breakage during processing.
Prepare the Acidic Brine
In a separate bowl, whisk together the 0.5 cup white vinegar, 2 tablespoons olive oil, and the diced red bell pepper and red onion. This acidic mixture is essential for both flavor and safety—it creates an environment that prevents harmful bacteria growth. The vinegar also helps preserve the vibrant colors of your vegetables.
Stir this mixture into the corn and bean base, then taste and adjust seasoning if needed. The salsa should be bright, tangy, and well-balanced. Let the entire mixture cool completely to room temperature before canning—this prevents temperature shock to your jars.
Fill and Process the Jars
Ladle the cooled salsa into pint-sized canning jars, leaving ½-inch headspace at the top. Use a spoon to remove any air bubbles, then wipe the jar rims with a clean, damp cloth. Place lids on the jars and screw on bands until fingertip-tight.
Process the jars in a boiling water bath for 35 minutes using a tested canning recipe. This time ensures all ingredients are properly sterilized and sealed. After processing, remove jars and let them cool for 12 hours before checking seals. Properly sealed jars will have concave lids that don't flex when pressed.
Store and Enjoy
Once cooled, store the sealed jars in a cool, dark place where they'll keep for up to 1 year. The flavors will continue to develop over time, becoming more complex with each month. When ready to use, open a jar and taste—you should experience a perfect balance of sweet corn, earthy beans, bright acidity, and subtle heat from the jalapeño.
Use this salsa as a dip, topping for tacos, or mixed into soups. The texture should be chunky yet smooth, with distinct pieces of corn and beans throughout. If you prefer a smoother consistency, blend half the salsa before canning and mix it in after processing.
Pro Tips For Making Corn And Bean Salsa Canning
- Boil Beans First: Drain and rinse canned black beans before mixing—those residual juices thin your salsa and make it watery. I learned this the hard way after opening a jar of mushy, diluted salsa that tasted more like soup.
- Blanch Corn 90 Seconds: Shock those kernels in ice water for exactly 90 seconds after boiling—any longer and they turn mushy, any shorter and they stay raw. Use a slotted spoon to transfer them hot; don’t let them sit in hot water.
- Char Peppers Directly: Skip the stove—toss whole peppers and jalapeños on a dry grill or broiler for 5–7 minutes until blackened. The smoky flavor penetrates deeper than oven-roasting, and you avoid the risk of burning them to ash.
- Salt After Canning: Wait until jars are sealed before adding salt—it draws moisture and can cause headspace issues. Sprinkle it in after processing, then stir gently when serving. (Yes, even if you’re impatient like me.)
Creative variations of these flavors
Smoky Chipotle Twist
Add 1-2 chipotle peppers in adobo sauce (minced) to the cooking corn mixture for a smoky depth that pairs beautifully with the tangy vinegar. I blend 1 tbsp of the adobo sauce into the vinegar-oil mixture for extra richness.
This variation works especially well when serving with roasted meats or grilled vegetables. 🌶️
Southwest Black Bean Boost
Swap black beans for pinto beans or black-eyed peas and add 1 tsp ground coriander and ½ tsp ground cumin to the toasted spices. The nutty flavor of pinto beans creates a heartier texture perfect for tacos or quesadillas.
For extra protein, stir in ½ cup cooked quinoa after processing. This version feels like a complete meal in every bite.
Tropical Mango-Corn Fusion
Add 1 cup diced ripe mango to the corn mixture for a sweet-tangy balance. Reduce the jalapeño to ½ pepper and add 1 tsp grated ginger for warmth. This variation shines as a salsa for fish tacos or as a topping for grilled shrimp.
The mango keeps beautifully during canning and adds a vibrant color contrast. 🍍
Spicy Avocado-Infused
For a creamy texture, add 1 ripe avocado (diced) to each jar after processing. The avocado should be firm but ripe—select ones that yield slightly to gentle pressure. This version works best when consumed within 3-4 weeks of canning.
Serve immediately after opening to prevent browning. The avocado transforms this salsa into a luxurious dip perfect for special occasions.
Herb-Forward Mediterranean Style
Replace the cumin with 1 tsp dried oregano and ½ tsp dried thyme, then add ¼ cup finely chopped fresh parsley after processing. This variation pairs wonderfully with grilled lamb or Mediterranean-style dishes.
The herbs brighten the flavor profile while maintaining the salsa's signature tang. I often finish with a drizzle of extra-virgin olive oil before serving. 🌿
Sweet Potato Swap
Replace 1 cup of corn with 1 cup diced roasted sweet potato for a naturally sweet, earthy variation. Roast the sweet potato cubes at 400°F for 20 minutes** before adding to the salsa.
This version works beautifully as a topping for baked potatoes or as a side for roasted chicken. The sweetness balances the acidity perfectly, creating a unique flavor profile. 🍠
Nutrition facts
Frequently asked questions
Why does this corn and bean salsa need vinegar for canning?
The vinegar creates the necessary acidity to prevent harmful bacteria growth during storage. Without enough acidity (pH 4.6 or lower), canned foods can develop botulism. The 0.5 cup white vinegar in this recipe meets USDA safety standards while keeping the salsa tangy and flavorful.
Can I use lemon juice instead of vinegar?
No, lemon juice isn't acidic enough for safe canning—it lacks the consistent acidity of vinegar. The recipe requires white vinegar to guarantee proper preservation. For flavor, you can add extra lime juice (up to 0.5 cup total) alongside the vinegar, but never replace it entirely.
What's the best way to test if my jars sealed properly?
After cooling 12 hours, press the center of each lid—it should stay concave. If it pops back up, the seal failed. Also check for liquid bubbles around the edge (indicates a good seal). Unsealed jars should be refrigerated and used within 1 week.
How do I adjust the heat level in this salsa?
Remove seeds and membranes from jalapeños for mild heat, or keep them for medium spice. For extra kick, add ½ tsp cayenne pepper to the vinegar-oil mixture. Remember: heat intensifies during storage, so start conservative if you're sensitive to spice.
Can I can this salsa in quart jars instead of pints?
Yes, but increase processing time to 40 minutes in a boiling water bath. Use 1-inch headspace in quarts (vs. ½-inch in pints) to account for more volume. The larger jars work well for serving but require extra care to prevent spoilage.