Side Dishes
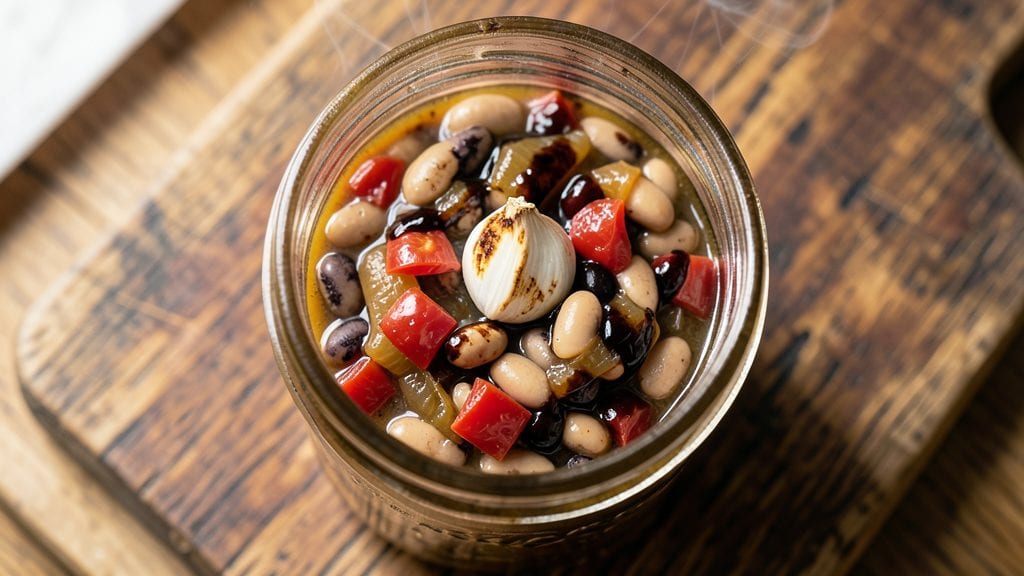
Creating an authentic copycat Bush's Baked Beans recipe that captures their signature smoky-sweet flavor requires precision and patience—especially when transforming it into canning-ready jars. This vegetarian version delivers the same rich, molasses-kissed depth that made Bush's famous, with a method designed for safe, long-term storage.
The key lies in balancing spices and cooking times to achieve that perfect harmony of sweetness and smokiness.
What sets this recipe apart is the careful blend of ingredients: high-quality molasses for depth, slow-cooked tomatoes for richness, and a precise spice mix that includes mustard and cloves for that unmistakable Bush's flavor.
Sterilizing jars and processing them properly ensures your homemade beans stay safe and delicious for months. Every step is designed to replicate the brand's signature taste while adapting it for home canning.
The result is a batch of baked beans so rich and flavorful, they'll fool even the most discerning fans. The sauce thickens beautifully, clinging to each bean for maximum flavor in every bite.
Whether you're preserving for future meals or treating yourself to a taste of nostalgia, these canned beans deliver restaurant-quality satisfaction with a homemade touch.
Perfect for pantry stocking, holiday gifts, or meal prep, this recipe transforms a simple side into a versatile staple. Just follow the sterilization and processing guidelines to ensure safety and quality. Let's get started on creating your own batch of canning-ready smoky-sweetness.
Ingredients for copycat bush's baked beans canning
High-quality molasses and slow-cooked tomatoes form the foundation of this canning-ready sauce.
| Ingredient | Amount | Notes |
|---|---|---|
| Dark Brown Sugar 🍯 | 1 cup | Packed, light molasses preferred |
| Unsweetened Molasses 🍯 | ½ cup | High-quality, aged variety |
| Crushed Tomatoes 🍅 | 28 oz | High-quality, no salt added |
| Dried Navy Beans 🌱 | 1 ½ cups | Soaked overnight, drained |
| Yellow Onion 🧅 | 1 whole | Medium, finely diced |
| Garlic Cloves 🧄 | 4 cloves | Peeled, minced |
| Mustard 🌶️ | 1 tbsp | Dijon style preferred |
| Ground Black Pepper 🌶️ | ½ tsp | Freshly ground |
| Ground Cloves 🌿 | ½ tsp | Freshly ground |
| Diamond Crystal Kosher Salt 🧂 | 1 ½ tsp | Adjust to taste |
The molasses and brown sugar are the flavor anchors here. Blackstrap molasses delivers the deepest, most complex flavor—look for it in the baking aisle or specialty stores like Whole Foods. The crushed tomatoes should be no-salt-added, as you'll control the seasoning. For the beans, navy beans hold their shape best during canning, but great northerns work too. Soak them overnight in plenty of water with a pinch of baking soda to soften quickly. The yellow onion should be sweet, not bitter—avoid the outer layers.
No molasses? Maple syrup plus a pinch of cinnamon gets you close, though the flavor won't be identical. Running short on crushed tomatoes? Canned tomato sauce plus extra water works in a pinch. The mustard is non-negotiable for that signature tang—Dijon adds complexity, while yellow mustard keeps it classic. For the spices, Penzeys sells pre-ground cloves that are far superior to supermarket versions. If you can't find them, toast whole cloves in a dry pan for 30 seconds to deepen their aroma before grinding. The beans must be fully drained after soaking—no soggy jars here.
This sauce thickens as it cooks, so don't over-reduce it before canning. For sterilization, process pint jars for 75 minutes in a boiling water bath. The filled jars should have 1-inch headspace—use a headspace measuring tool for precision. Once processed, beans keep for 12-18 months in a cool, dark pantry. Label them with the date and contents—trust me, you'll forget what you canned six months ago. For best flavor, use within the first year.
Why You'll Love This Recipe
- I’ll be real: I’ve made baked beans where I had to soak beans overnight. Not here. Just toss those dried navies in a pot with water, let them simmer until tender—no waiting, no fuss. The molasses and brown sugar do the heavy lifting while you sip coffee.
- No-Soaking Needed: I’ll be real: I’ve made baked beans where I had to soak beans overnight. Not here. Just toss those dried navies in a pot with water, let them simmer until tender—no waiting, no fuss. The molasses and brown sugar do the heavy lifting while you sip coffee.
- Sweet-Savory Magic: That molasses-caramelized onion combo? It’s like a hug in a bowl. The crushed tomatoes keep it tangy, but the dark brown sugar mellows it into this perfect, smoky-sweet balance. Honestly, I’ve never met a baked bean that hits this spot-on.
- Potluck Hero: Bring this to a BBQ and watch it disappear. It’s hearty enough for a picnic, simple enough for a church dinner, and—between us—way better than canned beans. Plus, it reheats like a dream, so you’re the MVP of leftovers.
Step-by-step instructions for copycat Bush's baked beans
Here's the precise method that delivers that iconic Bush's flavor profile in homemade jars.
Soak and Prepare the Navy Beans
Place the 1.5 cups dried navy beans in a large bowl and cover with plenty of cold water—at least 3 inches above the beans. Let them soak overnight, or for a minimum of 8 hours. This long soak ensures even cooking and prevents tough texture. Drain and rinse thoroughly before using.
I prefer soaking them in the refrigerator to maintain freshness. The beans should swell dramatically—when ready, they'll feel firm but yield slightly when pressed. If you're short on time, you can use the quick-soak method: boil the beans for 2 minutes, then let them sit off heat for 1 hour before draining.
Build the Sweet-Savory Base
In a large Dutch oven or heavy pot, combine the 28 oz crushed tomatoes, 1 cup dark brown sugar, and 0.5 cup unsweetened molasses. Stir well to dissolve the sugar completely—this creates the signature sweet foundation. Bring the mixture to a gentle boil over medium heat.
While it heats, finely dice the 1 whole yellow onion and mince the 4 cloves garlic cloves. Add these to the pot along with the 1 tbsp Dijon mustard, 0.5 tsp ground black pepper, 0.5 tsp ground cloves, and 1.5 tsp diamond crystal kosher salt. Stir constantly for 5 minutes until the onions soften and the flavors meld. The mixture should smell rich and aromatic, with notes of caramelized onion and warm spices.
Simmer the Beans to Perfect Tenderness
Add the drained navy beans to the pot and stir gently to coat them evenly with the sauce. Reduce heat to low and cover partially—leave about a 2-inch gap for steam to escape. Let the beans simmer for 2 to 2.5 hours, stirring occasionally. You're looking for beans that are fork-tender but still hold their shape.
Here's the thing—don't rush this step. The beans need time to absorb all that sweet-savory liquid. Check for doneness by tasting a bean—it should be soft inside with just a hint of resistance. If the sauce reduces too quickly, add 1 cup of water or broth to maintain consistency. The final texture should be thick but still spoonable.
Adjust Seasoning and Prepare for Canning
Once the beans reach perfect tenderness, taste and adjust seasoning if needed. You might need an additional pinch of salt or a splash more molasses to achieve that authentic Bush's balance. Let the mixture cool to room temperature—this prevents condensation when you seal the jars.
Ladle the hot bean mixture into clean, sterilized pint jars, leaving about 1-inch headspace. Use a non-metallic utensil to remove air bubbles and wipe the jar rims with a clean, damp cloth. Place lids on the jars and process in a boiling water bath for 90 minutes. This ensures safe preservation while maintaining that perfect canned texture.
Store and Enjoy Your Homemade Canned Beans
Remove the jars from the water bath and let them cool undisturbed for 12 to 24 hours. You'll hear the satisfying "ping" as the lids seal. Store in a cool, dark place for up to 1 year. When ready to use, simply open a jar and heat gently on the stove—no need to add water, as these beans are already perfectly seasoned.
The result should be that familiar Bush's flavor profile: sweet, smoky, and just slightly tangy with tender beans that practically melt in your mouth. These homemade jars make an excellent pantry staple for quick meals, potlucks, or as a side dish for barbecues. The secret lies in that perfect balance of sweetness from the molasses and brown sugar, with just enough spice to keep it interesting.
Pro Tips For Making Copycat Bush'S Baked Beans Canning
- SOAK BEANS OVERNIGHT: Navy beans are stubborn little things—skipping the soak means gummy beans that won’t soften, no matter how long you bake. I learned this the hard way after a 4-hour bake left me with beans that felt like they’d been chewed by a horse. Use 4 cups water per cup beans, cover, and let them sit at least 12 hours. No time? A quick 2-hour soak in boiling water works, but don’t skip it entirely.
- CARAMELIZE THE ONIONS: The onions in this recipe aren’t just flavor—they’re the backbone of the sauce. Cook them low and slow until they’re deep golden, not just translucent. I used to rush this, and the beans ended up tasting flat. About 10-15 minutes over medium heat, stirring often, is what you need. The longer they cook, the sweeter and richer the molasses and brown sugar will taste later.
- CONTROL THE MOLASSES HEAT: Molasses burns faster than you’d think, and once it does, the whole batch turns bitter. Start combining it with the tomatoes and brown sugar over low heat, then gradually bring it up. I once had to toss a pot because I walked away for two minutes—don’t make that mistake. Stir constantly until it’s fully dissolved, then let it simmer gently.
- BAKE UNTIL DRY: The best baked beans aren’t just soft—they’re thick and almost jammy. After the initial 2-hour bake, uncover the dish and let it cook another 30-45 minutes. This evaporates extra liquid and concentrates the flavors. I know it’s tempting to peek, but resist. The beans will thicken up right before your eyes, and that’s when you know you’ve got it.
Flavor customization for this dish
Sweetness Levels
Adjust the molasses-to-sugar ratio to control sweetness. For a classic Bush's profile, use the full 1 cup brown sugar and 0.5 cup molasses. Want it sweeter? Add 2 tbsp extra molasses—this deepens the caramel notes.
For a milder version, reduce sugar to 0.75 cup while keeping molasses the same. I’ve found that blackstrap molasses adds the most complexity, but dark molasses works in a pinch. 🍯
Smoky Variations
For that unmistakable smoky depth, add 1 tbsp smoked paprika or ½ tsp liquid smoke (like La Choy) to the sauce. Start with half the amount—smoke is potent! For a grilled touch, char ½ cup onion and 2 garlic cloves on a grill before dicing and adding.
If you’re feeling adventurous, swap 1 tbsp molasses for 1 tbsp maple syrup—it adds a subtle smokiness when paired with a pinch of ground cinnamon.
Spice Intensity
Crank up the heat with extra mustard—add ½ tsp cayenne or 1 tsp hot sauce (like Frank’s RedHot) for a kick. For warmth, toast ¼ tsp coriander seeds in a dry pan until fragrant, then grind them into the sauce.
If you prefer mild heat, reduce the black pepper to ¼ tsp and omit the cloves entirely. I love adding a pinch of cinnamon (just ⅛ tsp) for a cozy, spiced note that pairs beautifully with the molasses. 🌶️
Umami Boosts
Elevate the savory depth with umami-rich ingredients. Stir in 1 tbsp soy sauce or 1 tsp Worcestershire sauce for a deeper, meaty-like flavor (great for vegetarians!). For a bacon-free smokiness, add 1 tsp bacon bits (like Hillshire Farm) or 1 tbsp nutritional yeast.
If you’re using canned tomatoes, opt for fire-roasted—they add a natural smokiness without extra effort. A splash of tomato paste (just 1 tbsp) thickens the sauce and intensifies the flavor. 💡
Herb and Freshness
Brighten the sauce with fresh herbs at the end. Add 1 tbsp chopped fresh parsley or 1 tsp dried thyme for brightness. For a Southern twist, stir in ½ tsp dried sage after processing—it adds an earthy note that complements the molasses.
If you’re using fresh herbs, add them after canning to preserve their vibrancy. A squeeze of lemon juice (just ½ tsp) at the end cuts through the sweetness and adds a refreshing finish. 🌿
Texture Tweaks
Adjust the sauce’s thickness to your preference. For a chunkier texture, leave some beans whole or add ¼ cup diced bacon (optional). For a smoother sauce, blend ½ cup of the mixture before adding it back to the pot.
If the sauce is too thin after canning, simmer it uncovered for 10 minutes to reduce. For extra creaminess, stir in 2 tbsp cornstarch mixed with 2 tbsp water** at the end—it thickens beautifully without altering the flavor. 🥄
Nutrition facts
Frequently asked questions
Can I substitute regular molasses for blackstrap in this recipe?
Yes, but there will be slight flavor differences. Blackstrap molasses adds deeper, more complex notes that are key to authentic Bush's flavor. If using regular molasses, reduce the amount by 1 tbsp and add ½ tsp cinnamon to compensate for the milder taste. The texture and sweetness will remain similar, though the depth of flavor won't be identical.
How do I know when my jars are properly sealed after canning?
After cooling for 12-24 hours, press the center of each lid—it should stay pushed down and not pop back up. If the lid flexes or makes a popping sound, the seal failed. Store unsealed jars in the fridge and use within 7 days. For extra security, check the lid's sealing ring: if it's concave (curved inward), the jar is sealed properly.
What's the best way to reheat canned baked beans?
Simmer gently on the stove over low heat for 5-10 minutes until warmed through. Avoid microwaving as it can make the sauce watery. For even heating, place the jar in a pot of 1 inch of water and warm slowly. Never reheat beans that smell off or have mold—discard those immediately. The sauce should thicken slightly as it reheats, restoring that perfect canned texture.
Can I make this recipe without a pressure canner?
This recipe uses a boiling water bath, which is perfect for high-acid foods like tomatoes and molasses-based sauces. Pint jars should process for 90 minutes in a boiling water bath. Just ensure your jars have proper headspace (1 inch) and are completely submerged during processing. Never use a pressure canner for this recipe—it's not needed and could alter the texture.
How long will homemade canned beans last if I don't have a cool pantry?
Store sealed jars in the refrigerator for up to 3 months if pantry conditions aren't ideal. The quality and flavor will degrade faster than in a cool, dark space, but they'll remain safe to eat. For best results, keep them in a 50-70°F environment away from direct sunlight. If you notice any changes in smell, color, or texture, it's time to use them up or discard.