
Side Dishes
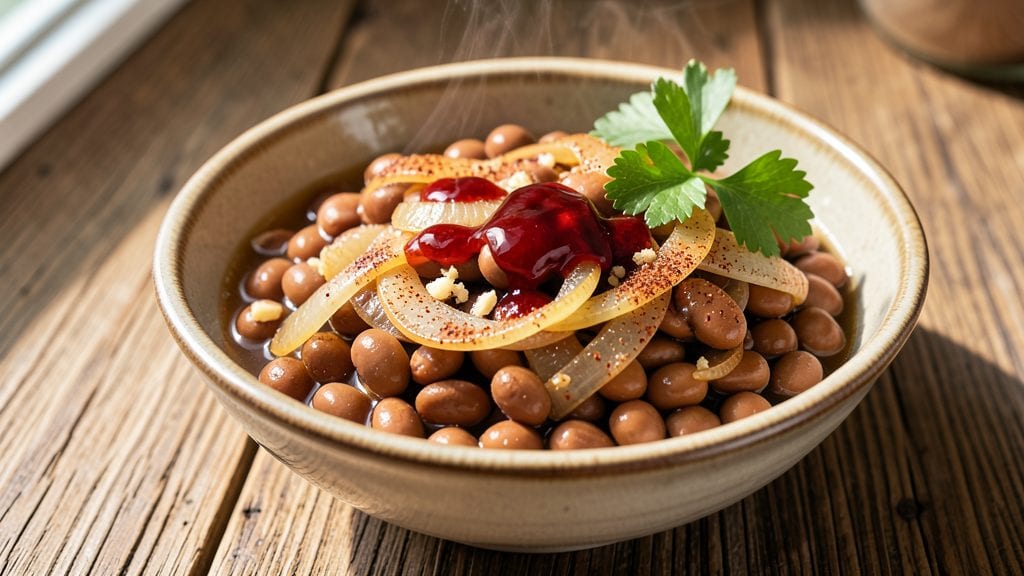
This black-eyed peas recipe with canned beans proves you don't need hours or fresh ingredients to create soul-warming Southern comfort. The secret lies in balancing smoky paprika, tangy vinegar, and sweet onions—simple ingredients that transform into a dish rich enough to stand alongside ham or shine as a vegetarian main.
Standing on a step stool in my grandmother's kitchen, I learned how to build flavor through slow simmering, and this version keeps that tradition alive while cutting prep time in half.
What makes this recipe work is the layering of flavors: crispy bacon (or smoked paprika for vegetarians) adds depth, while a splash of apple cider vinegar brightens the creamy beans. The canned beans absorb these flavors beautifully, creating a texture that's tender yet substantial.
With just 15 minutes of active prep and 30 minutes of simmering, you'll have a dish that tastes like it's been cooking all day—perfect for weeknight dinners or holiday tables.
The result is a pot of black-eyed peas with just the right balance of smoky, tangy, and slightly sweet notes. Each bite delivers creamy beans with a touch of crispness from the aromatics, making it a side dish that can easily become the star.
Serve it alongside cornbread, collard greens, or even grilled meats for a complete Southern meal. This is comfort food at its finest—simple, satisfying, and full of heart.
Whether you're cooking for a family gathering or just craving a taste of home, this recipe delivers restaurant-quality results with minimal effort. The beauty of using canned beans is that you can have dinner on the table in under an hour without sacrificing flavor. Let's get cooking!
Ingredients for black eyed peas recipe with canned beans
Just 14 simple ingredients transform canned beans into soulful Southern comfort food.
| Ingredient | Amount | Notes |
|---|---|---|
| Black-Eyed Peas (Canned) 🥣 | 2 cans | 15-ounce cans, drained and rinsed |
| Yellow Onion 🧅 | 1 whole | Diced, about 1.5 cups |
| Garlic Cloves 🧄 | 3 cloves | Minced, about 1 tbsp |
| Smoked Paprika 🌶️ | 1 tbsp | For deep smoky flavor |
| Apple Cider Vinegar 🍋 | 2 tbsp | For tangy brightness |
| Vegetable Broth 💧 | 2 cups | Low-sodium preferred |
| Bay Leaves 🌿 | 2 whole | Dried, for aroma |
| Dried Thyme 🌿 | 1 tsp | Or 1 tbsp fresh thyme |
| Salt 🧂 | 1 tsp | Kosher or sea salt |
| Black Pepper 🌶️ | ½ tsp | Freshly ground preferred |
| Cold-Pressed Olive Oil 🫒 | 2 tbsp | For finishing drizzle |
| Green Onion 🧅 | 2 whole | Sliced, for garnish |
| Lemon Juice 🍋 | 1 tbsp | Freshly squeezed |
| Hot Sauce 🔥 | 1 tsp | Optional, for heat |
The smoked paprika is non-negotiable here—it's what gives that classic Southern smokiness. Penzeys or Tony Chachere's are my go-tos for quality, but any good brand works. The canned beans? Butter Bean or Crowder Peas from the Southern aisle at Walmart or Kroger are my favorites—they're tender but hold their shape. Fresh thyme is ideal, but dried works fine if you've got it (just use a third the amount). The onion and garlic are your flavor base—don't rush the chopping. I usually grab a big yellow onion and dice it while I'm waiting for the pot to heat up. The broth matters too—low-sodium so you can control the saltiness.
No smoked paprika? Substitute with 1 tsp liquid smoke plus 1/2 tsp regular paprika—it's not identical, but close. Fresh thyme? Dried at one-third the amount works in a pinch. The apple cider vinegar can be swapped for white vinegar or even lemon juice, but the tang is key. No vegetable broth? Water plus 1 tsp soy sauce or bouillon cube gets you close. The green onions are just for garnish, but if you're out, chives or extra parsley work too. The hot sauce is optional, but I always keep some Crystal or Tabasco on hand for that little kick at the end.
This keeps beautifully in the fridge for 5 days—the flavors actually get better as it sits. I like to portion it into containers so I can grab a serving for lunches all week. Freezes well too for up to 3 months. The best part? It reheats like a dream. Just add a splash of water or broth and warm it through. The beans stay creamy, and the smoky aroma fills the kitchen. Perfect for meal prep or holiday leftovers.
Why You'll Love This Recipe
- No-Chop Needed: I swear by this—just slice that onion and garlic once, then dump everything in a pot. The canned peas save me from soaking or pre-cooking, and the vinegar brightens the whole dish while I’m still chopping. Honestly, it’s the kind of recipe that makes me want to cook on days when I’d rather just order takeout.
- Smoky-Sweet Magic: That smoked paprika and apple cider vinegar combo? It’s what turns a simple can of peas into something ridiculously good. The vinegar cuts through the richness of the onions and garlic, while the paprika adds this deep, earthy warmth that lingers. I’ll be real: it’s the kind of flavor that makes me pause mid-bite.
- Leftover Hero: This dish actually improves the next day. The flavors meld together, and the texture gets just tender enough to eat straight from the fridge. I make a double batch on Sundays—half for dinner, half to toss into salads or sandwiches all week. No sad, soggy leftovers here.
- Budget-Friendly Powerhouse: Canned peas, onions, and garlic? We’re talking dirt cheap ingredients that still feel fancy. The smoked paprika adds depth without costing a fortune, and the vinegar stretches the flavor further. It’s my go-to when I need to feed the family without breaking the bank—or when I’m craving something hearty but can’t justify a splurge.
Step-by-step instructions for smoky black-eyed peas
Here's how to make Southern-style black-eyed peas that pack smoky depth and bright tang.
Sauté Onion and Garlic Until Soft
Heat the 2 tablespoons cold-pressed olive oil in a medium saucepan over medium heat. Add the diced yellow onion and cook for 5 minutes, stirring occasionally, until it becomes translucent and just starting to soften. This is where all the flavor begins to develop.
Add the 3 minced garlic cloves and cook for another 1 minute until fragrant. You'll know it's ready when the garlic stops sizzling and smells sweet. Don't let it brown—just cook until it releases its aroma. This aromatic base forms the flavor foundation for everything that follows.
Stir in Spices and Vinegar
Reduce heat to medium-low and add the 1 tablespoon smoked paprika, 2 tablespoons apple cider vinegar, 2 whole bay leaves, and 1 teaspoon dried thyme. Stir everything together for 1 minute until the spices are fully incorporated and the vinegar begins to evaporate slightly.
The paprika will deepen in color as it warms, giving your dish that signature smoky hue. Here's the thing—don't rush this step. Let the spices bloom and mingle with the onions and garlic for at least 30 seconds before moving forward. This ensures maximum flavor extraction.
Add Beans and Broth
Pour in the 2 cups vegetable broth and add the 2 cans drained black-eyed peas. Stir everything together and bring to a gentle simmer over medium heat. Once simmering, reduce heat to low and let it cook uncovered for 10 minutes. You want the beans to heat through while the flavors meld together.
During this time, taste the mixture. It should be developing that perfect balance of smoky, tangy, and savory flavors. If it needs more seasoning, add the 1 teaspoon salt and ½ teaspoon black pepper now. Remember, you can always adjust later, but you can't take away what's already there.
Finish with Bright Flavors
After 10 minutes, remove the pan from heat. Stir in the 1 tablespoon lemon juice and 1 teaspoon hot sauce. The lemon juice brightens everything up, cutting through the richness, while the hot sauce adds a little kick. Give it one final taste and adjust seasoning if needed.
Let the mixture sit off the heat for 5 minutes to allow all the flavors to fully integrate. This resting period is crucial—it lets the beans absorb all those beautiful flavors you've built. While it rests, slice the 2 whole green onions for garnish.
Serve Warm and Garnish
Return the pan to low heat just to warm through if needed, then spoon the black-eyed peas into serving bowls. Garnish each serving with the sliced green onions. The contrast of their fresh, bright flavor against the smoky, tangy beans is what makes this dish truly special.
Serve immediately while warm. These black-eyed peas are perfect as a side dish for grilled meats, fried chicken, or even as a hearty vegetarian main when paired with crusty bread. The beauty of this recipe is that it comes together quickly but tastes like it simmered all day.
Pro Tips For Making Black Eyed Peas Recipe With Canned Beans
- Sauté Onions Low and Slow: I learned this the hard way—black-eyed peas need sweet, caramelized onions, not burnt ones. Cook them over medium heat for 8-10 minutes with a pinch of salt, stirring occasionally, until they’re golden but not crispy. Rushing this step turns your dish from rich to bitter.
- Drain and Rinse Canned Beans: Skipping this is a rookie move. Canned beans hold way too much sodium, and the liquid can make your dish watery. Drain them, then rinse under cold water—this cuts down on salt and washes away that metallic canned taste. Trust me, your flavor will thank you.
- Toast Garlic Until Fragrant: Don’t just chop and dump. Sauté the garlic in the same pot as the onions until it’s golden and smells like a forest after rain—about 1-2 minutes. This deepens the flavor way more than raw garlic ever could. (Yes, even if you’re impatient like me.)
- Balance Vinegar with Fat: Apple cider vinegar brightens the dish, but too much makes it sharp. For every tablespoon of vinegar, add a splash of olive oil or a pat of butter at the end. This softens the acidity and keeps the peas from tasting like a salad dressing.
Storing and reheating this dish
Fridge Storage Secrets
Store your black-eyed peas in an airtight container with a lid—I prefer glass Pyrex with snap-on lids for easy reheating. Keep them refrigerated at 40°F or below for up to 5 days, but honestly, the flavors get even better after a day or two as the spices meld.
The beans stay creamy and absorb all those smoky notes from the paprika. 🥣
Freezer-Friendly Tips
For longer storage, freeze in quart-sized freezer bags with 1 inch headspace to prevent expansion. Squeeze out excess air to avoid freezer burn, and label with the date.
These beauties keep for 3 months without losing texture or flavor. When ready to eat, thaw overnight in the fridge for best results.
Stovetop Reheating
My preferred method is stovetop reheating—it preserves that perfect creamy texture. Pour the peas into a saucepan with 2 tablespoons water or broth, then heat over medium-low for 5-7 minutes, stirring occasionally.
The gentle warmth brings back that smoky aroma without drying out the beans. Taste and adjust seasoning—you might need a pinch of salt or a splash of vinegar to refresh the tang.
Microwave Shortcut
For quick lunches, transfer a portion to a microwave-safe bowl, cover with a damp paper towel, and heat on 70% power for 2-3 minutes. Stir halfway, then continue in 30-second bursts until steaming hot.
Add a splash of water if it looks too thick—this keeps the beans tender and prevents that sad, mushy texture.
Garnish Before Serving
Always finish with fresh green onions and a drizzle of olive oil—this adds that bright, fresh contrast that makes the dish sing. If reheating leftovers, sprinkle the garnishes on top right before serving so they stay vibrant.
A squeeze of lemon juice or dash of hot sauce can also revive the flavors if needed.
Meal Prep Magic
Double the batch and portion into individual containers for easy grab-and-go meals. I like to pair these with cornbread muffins for a complete Southern lunch.
The beauty of this recipe is that it reheats beautifully—just add a splash of broth or water to loosen it up if it thickens during storage. 💡
Nutrition facts
Frequently asked questions
Can I use black beans instead of black-eyed peas in this recipe?
Yes, you can substitute black beans for black-eyed peas, but the flavor profile will differ slightly. Black beans have a richer, earthier taste, while black-eyed peas offer a milder, creamier texture. If using black beans, reduce the cooking time to 8 minutes instead of 10 minutes since they soften faster. The smoky paprika and vinegar will still shine through beautifully.
How do I make this vegetarian if it traditionally includes ham?
This recipe is already vegetarian-friendly! The smoky depth comes from smoked paprika instead of ham, while the tangy vinegar and bright lemon juice balance the flavors perfectly. For extra richness, add 1 tablespoon olive oil or a pinch of liquid smoke to mimic the smokiness of ham. Serve with cornbread or collard greens for a complete Southern-style vegetarian meal.
Why does my dish taste bland after reheating?
Reheating can mute flavors, but a few quick fixes revive this dish. Add 1 tablespoon apple cider vinegar or lemon juice to restore tang, or stir in 1 teaspoon smoked paprika for a smoky boost. If the texture is too thick, loosen with 1-2 tablespoons broth or water. Always reheat gently over medium-low heat to preserve the creamy texture.
Can I make this in a slow cooker for hands-off cooking?
Sauté the onions and garlic as directed, then transfer everything to a 3-4 quart slow cooker. Cook on LOW for 2-3 hours or HIGH for 1-1.5 hours, stirring occasionally. The slow cooking enhances the smoky flavors even more. Just skip the final resting time—it’ll be ready to serve straight from the pot. Perfect for meal prep!
What’s the best way to serve these black-eyed peas?
These peas shine as a side for grilled meats, fried chicken, or even as a hearty vegetarian main. Pair with cornbread, collard greens, or a crisp green salad for a full Southern spread. For extra flair, top with crumbled bacon (optional) or a dollop of sour cream. The contrast of textures makes every bite satisfying.